Recording audio on a Chromebook is a simple process that can boost your productivity and communication. Whether you want to capture your voice, create tutorials, or record meetings, your Chromebook has the tools to help. This guide covers the various ways to record audio, whether you are using the built-in microphone or an external audio recorder, and how to manage the audio quality.
By learning how to record on Chromebook, you'll unlock the potential to create voice recordings, edit audio, capture meetings, or produce high-quality audio recordings. Continue reading to discover the best tools and settings for capturing clear and detailed audio recordings.
How To Record Audio On Chromebook Using The Built-In Audio Recorder
To begin, use your Chromebook’s built-in tools, access the audio recording feature by pressing the appropriate keys or launching an audio recording app. This opens the audio capture interface where you can attach recordings and choose to record your voice or other sounds.
Once you're ready to begin recording, adjust your settings by selecting the mic note, which controls the input for your Chromebook’s built-in microphone. After configuring the settings to your liking, simply click the record button to start recording the audio recording.
When you’re done, press stop recording, and your recorded audio will be saved as an audio file, usually in WAV or MP3 format. These files are stored in your downloads folder, where you can easily access, edit, or share them.
How To Record Audio With Keyboard Shortcuts
To record quickly on your Chromebook, use a keyboard shortcut to access the audio recording tool. Press Ctrl + Shift + S to open the recording interface, and select whether to capture full-screen audio or just specific sections of the screen. If you want to capture audio, make sure your mic access is enabled.
After you choose the desired recording option, press the red record button to begin capturing your audio. When finished, you can stop the recording by using the Ctrl + Shift + Q shortcut. The recorded audio file will be saved automatically in your downloads folder.
How To Record Audio Using A Browser Extension
To use a voice recorder on a Chromebook using a browser extension, follow these steps:
1. Go to the Chrome Web Store and search for “audio recorder.”
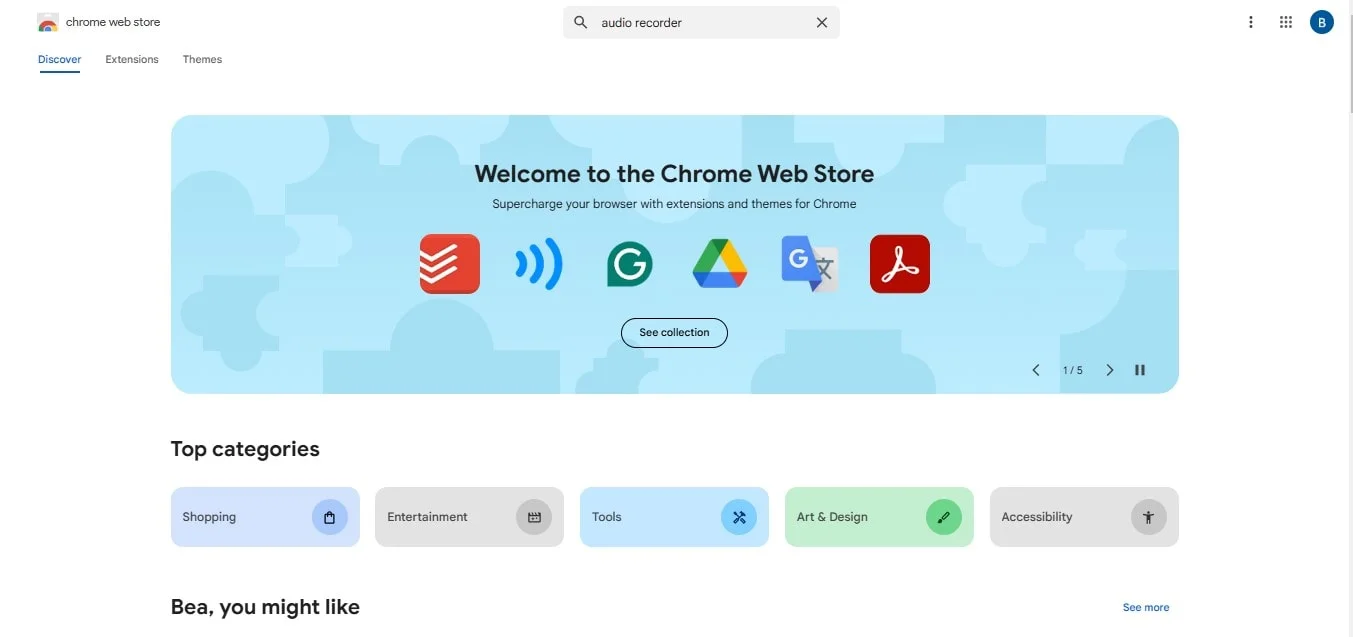
2. Choose an audio recording extension that fits your needs.
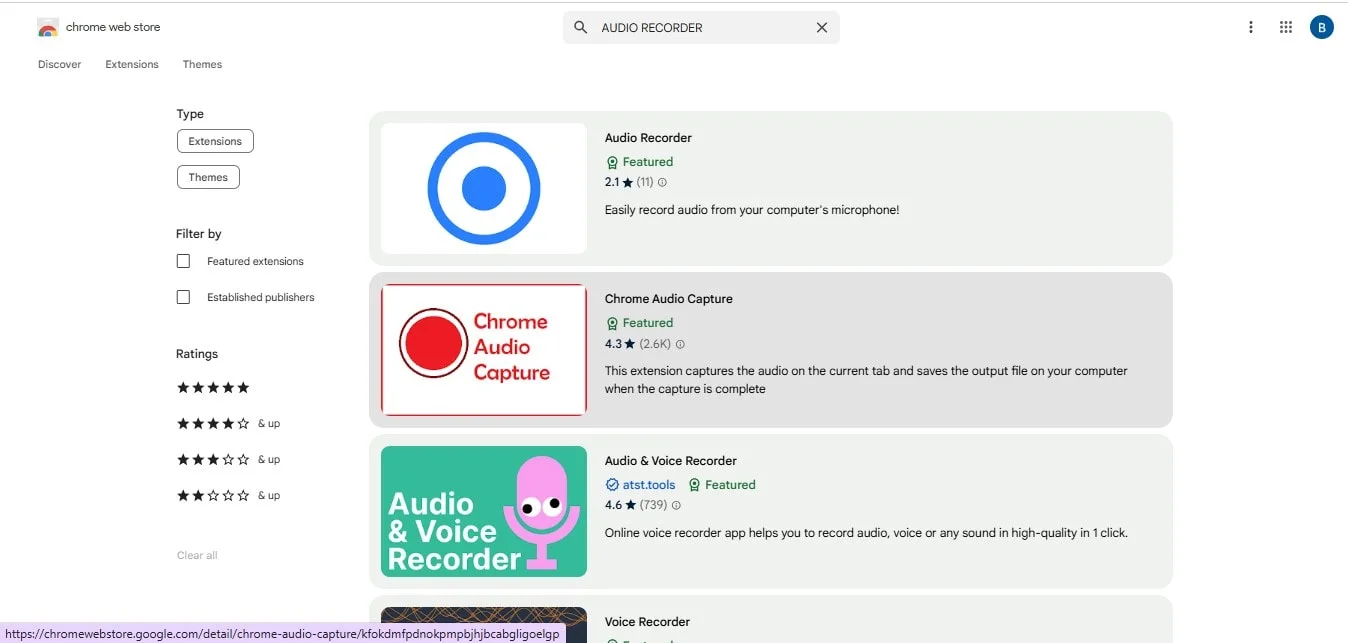
3. Click Add to Chrome to install the extension.
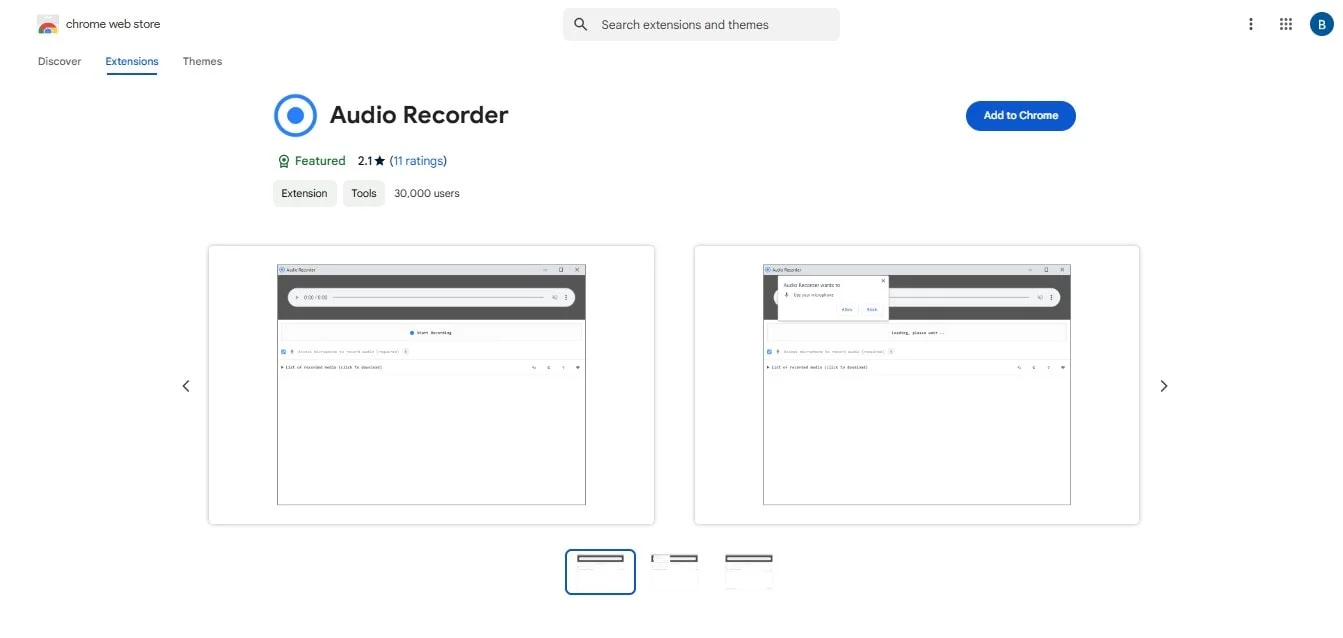
4. Grant the necessary permissions.
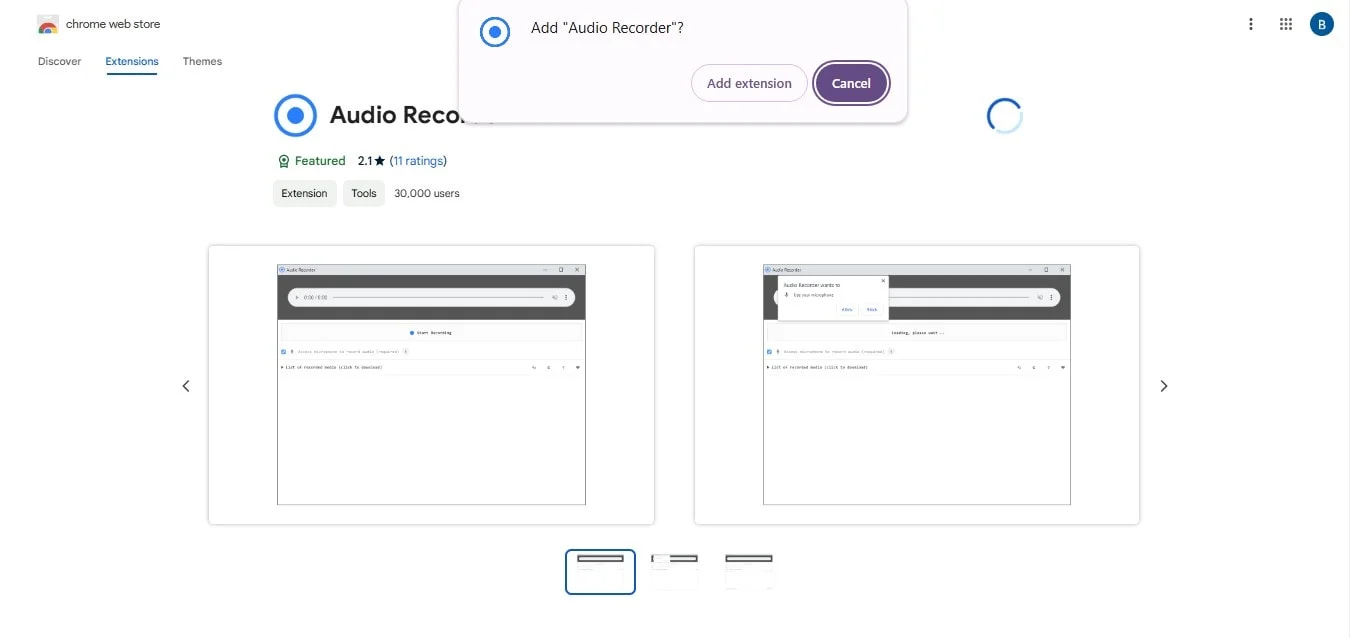
5. Once installed, launch the extension by clicking its extension icon in the top-right corner of your browser.
These audio recorders allow you to capture high-quality recordings directly from your browser. Some extensions may even provide advanced features such as editing tools or support for multiple audio formats, making it easy to record and capture audio for various purposes. After finishing your recording, stop the capture, and your audio file will be saved in your downloads folder.
Recording Audio Without Background Noise
If you need to capture audio without any unwanted sounds, follow these steps:
- Open your audio recording apps and select the mic note settings.
- Disable background noise by adjusting your audio settings to focus only on the desired sound.
- Choose the recording area or start recording your voice.
- Press the record button to start your audio recording or to stop recording.
After completing your recording, stop the session, and your recordings will be saved automatically. This feature is useful for recording podcasts, interviews, or other formats of voiceovers without interference.
How To Choose the Best Way To Record Audio on a Chromebook
When deciding how to record audio on your Chromebook, consider these key factors:
- Built-in tools vs. extensions: Chromebooks come with a built-in microphone and free audio recorder, which is perfect for basic voice recording. However, if you need advanced tools such as multi-channel audio, an audio recorder app or third-party software might be better.
- Quality: Ensure the app or extension you use offers good quality. Many extensions also let you manage microphone access, ensuring you get the best sound possible for audio recorders.
- Recording area: Decide whether you want to record audio across the entire screen or just a portion of it. Built-in tools typically offer full-screen capture, while extensions may allow more flexibility.
- Ease of access: Consider how easily you can access the audio recording tool. For example, browser-based tools often require launching from the Chrome Web Store, while built-in tools can be activated with a shortcut.
- File formats: If you need multiple formats for your recordings, check that your chosen tool supports exporting audio files in the formats you need, like MP3 or WAV.
Conclusion
Mastering how to use a voice recorder for audio on a Chromebook opens up new possibilities for productivity and creativity. Whether you're creating tutorials, recording meetings, or capturing voice recordings, your Chromebook provides the tools you need. For those looking for a seamless audio recording solution, Bluedot stands out as the best choice.
Bluedot allows users to record video and audio on platforms like Google Meet, Microsoft Teams, and Zoom. Its intuitive interface ensures that you capture all the important details, especially when someone is sharing their screen. Additionally, Bluedot offers additional features, like automatic transcription, auto-generated emails, conference call transcription, automatic note taker, meeting templates, meeting minutes transcription, interview transcription software, while securely saving recordings for future reference.
By using Bluedot, you can ensure high-quality audio capture and efficient audio recording activities, making it the perfect voice recorder tool for your Chromebook recording needs.
FAQs
How can I stop my audio recording on a Chromebook?
To stop your audio recording, click the red record button or use the Ctrl + Shift + Q shortcut. Your audio will save automatically in your downloads folder.
Why is there no sound in my Chromebook audio recordings?
If your Chromebook is not voice recording sound, it might be because the system’s audio capture is not enabled by default. Ensure you check your mic access settings or use an extension that supports audio capture.
Where can I find my recordings on my Chromebook?
Depending on where you downloaded your open source audio recorder, such as Google Play Store, Or the Chrome Web page, each option will differ. Usually once your recording is complete, you can find your audio file in the downloads folder, ready to use, edit, or share.

%201.svg)
