
If you’re looking to cancel your Otter AI subscription, this guide makes it easy to walk through the steps to stop auto-renewals and avoid unexpected charges. We’ll break down everything you need to know about managing your billing cycle and how to cancel your plan smoothly.
Whether you’re switching to a different pricing option or simply no longer need the service, this guide helps you stay on top of things. Keep reading to learn how to take control of your Otter AI subscription and prevent any future charges with no stress.
How To Cancel Your Otter AI Subscription
If you’re thinking about cancelling your Otter AI subscription, here’s a simple guide to help you without any hassle:
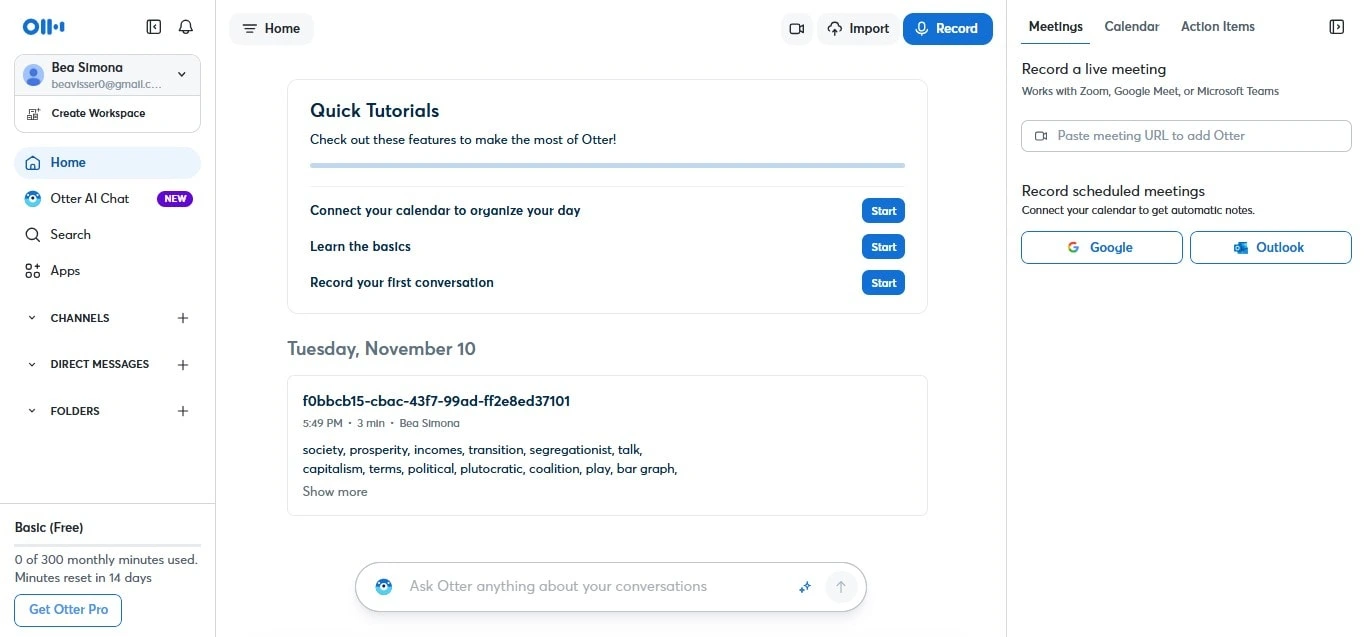
- Log in to Your Account
Start by heading to Otter AI and logging into your account.
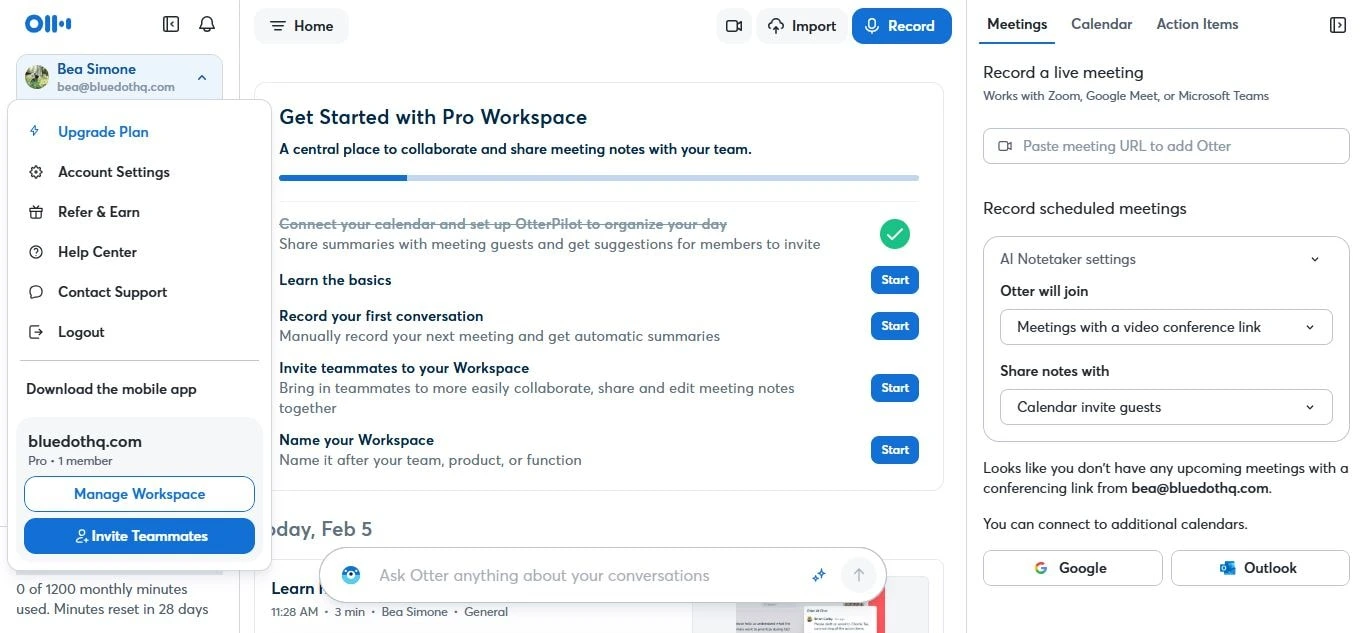
- Go to Account Settings
Once you’re in, select Account Settings from the left navigation menu.
- Find the Plan Tab
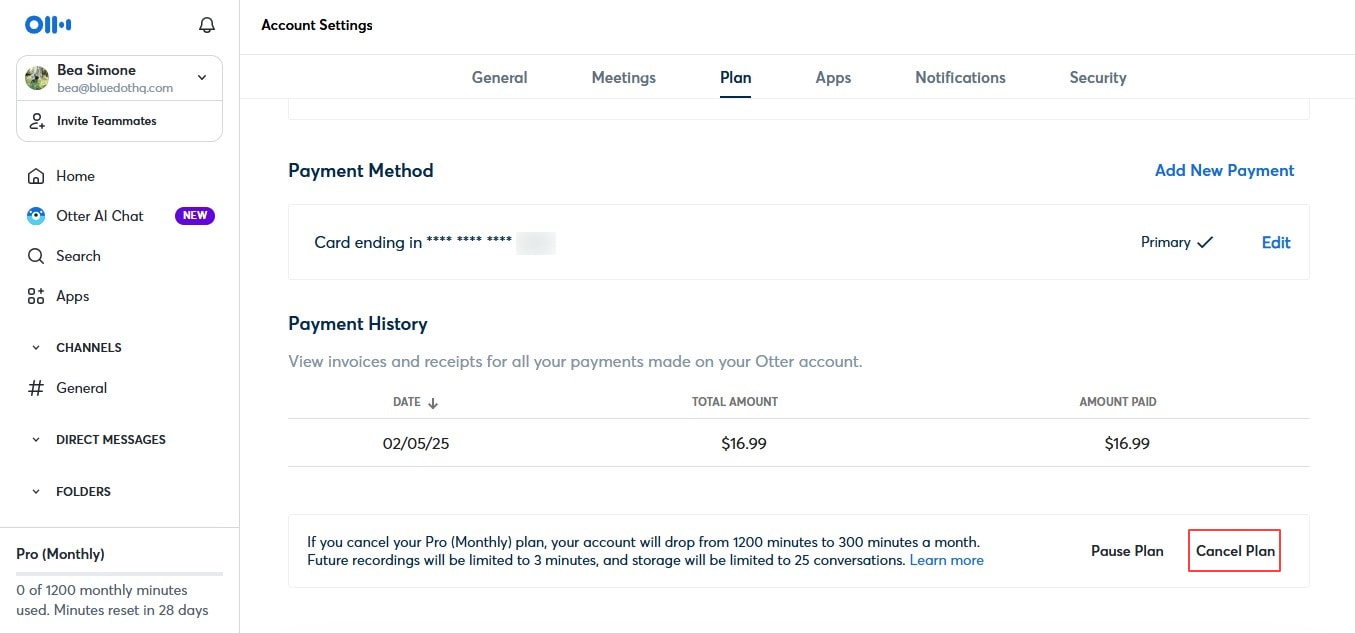
In your settings, click on the Plan Tab to see details about your current subscription, when your billing cycle ends, and other available plans.
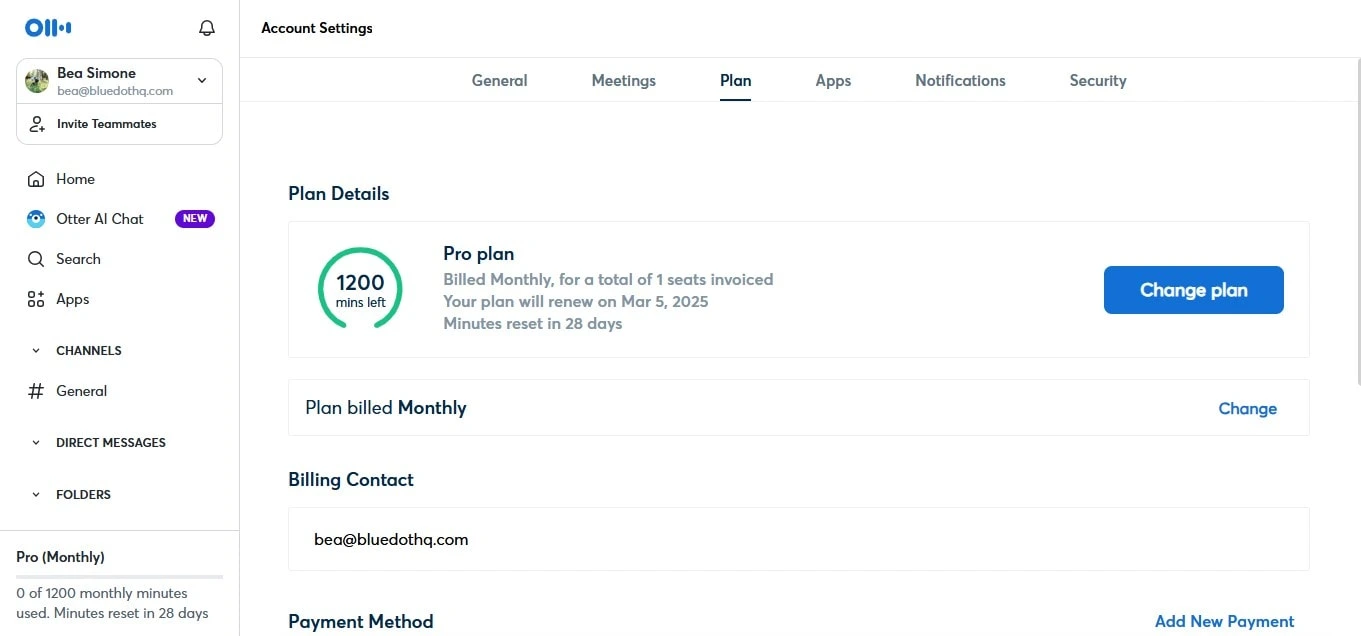
- Scroll to the bottom of the plan page
At the bottom of the plan page, you will see the option to "cancel plan". Before you click on this, make sure to check your current billing period first to see when your plan will renew, to make the most use of your paid features. Try to cancel it before your plan renews.
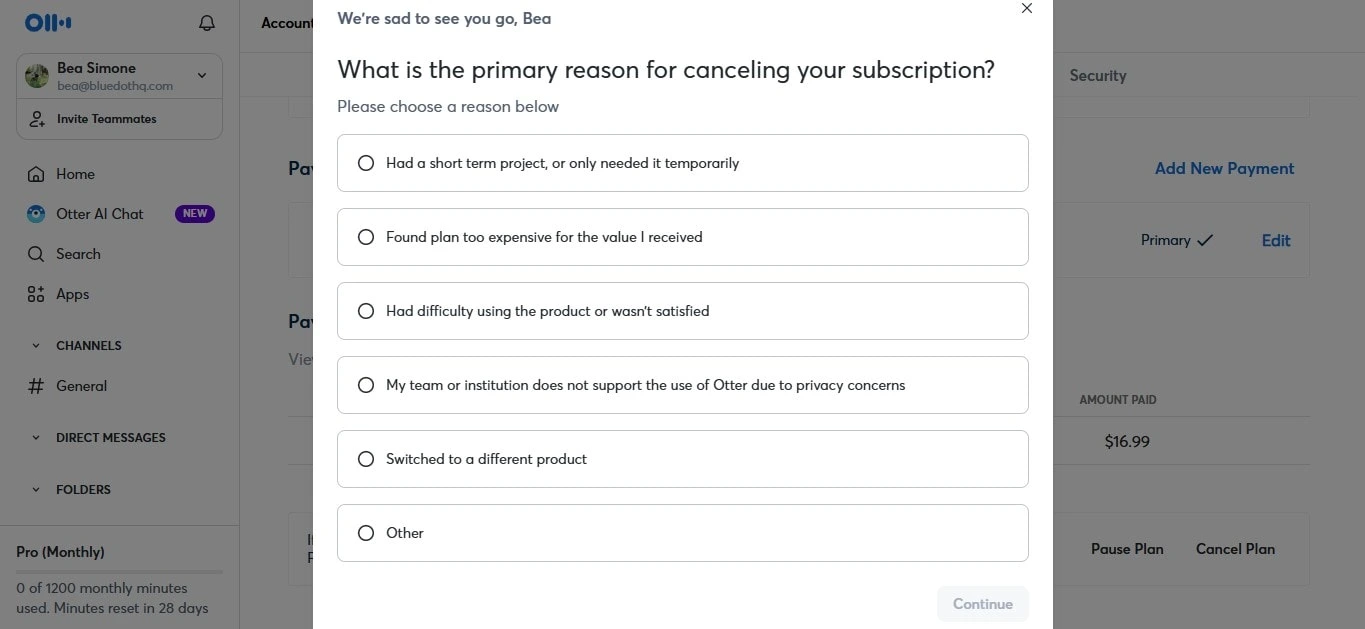
- Provide feedback
If you have any feedback about your experience using Otter, you can let them know before confirming your cancellation.
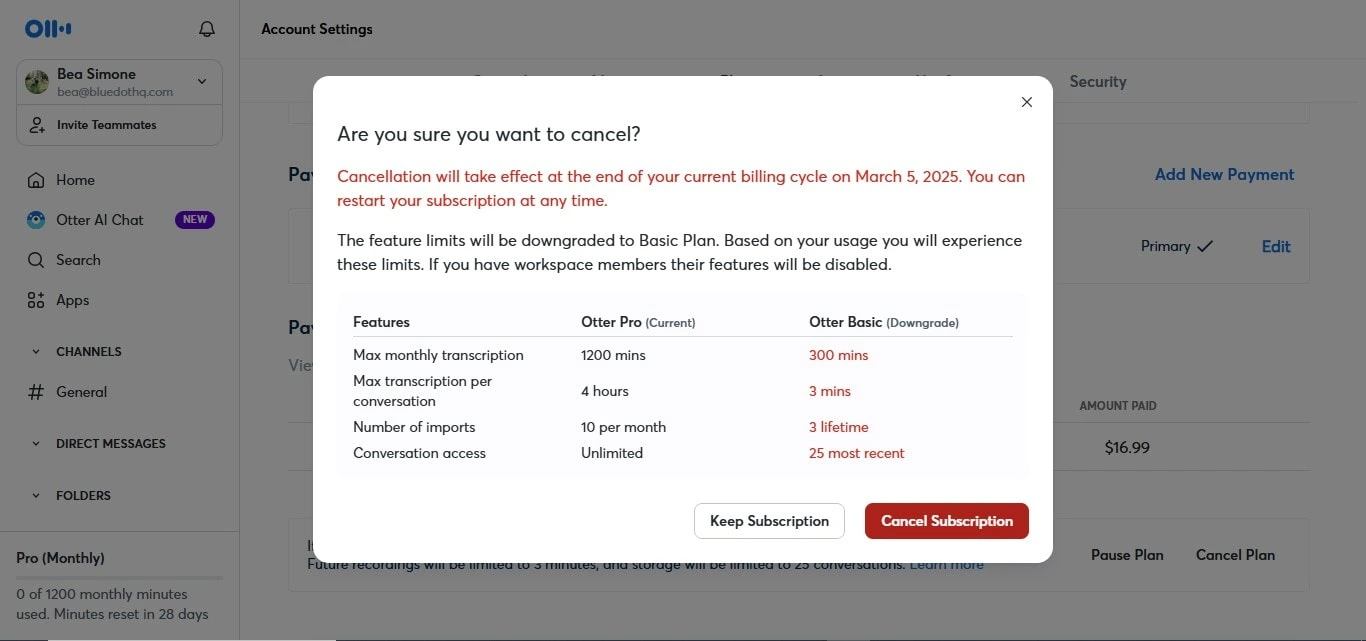
- Confirm the changes
Once you have provided feedback, you can click "cancel subscription". Always make sure you cancel before your next billing date.
How To Delete Your Otter AI Account
If you’ve decided you no longer need Otter AI, deleting your account is a simple process. Here’s how to do it step by step:
- Log in to Your Otter AI Account
Start by heading over to Otter AI and logging in.
- Go to Account Settings
Once you’re logged in, select Account Settings from the menu on the left navigation menu.
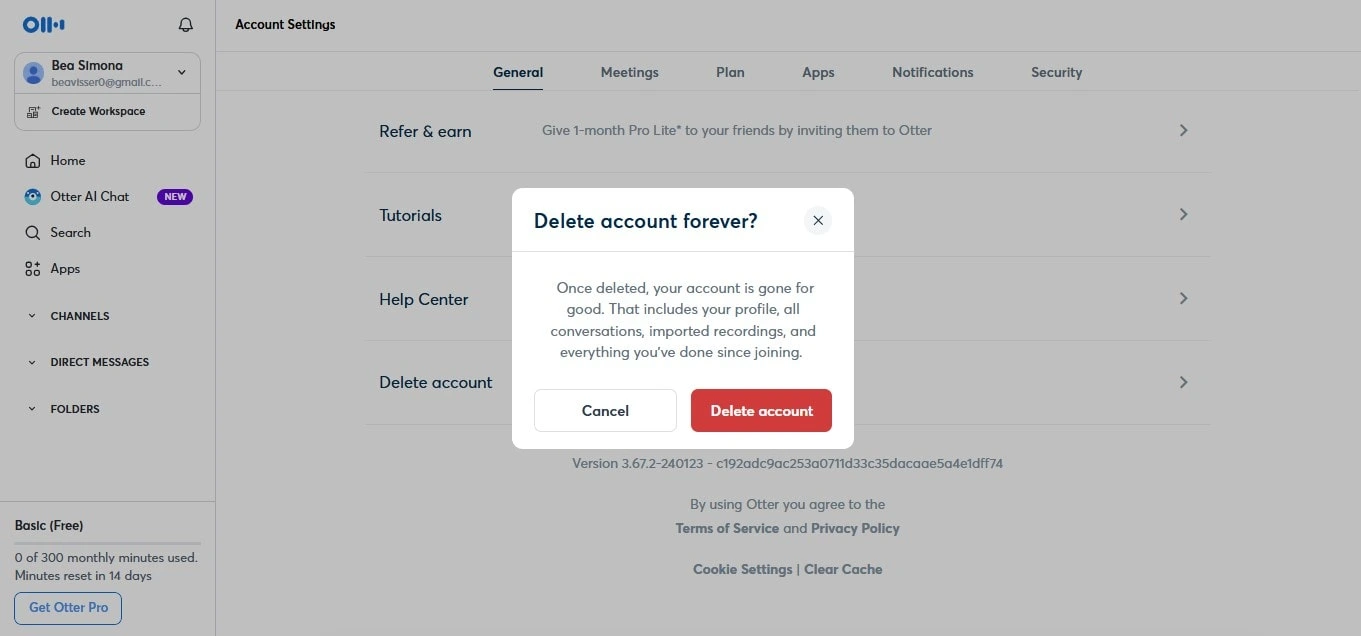
- Find the delete account option
Scroll to the bottom of the general page, and you’ll see the option to delete your account.
- Review what this means
Before you go through with it, make sure you understand that deleting your account will permanently erase all your data—this includes your conversations, transcriptions, and anything else saved in Otter AI. There’s no way to recover it once it’s gone.
- Confirm Deletion
Follow the prompts to confirm. Otter might ask you to re-enter your password to verify it’s really you.
- Final Steps
After confirming, your account will be deleted. You’ll also get an email to let you know the process is complete.
Important Notes
Before you delete your Otter AI account, there are a few things you should know to avoid any surprises:
- Cancel your subscription first: If you’re on a paid plan, make sure to cancel it before deleting your account. This way, you won’t get hit with any unwanted charges once your subscriptions automatically renew. It’s a good idea to check your billing cycle and stop it before your subscriptions automatically renew, so you don’t pay for another billing cycle.
- Billing cycle: Just a heads-up, deleting your account won’t automatically refund any unused time in your current billing period. You’ll still have access to your paid features until your paid subscription expires, but if you’re near your next billing date, it’s worth timing your account deletion accordingly before your paid subscription expires.
- Permanent deletion: Once you click cancel subscription and delete your account, there’s no going back. Everything—your conversations, transcriptions, and saved data—will be permanently erased. If you want to keep anything, be sure to export it before confirming the deletion. Once it’s gone, it’s gone forever.
- No turning back: When you confirm that you want to cancel plan and delete account, that’s it. It’s a final tip, and you won’t be able to recover any of your information. So, just take a moment to be sure you’re ready to make the change.
- Needing help: If you’re unsure about anything or just need clarification, don’t hesitate to reach out to Otter AI’s support team. They’re available to answer any further questions and guide you through the process if needed.
Otter AI alternative - Bluedot
If you're on the hunt for an alternative to Otter AI, Bluedot is a great option that offers more than just transcription. One of its key features is the ability to record meetings, even when someone is sharing their screen. This ensures you never miss important details, whether you’re using Google Meet, Microsoft Teams, or Zoom. It’s especially useful for capturing everything discussed, even if there are lots of visuals being shared.
But Bluedot isn't just about transcriptions. It also offers AI-generated summaries, meeting templates, and automated email follow ups that highlight the most important points of your meetings. Plus, your Google Meet recordings are stored securely, so you can access them anytime without worrying about losing anything.
A cool new addition to Bluedot is its AI chat feature, which allows you to get insights and interact with your meeting content in a more conversational way. Whether you're looking to record, transcribe, or follow up with meeting summaries, Bluedot has you covered.
If you're looking for a tool that goes beyond simple transcription and helps you capture and organize all your meeting content, Bluedot is worth considering.
%201.svg)
