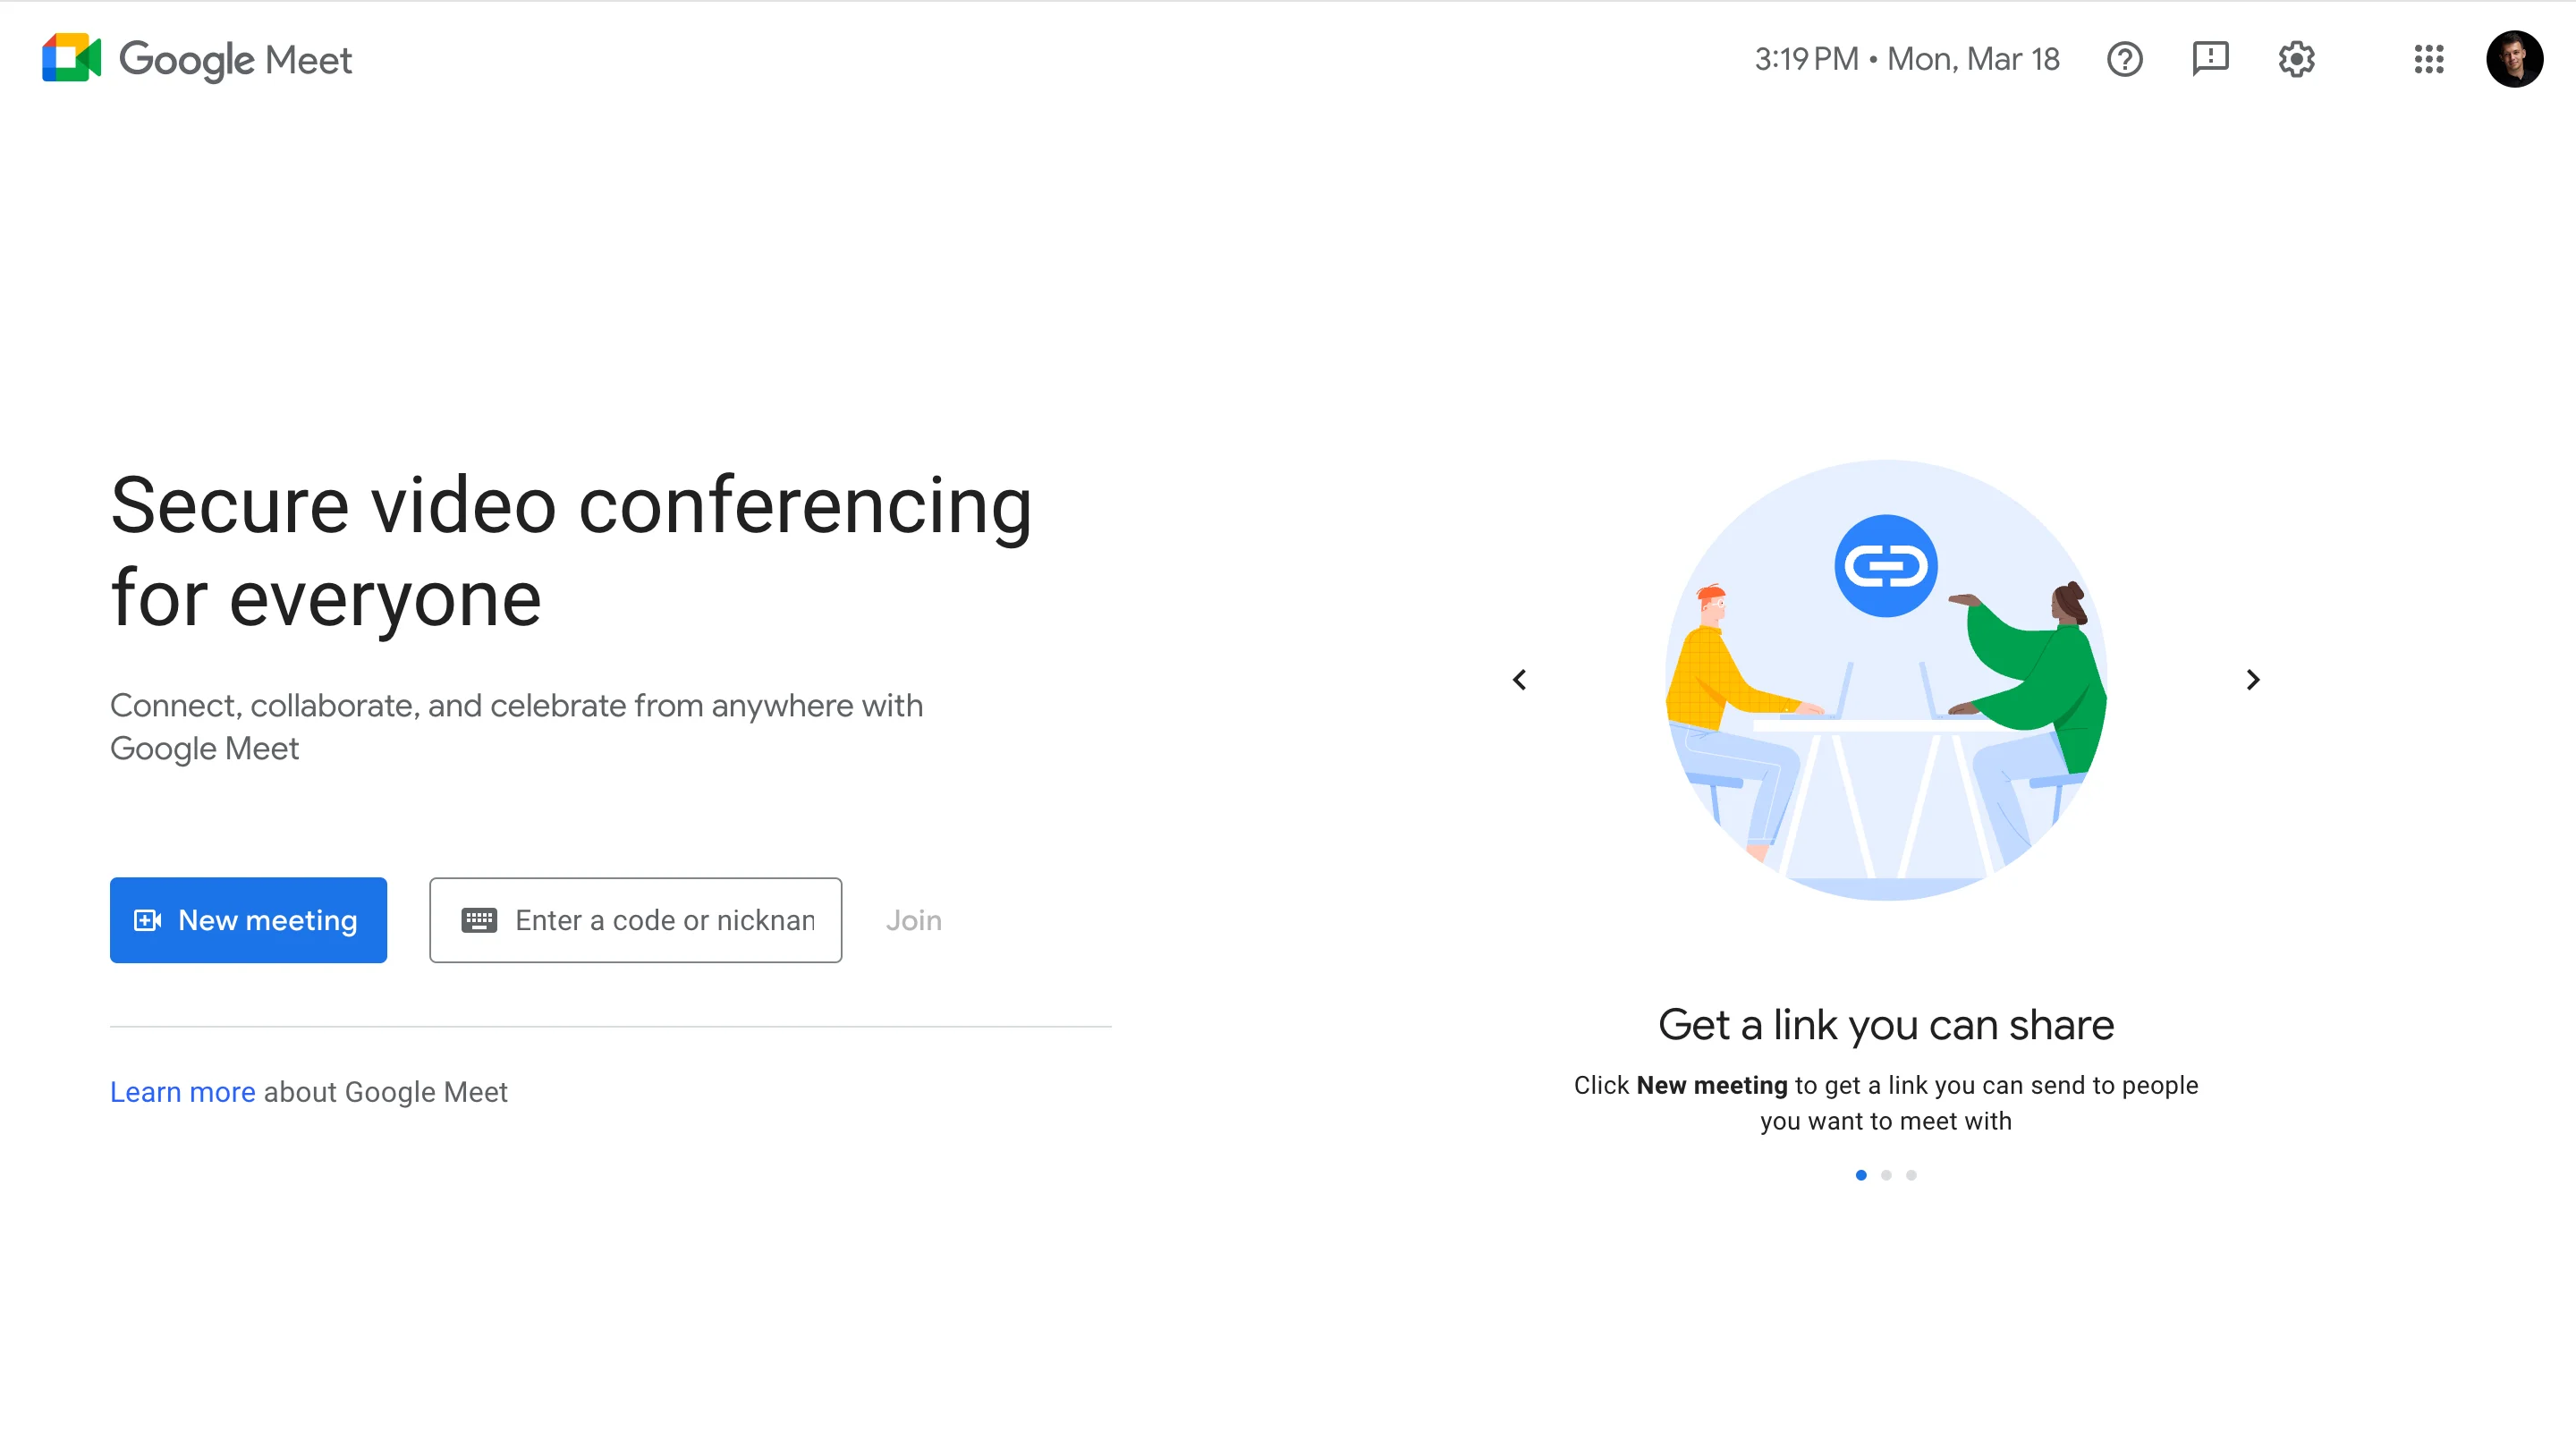
Have you ever found yourself scrambling to fix audio or video issues right before an important meeting? Say goodbye to those last-minute stresses with Google Meet's test call function. Google Meet offers a built-in test call function, a hidden gem that can alleviate your worries and ensure a smooth and successful meeting.
This guide will unveil the power of the Google Meet test call function. We'll explore how it helps you troubleshoot potential video and audio issues before your meeting. By following these simple steps, you'll gain the confidence to lead flawless video conferences, eliminating the stress of technical surprises.
Why It's Important To Test Your Google Meet Video Call Functions
Let's face it, joining a Google Meet call only to realize your mic is on mute, your camera turned you into a pixelated mess, or your internet is causing you your computer to freeze is a video conferencing nightmare. Testing your call beforehand with Google Meet's handy test call feature is like having a reliable assistant for your meetings. It helps you to:
- Dodge those tech glitches: A test call reveals any microphone issues, unflattering camera angles, and audio problems, saving you the scramble to fix things at the spur of the moment.
- Level up your confidence: Knowing everything looks and sounds good lets you ditch the pre-meeting jitters and focus on being a video conferencing professional.
- Keep the meeting going smoothly: By ironing out any technical kinks beforehand, you avoid awkward pauses and delays during the actual call, keeping things moving and productive. The test call is your secret weapon for a flawless Google Meet experience.
Exploring Google Meet's Green Room For Testing Call Quality
As we dive into exploring Google Meet's call quality testing, let's take a closer look at some essential functionalities to ensure your meetings run smoothly.
We'll guide you through various aspects, including checking your settings during a Meet video call, reviewing your audio and video quality before joining a meeting, your audio settings, and exploring the effects options available to enhance your virtual interactions. Let's get started on maximizing the potential of your Google Meet sessions.
Check your video and audio settings before a Google Meet video call
1. Open Google Meet on your computer.
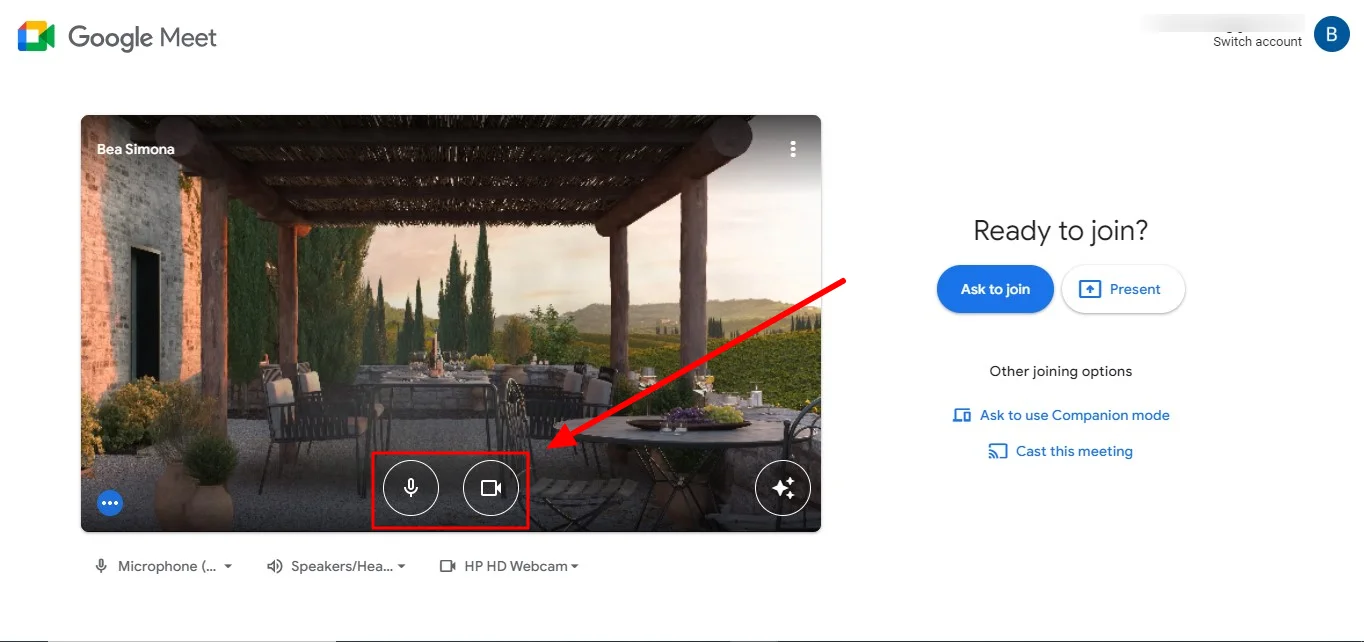
2. Before you click join, locate your devices - such as microphone, speaker, and camera - at the bottom of your preview tile.
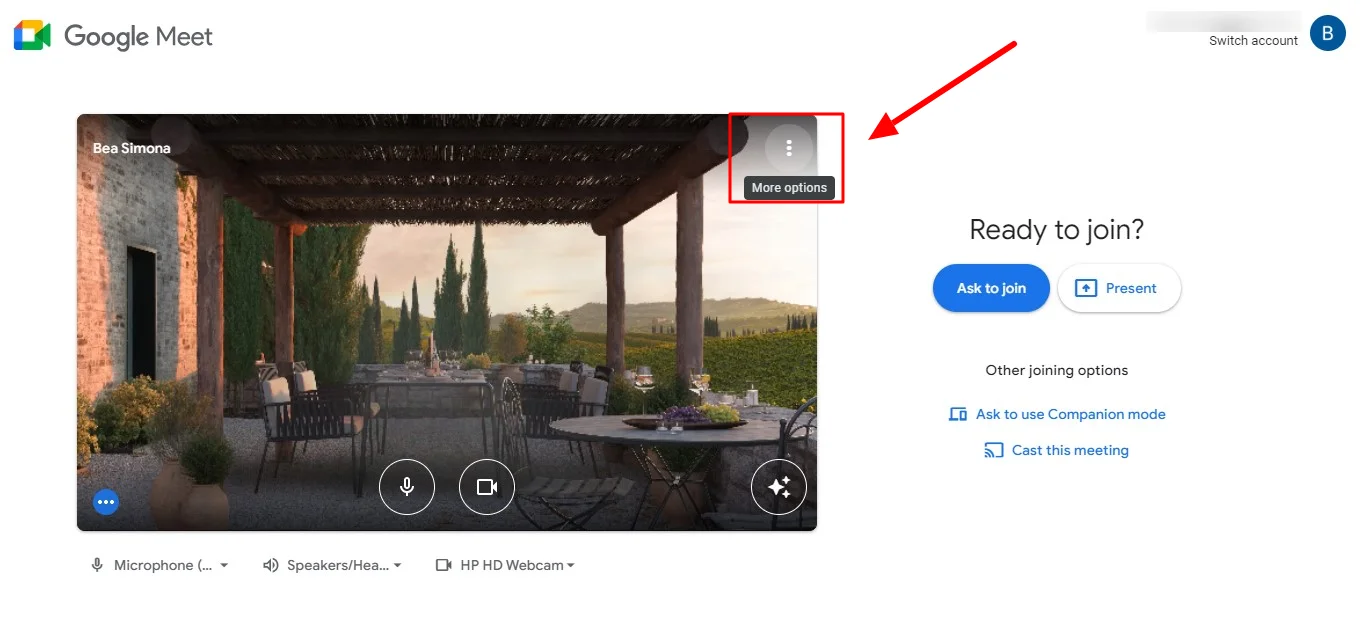
3. Access your settings by clicking on the "More options" vertical menu at the top right of your preview tile.
4. Choose "Settings".
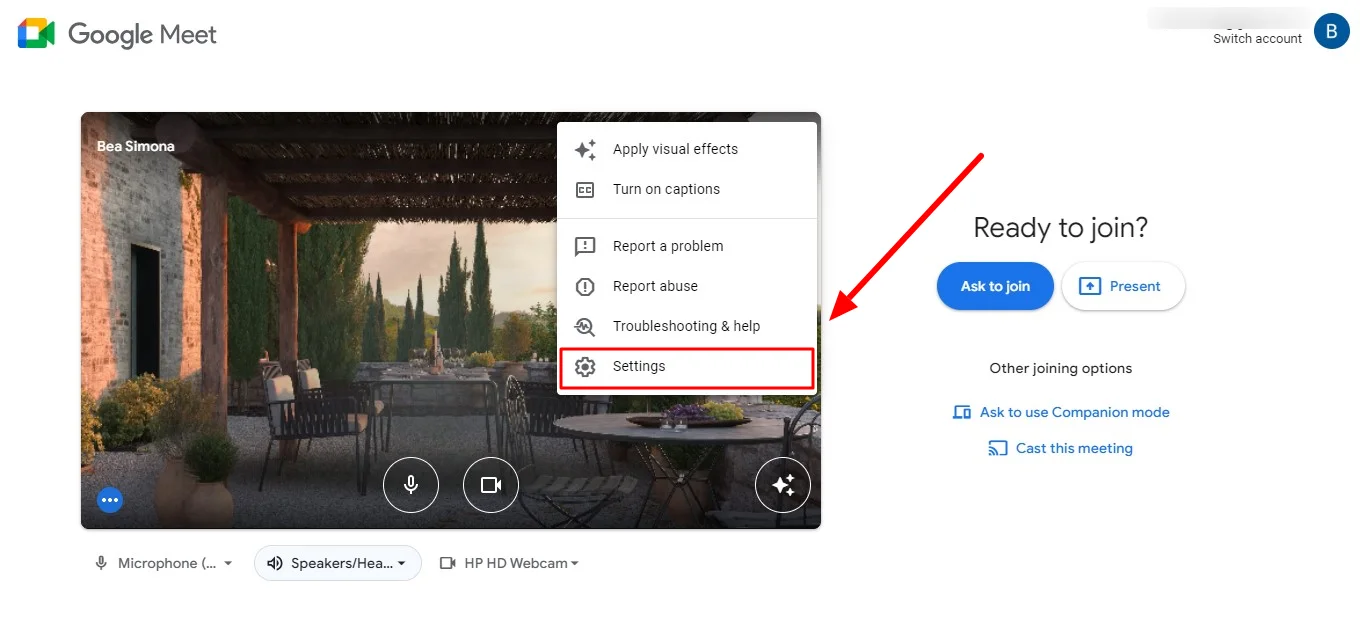
5. Select either "Audio" or "Video".
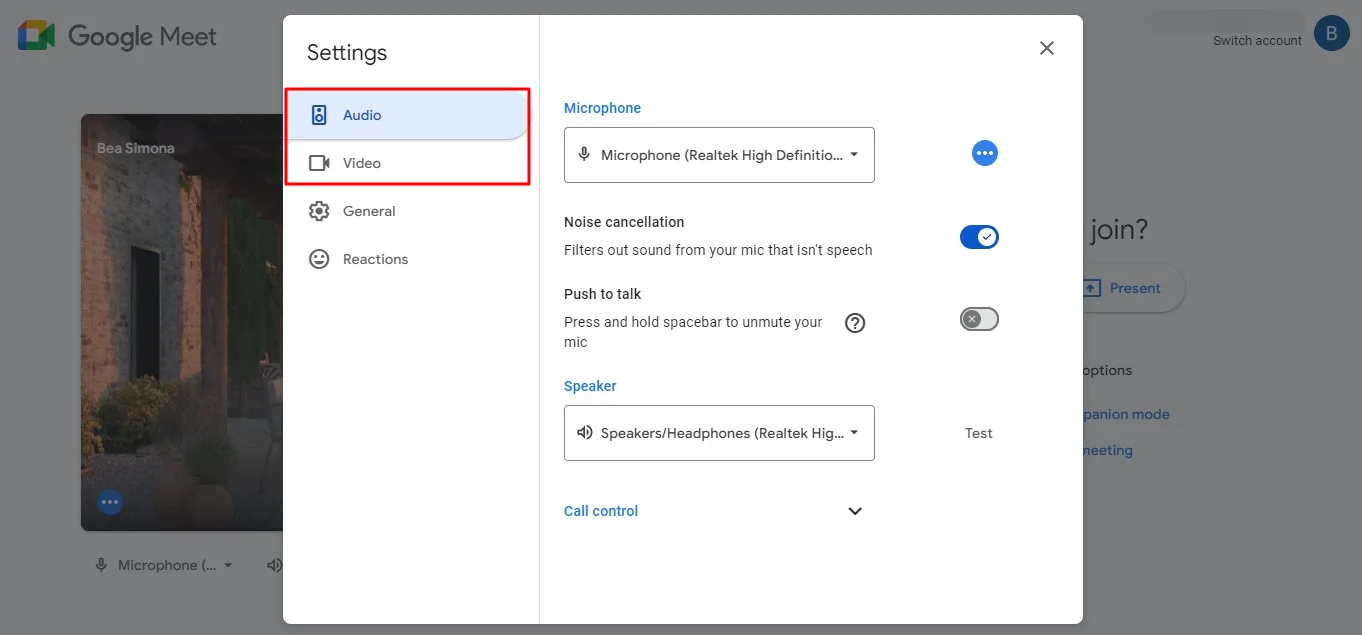
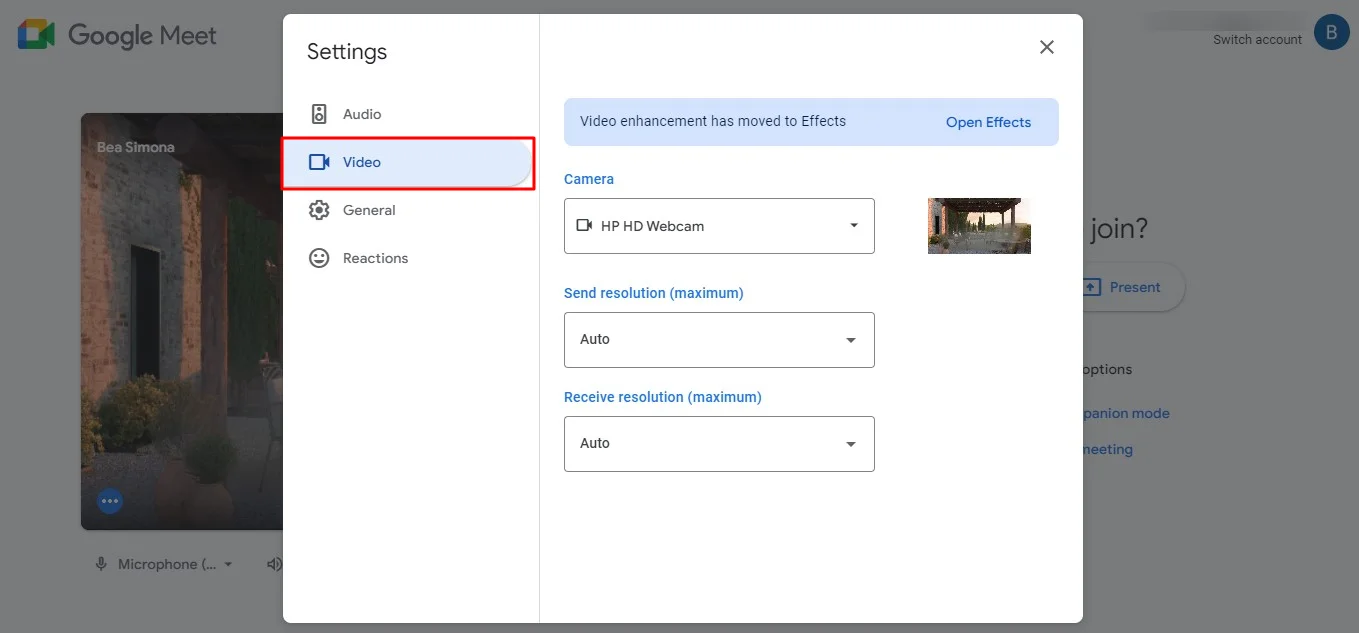
6. To check your audio and video settings:
- Locate "Microphone" to test your microphone by speaking. If the microphone bar moves, your microphone is working properly, if not, you might have poor sound quality.
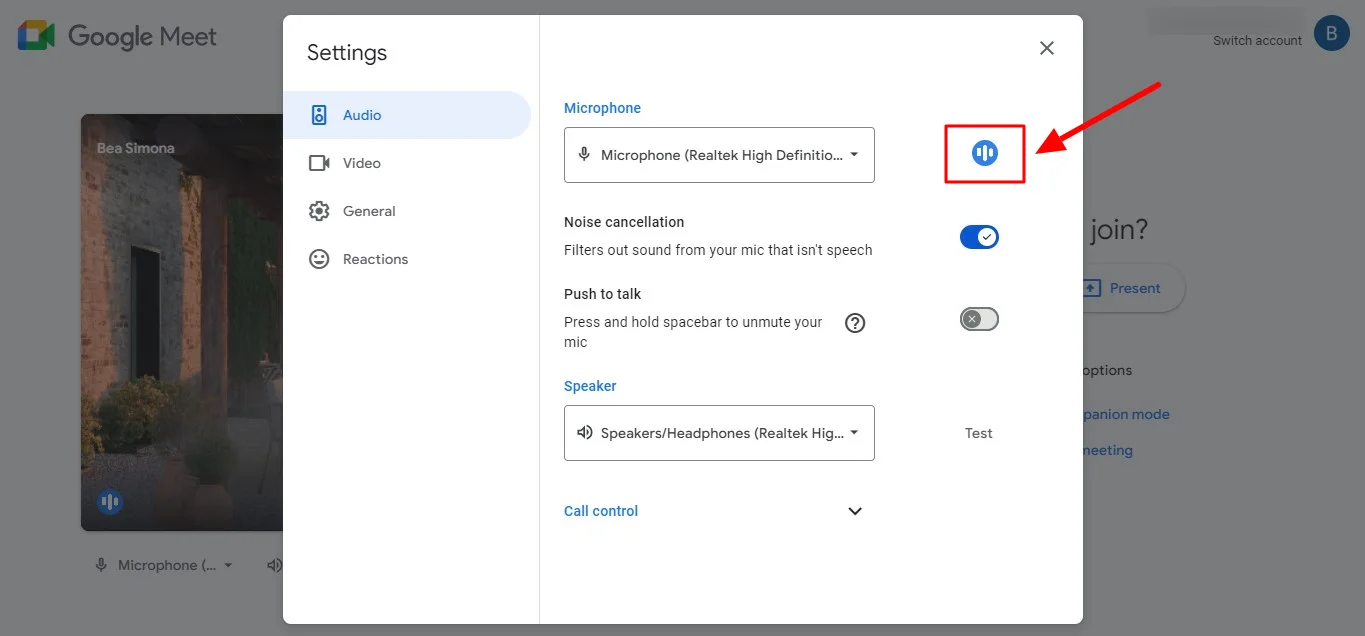
- Locate "Speaker" and then "Test speakers" to test your speaker. If you hear a test sound, your speaker is working correctly. You can even access the Push To Talk function with your audio settings.

- Locate "Camera" to test your camera. If you see your video in the preview tile, your camera is functioning correctly, if not, you might want to try troubleshooting your camera.
7. When you're ready to join the meeting, then click "Join now."
Check your audio and video settings during a Meet video call
If you're currently in a Google Meet meeting and need to assess or adjust the audio and video quality, follow these steps:
1. Click on the circle with three white dots located at the bottom of your screen.
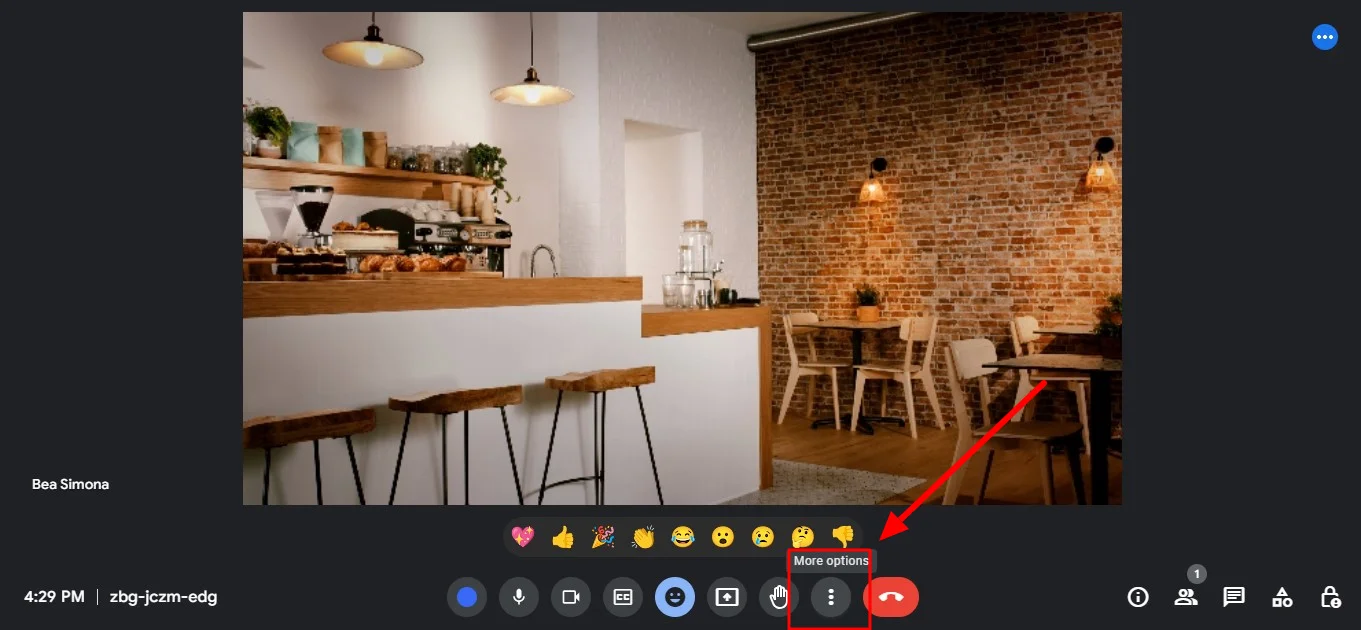
2. Scroll down and choose "Settings." This action will prompt a window to appear, displaying your current audio and video settings.
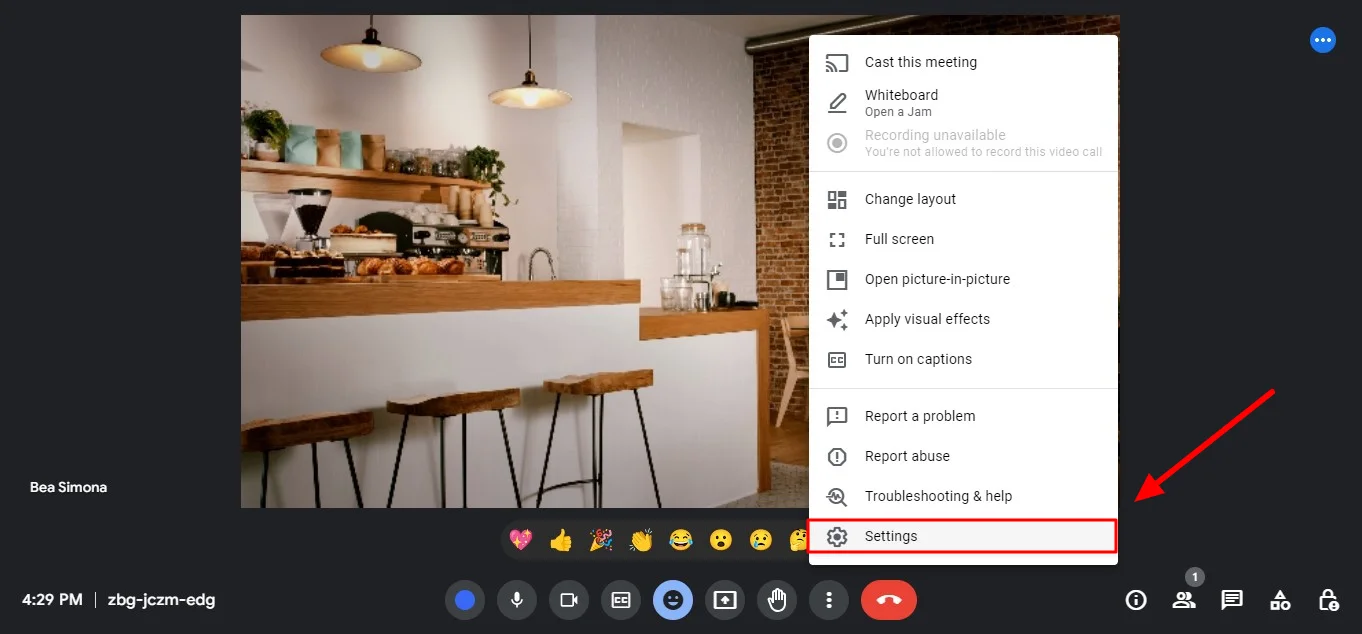
3. From here on follow the same steps as mentioned above.
The "Effects" menu
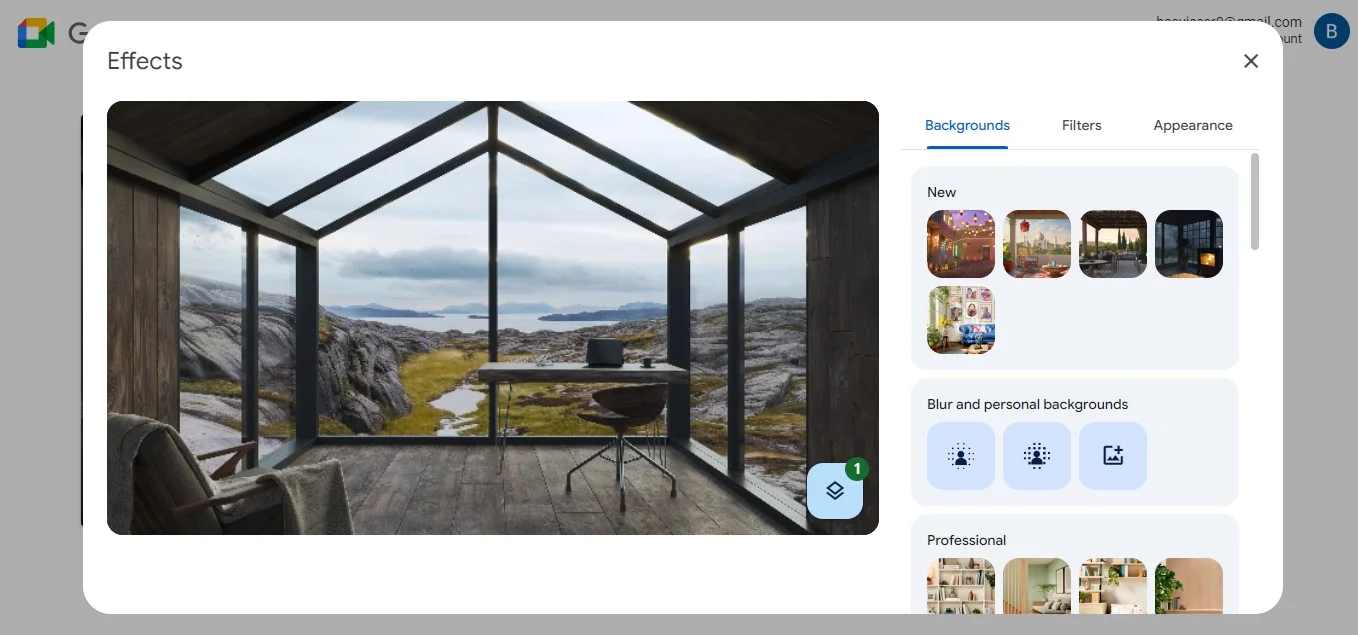
The effects menu is a new feature in Google Meet and is located on the main screen where you can see your video feed before joining a meeting. It is represented by three circular icons, typically found at the bottom or top right corner of the screen.
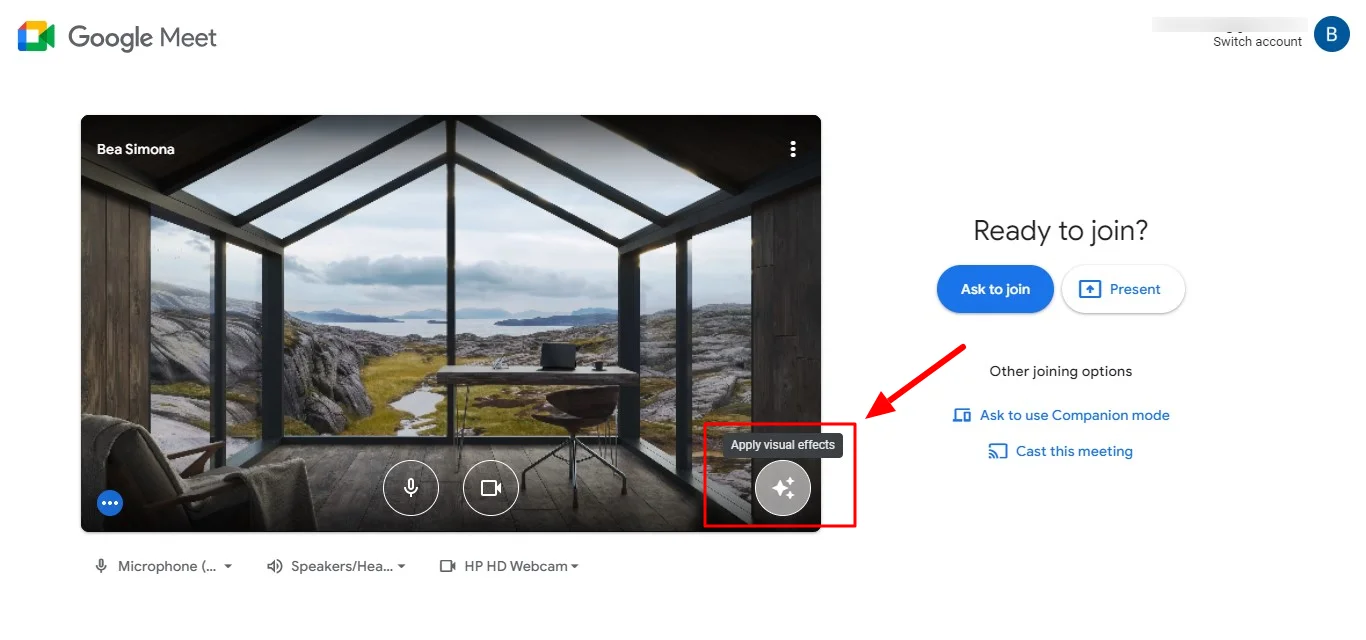
You can click on these icons to access the drop-down menus and various effects such as background blur, change your virtual backgrounds, and other dynamic visual effects.
Conclusion
Embracing Google Meet's test call function is a simple yet powerful way to ensure a smooth and successful video conference. By taking a few minutes to test your audio, video, and overall setup, you can dodge technical glitches, boost your confidence, and keep the meeting running like a well-oiled machine.
However, for an even more productive meeting experience, consider using Bluedot alongside Google Meet. While the test call helps ensure everything runs smoothly technically, Bluedot goes a step further by capturing the valuable content of your meeting. Imagine forgetting a key point shared during screen sharing – with Bluedot, that wouldn't be an issue.
It seamlessly records your Google Meet call sessions, including screen shares, audio, and video. Bluedot then automatically transcribes your recording, generates intelligent summaries, and allows for effortless organization and sharing. By leveraging both Google Meet's test call function and Bluedots's recording and note-taking capabilities, you can elevate your video conferencing experience to a whole new level.
FAQs
Can I use the call test feature on mobile devices?
Google Meet's call test feature is available on both desktop and mobile devices. You can access it through the settings menu before joining a meeting, ensuring consistent audio and video quality across different devices.
Is the call test feature available for all Google Meet users?
Yes, the call test feature is available for all Google Meet users, whether you're using the free version or a paid subscription. It's a valuable tool for anyone looking to optimize their meeting experience.
Does the call test feature consume additional data?
No, the call test feature doesn't consume additional data as it's a pre-meeting check. It simply allows you to preview and check your audio and video settings without actually joining a meeting.


