Recording audio on your iPhone is a simple and convenient process, allowing you to capture high-quality audio for different purposes. Whether you want to record a meeting, create a podcast, or just capture a thought, the Voice Memo app provides a simple and reliable solution. Our guide will equip you on how to voice record, teaching you tips on how to record high-quality audio to improve your user experience.
By reading further you’ll discover the best insights on editing and sharing your recordings while making sure that your audio stays clear and easily accessible. Make the most of your iPhone recordings by finding the best way to record while being on the go.
Can You Record Audio On An iPhone?
You can record audio on an iPhone using the voice memo app, or even third-party apps found in your app store if you wish to have more advanced features for your recording. The voice memos app is the primary voice recorder on iPhones, and this feature offers a free and simple way to capture your audio.
If you want higher sound quality or wish to reduce background noise, consider using an external microphone that connects to your device. You can also embed audio into your Notes app for personalized notes, and the Messages app even allows you to send recordings through text.
All recordings are automatically saved in the voice memos app where they can be edited or trimmed down for shorter voice notes, and notes can be shared with other apps.
How To Audio Record On iPhone With Voice Memos
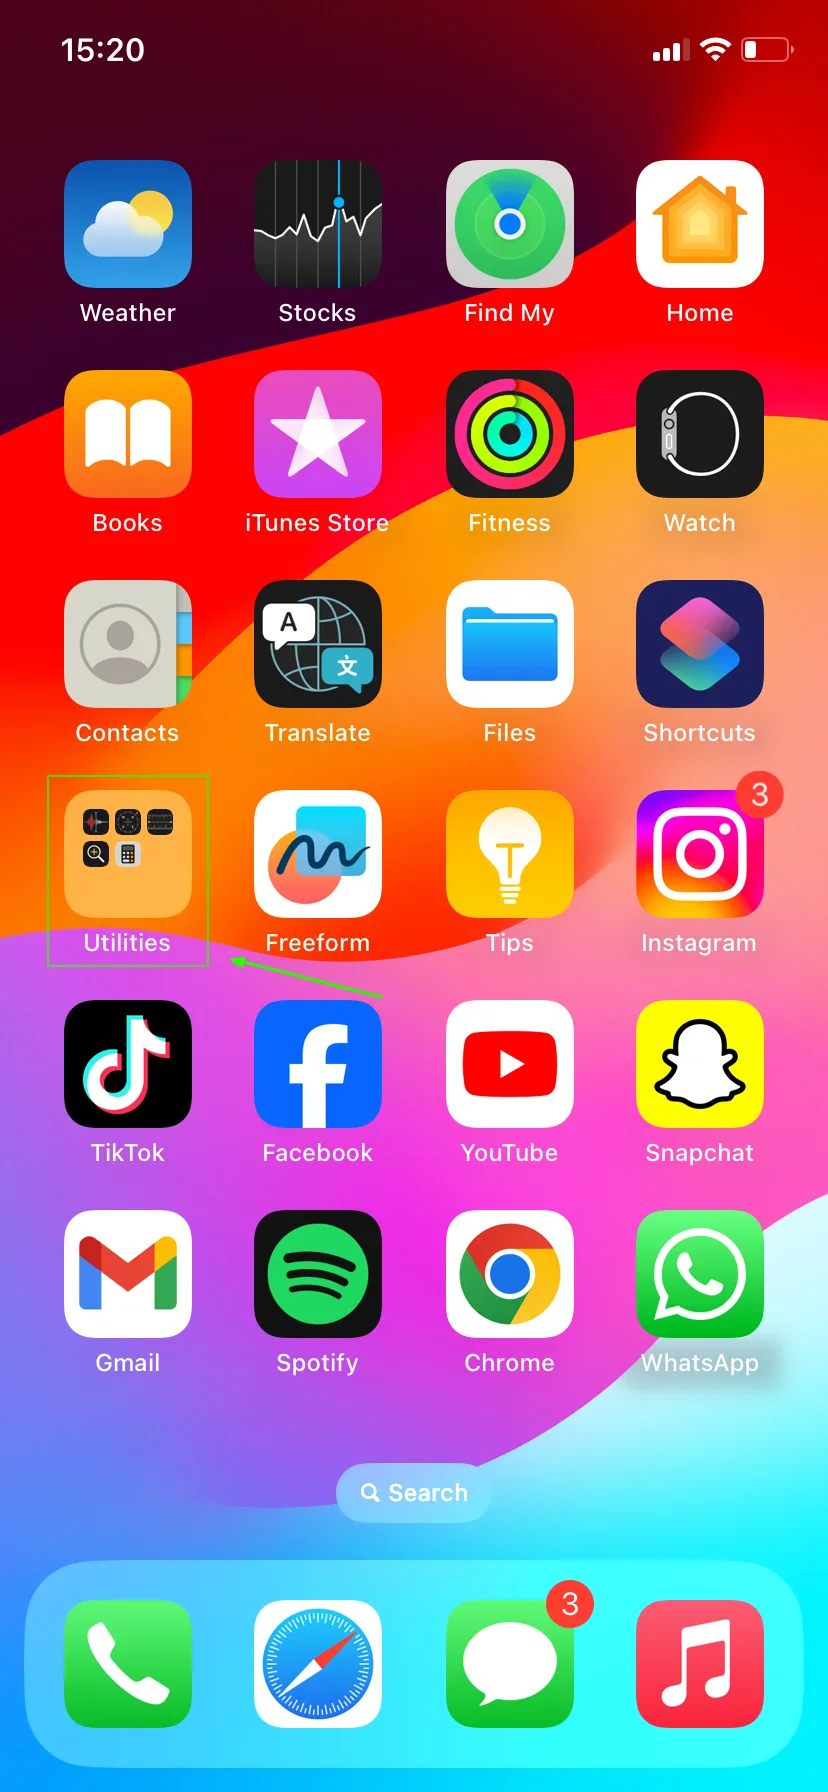
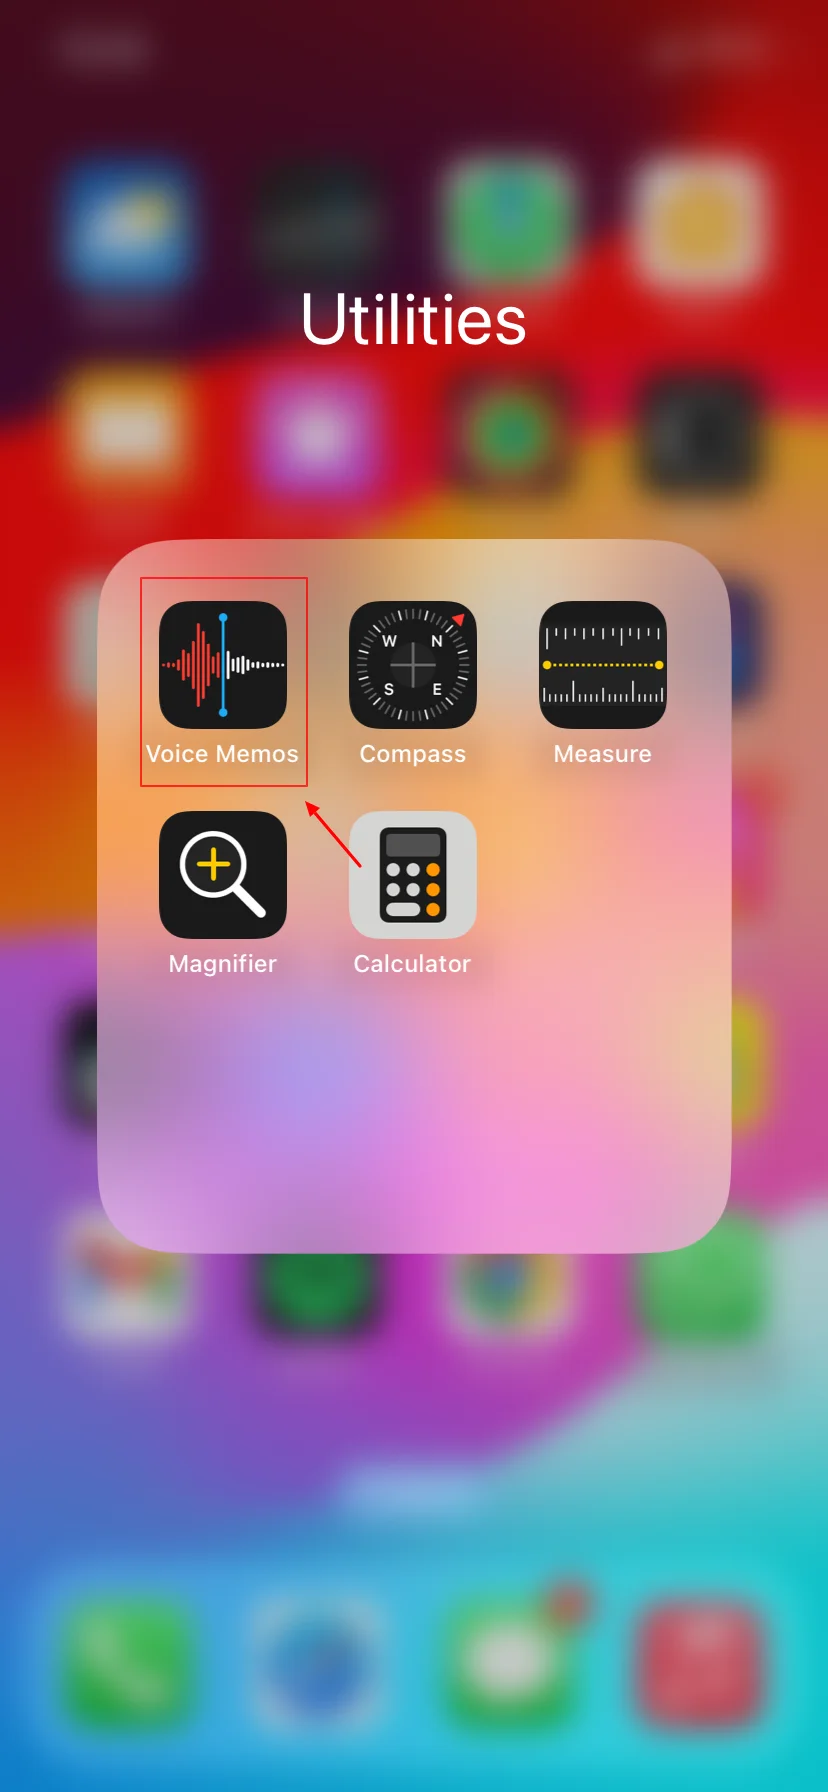
Locate and launch the Voice Memos app
To start recording on your iPhone, try to find your Voice Memos app on your home screen. If you have deleted or removed it from your home screen, you can find it in your App Library. This free app comes pre-installed on every iOS device and is one of the most reliable voice recorders to capture your voice recordings, it is also a great app to record a phone call.
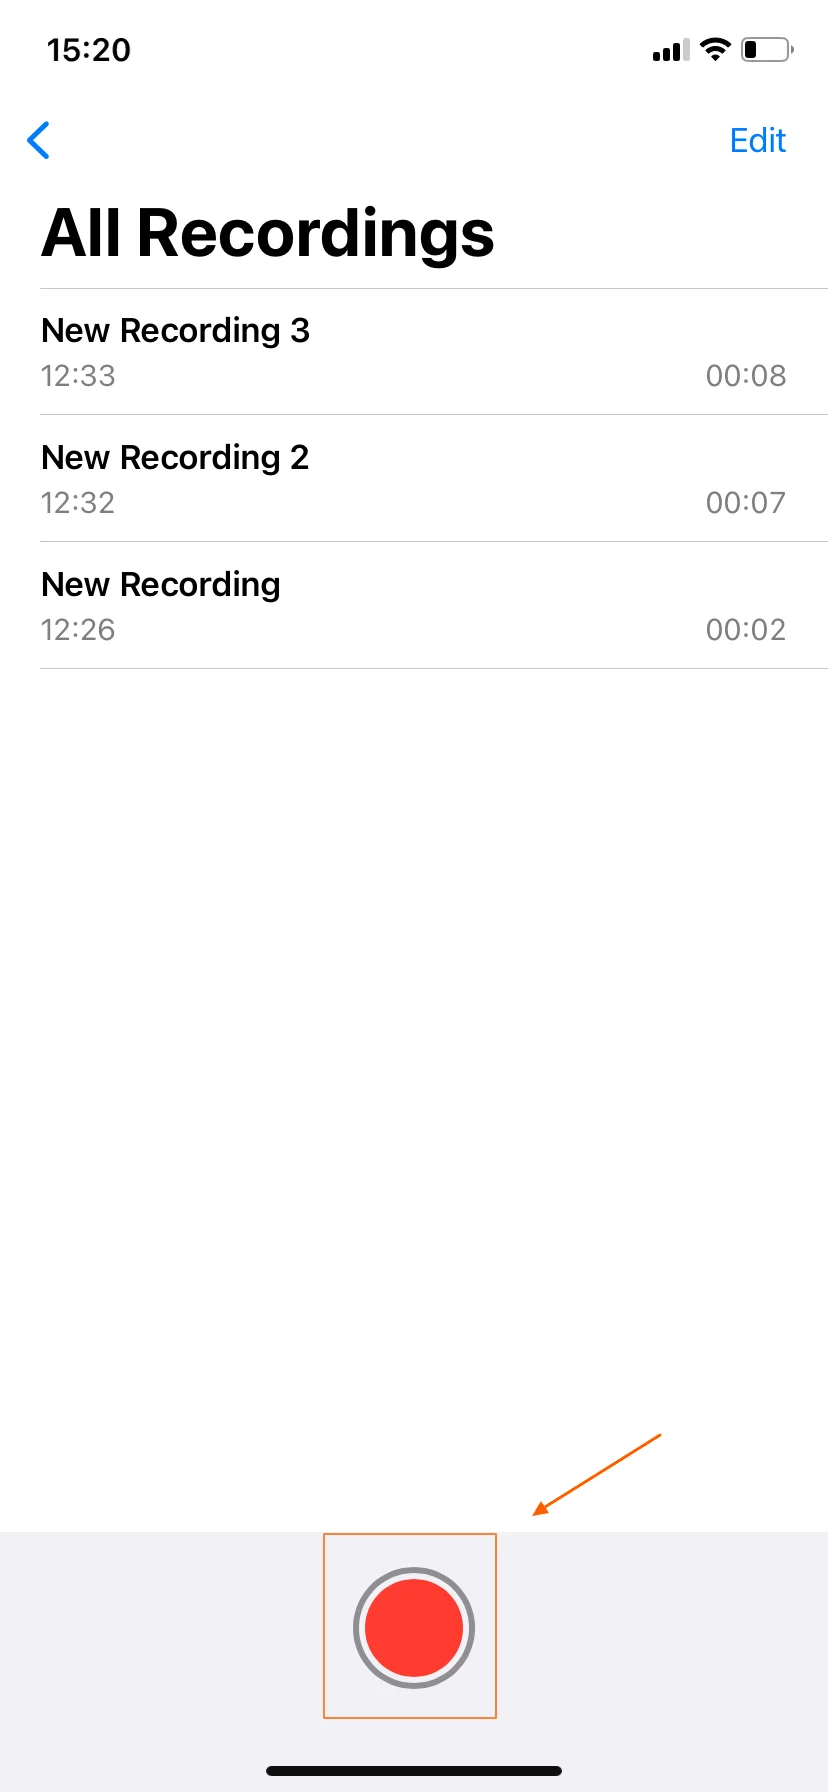
Hit the record button
Once your main voice memos screen has opened, click the red record button to start recording phone calls or voice notes. You will notice that the red round record button turns into a square on the Dynamic Island, or the status bar built-in microphone itself to indicate that it is busy audio recording. To record high-quality audio, you can connect your external microphone and try to reduce the background noise that might interfere with the sound.
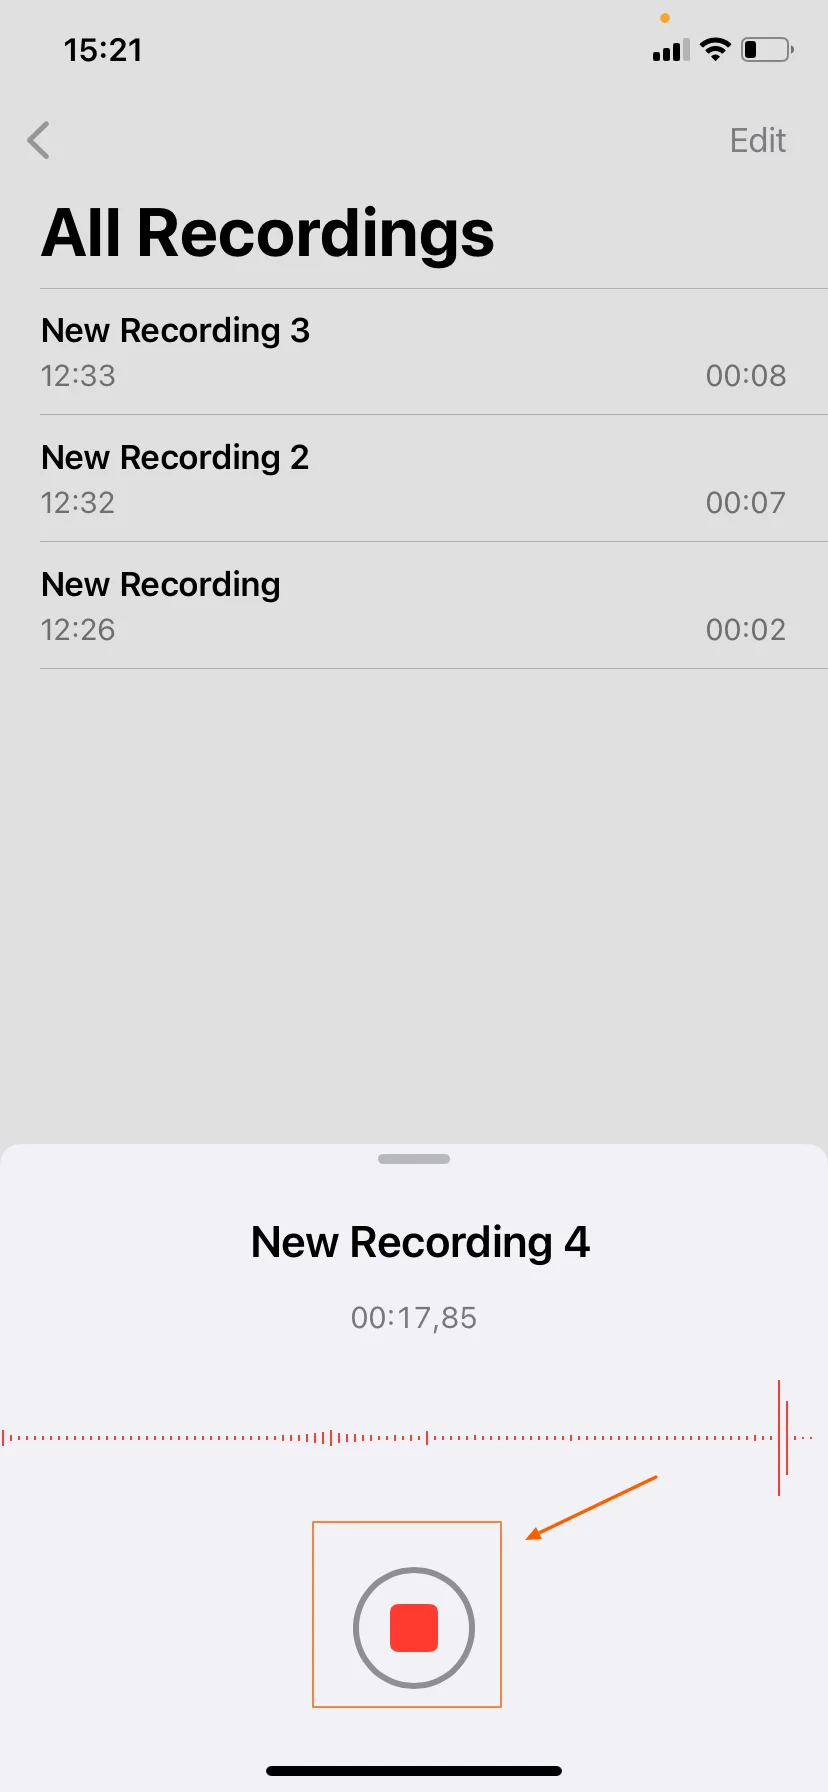
Record your audio
When recording, make sure to speak clearly into your iPhone's microphone to ensure that your sound quality remains top-notch. You can use this app for various purposes like capturing audio messages, seminars, recording personal notes, writing songs, or even just recording a quick thought or idea of something.
Pause or stop the recording
To pause the recording, simply click on the pause button. To start your recording, tap resume. To stop your recording, just click on the red record button with a square shape. Your recording will be automatically saved under the rest of your recordings as a new recording in your app.

Name and save your recording
If you click your recording, you will be able to access more features. You can rename it by tapping on the recording name, typing what you want to rename, and then tap save.
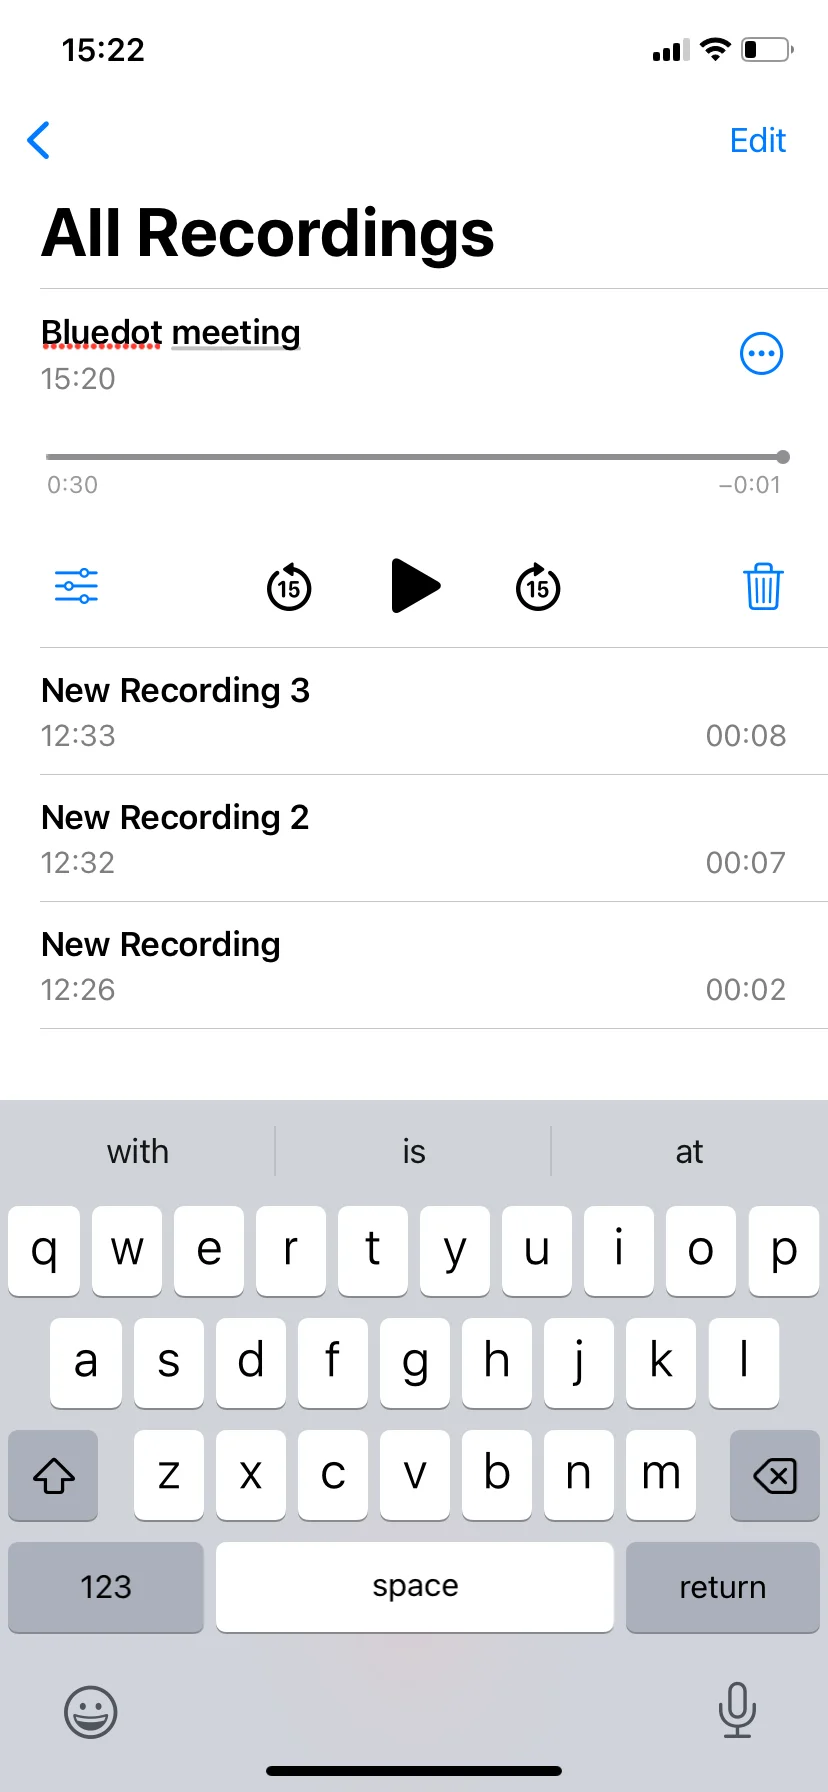
Access and edit your recorded audio
Open the recording of your choice to playback, monitor the recording level, and adjust playback speed. You can use the edit feature to edit your recordings or download third-party apps with editing tools to help you trim down your recording. Once done editing, tap save. Explore your sharing options to share your audio file via email, messages, or different apps.
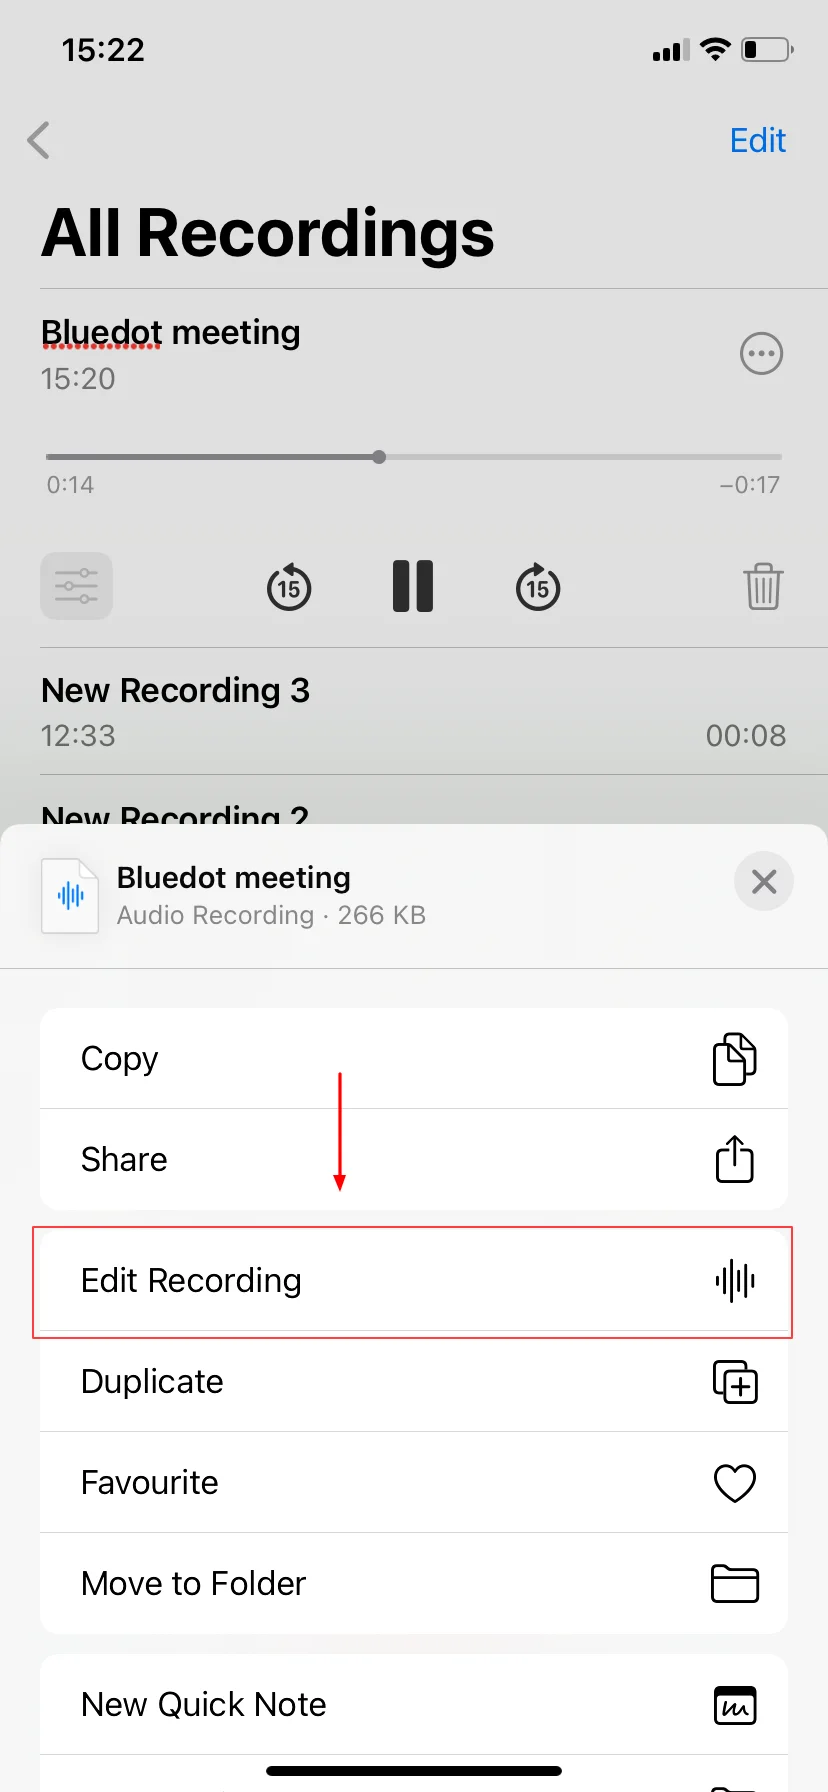
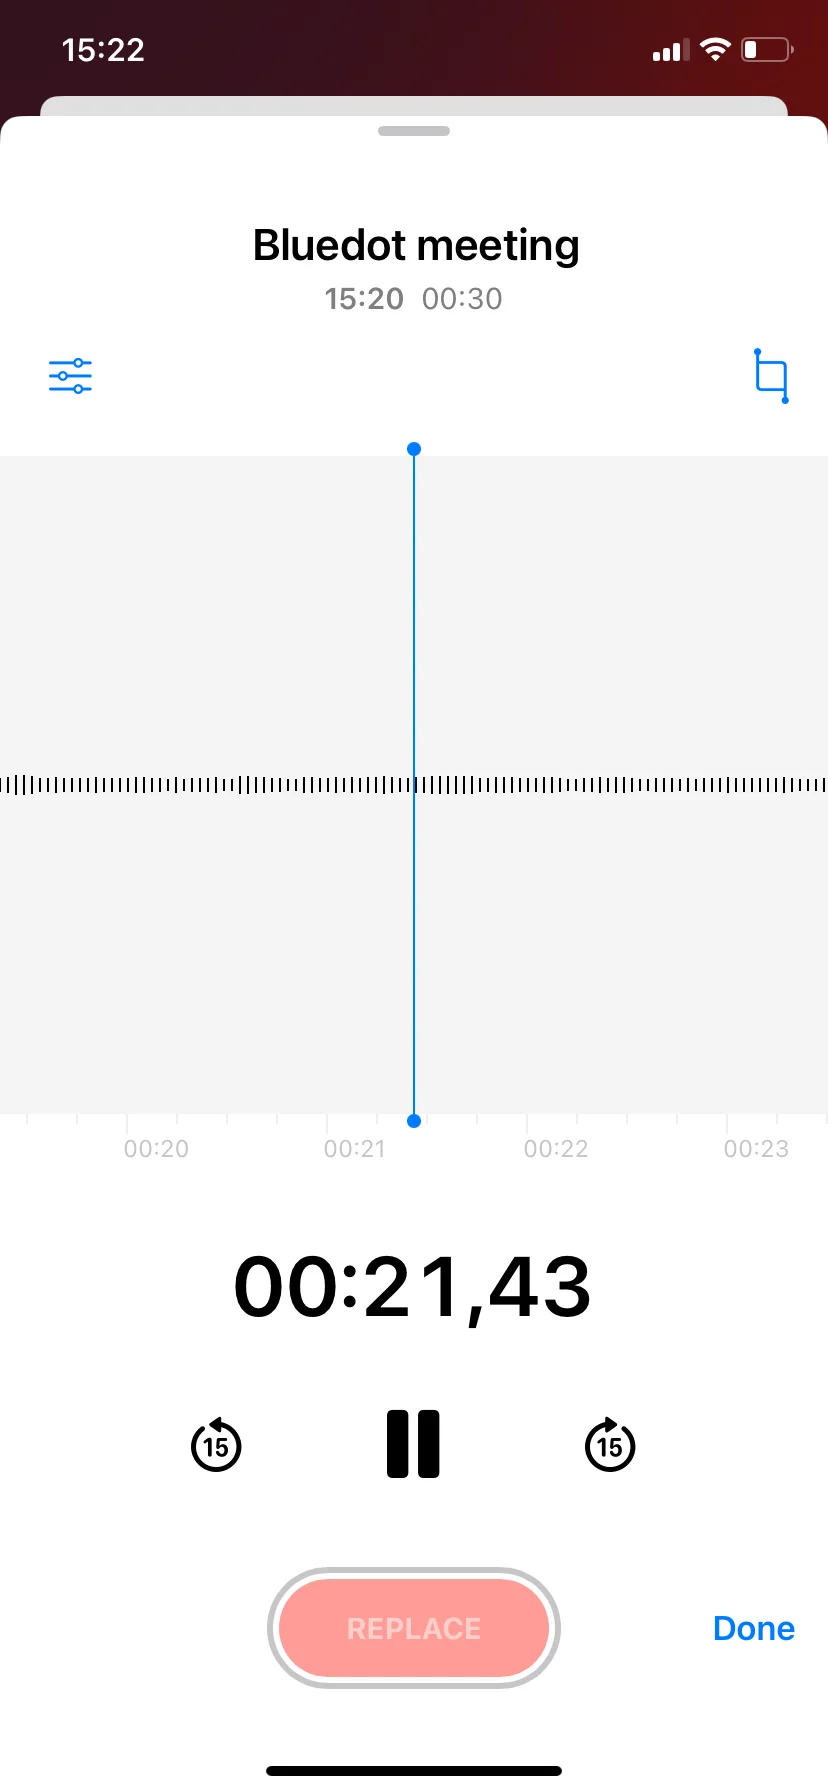
How To Share An Audio Recording On iPhone
Select the recording
Go to your Voice Memos app, and navigate to where your recordings are stored. Click on the recording you want to share.
Access sharing options
While your recording is selected, click on the three-dot menu icon on the right-hand side of your screen, or the share button to open the sharing options. This menu will give you a few options for different options to share your file.
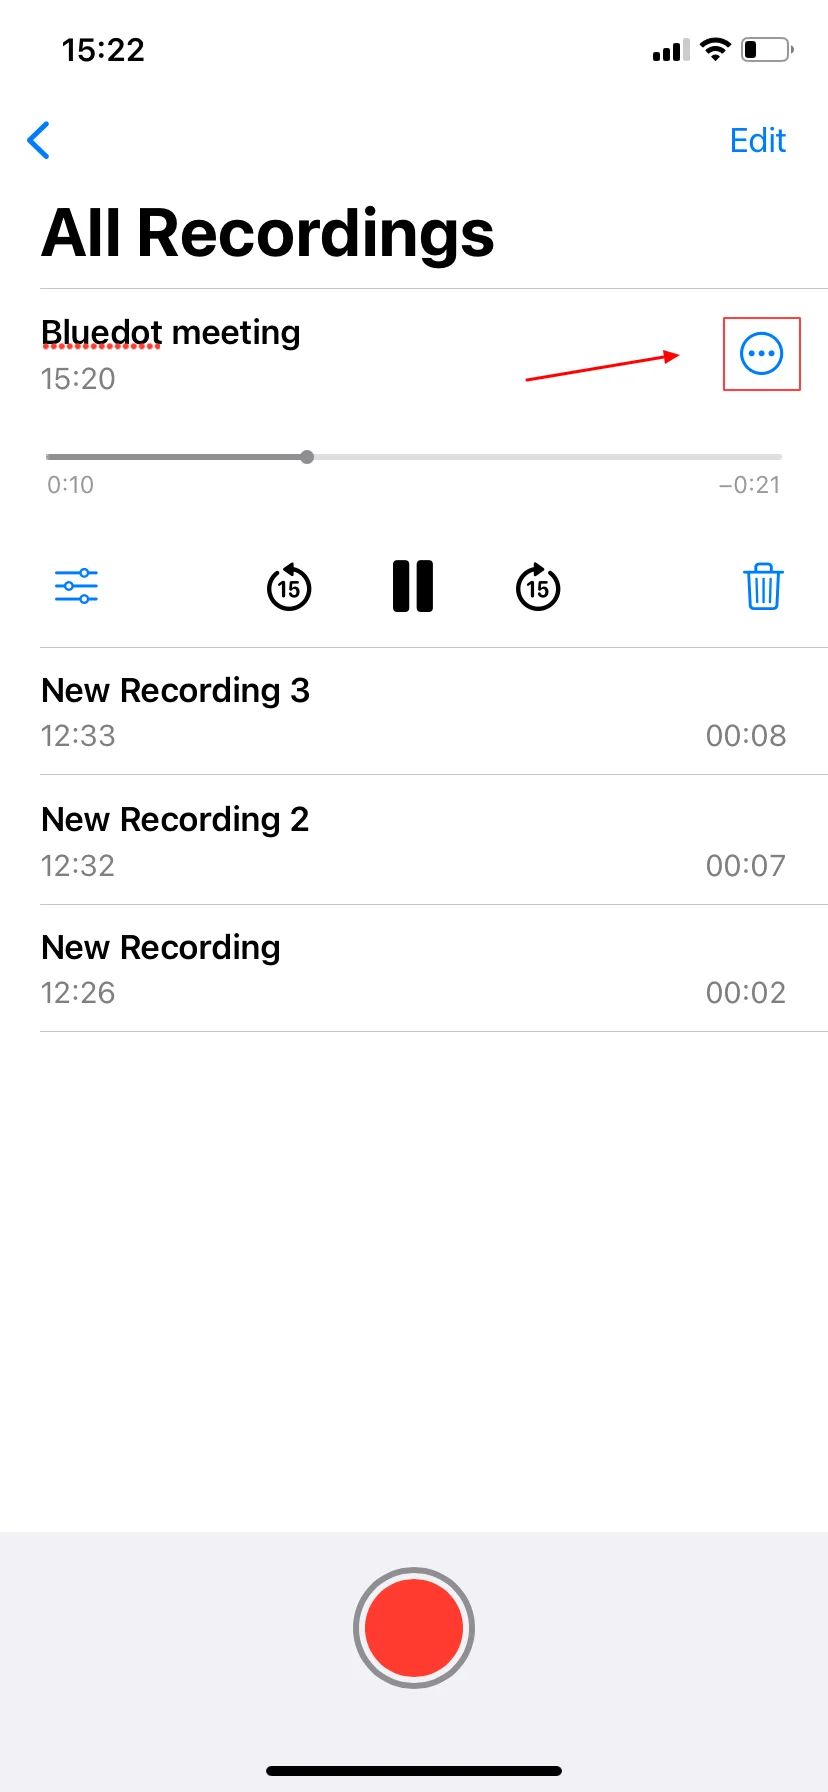
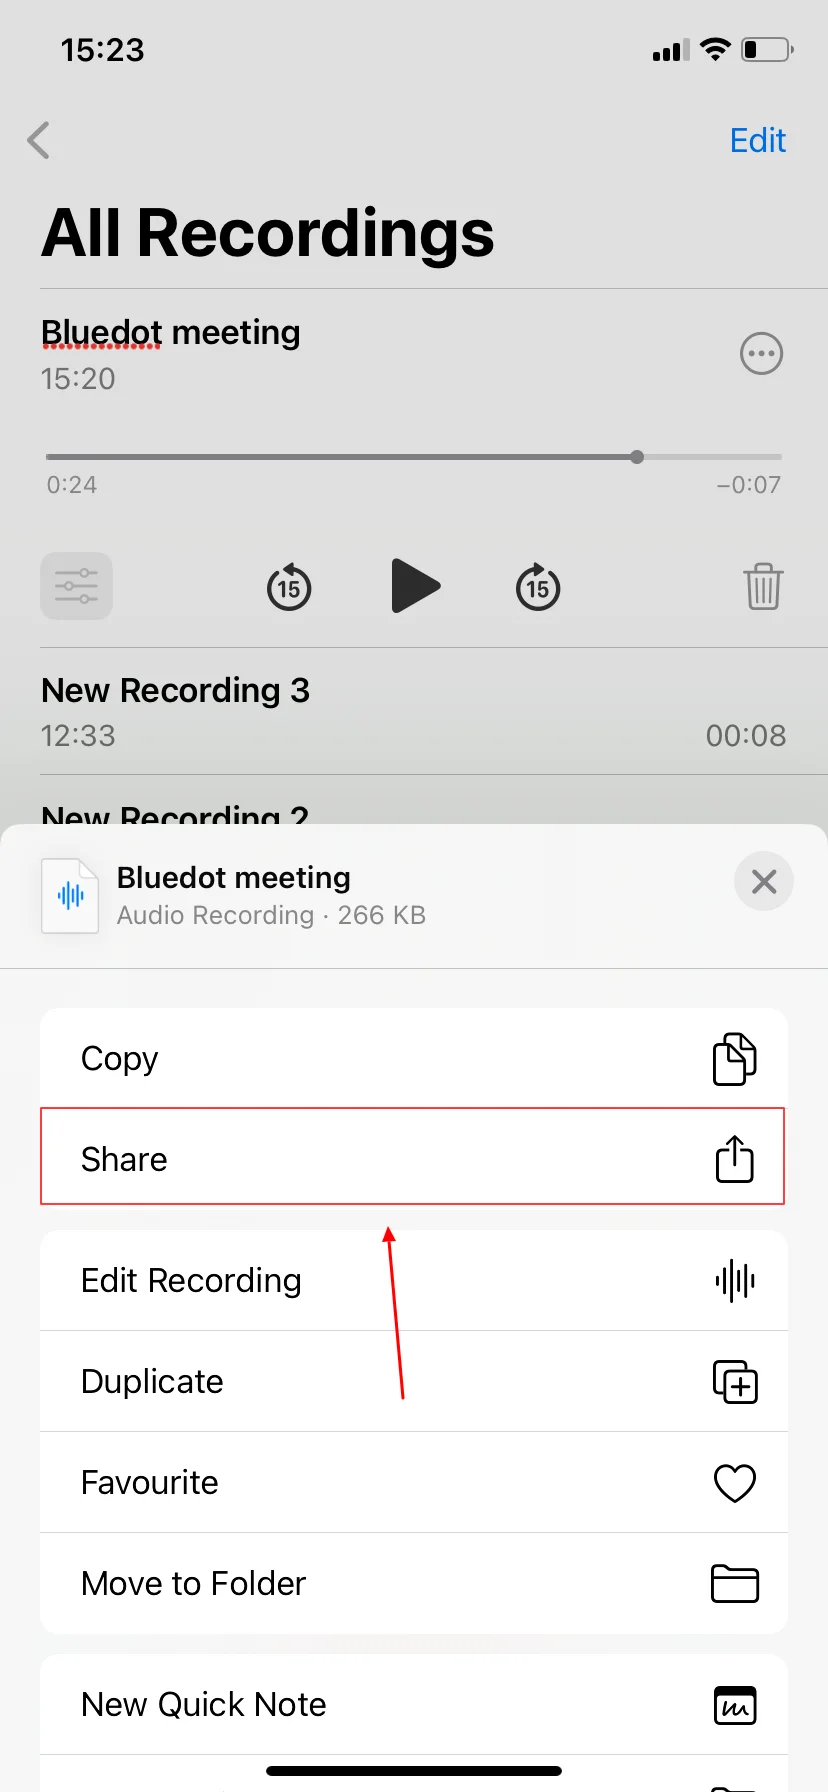
Select a sharing option
Choose your preferred method or app such as Mail, text messages, or Airdrop that will support audio files. If you wish to share your recording with multiple people, you might want to consider using your email or group messaging for that.
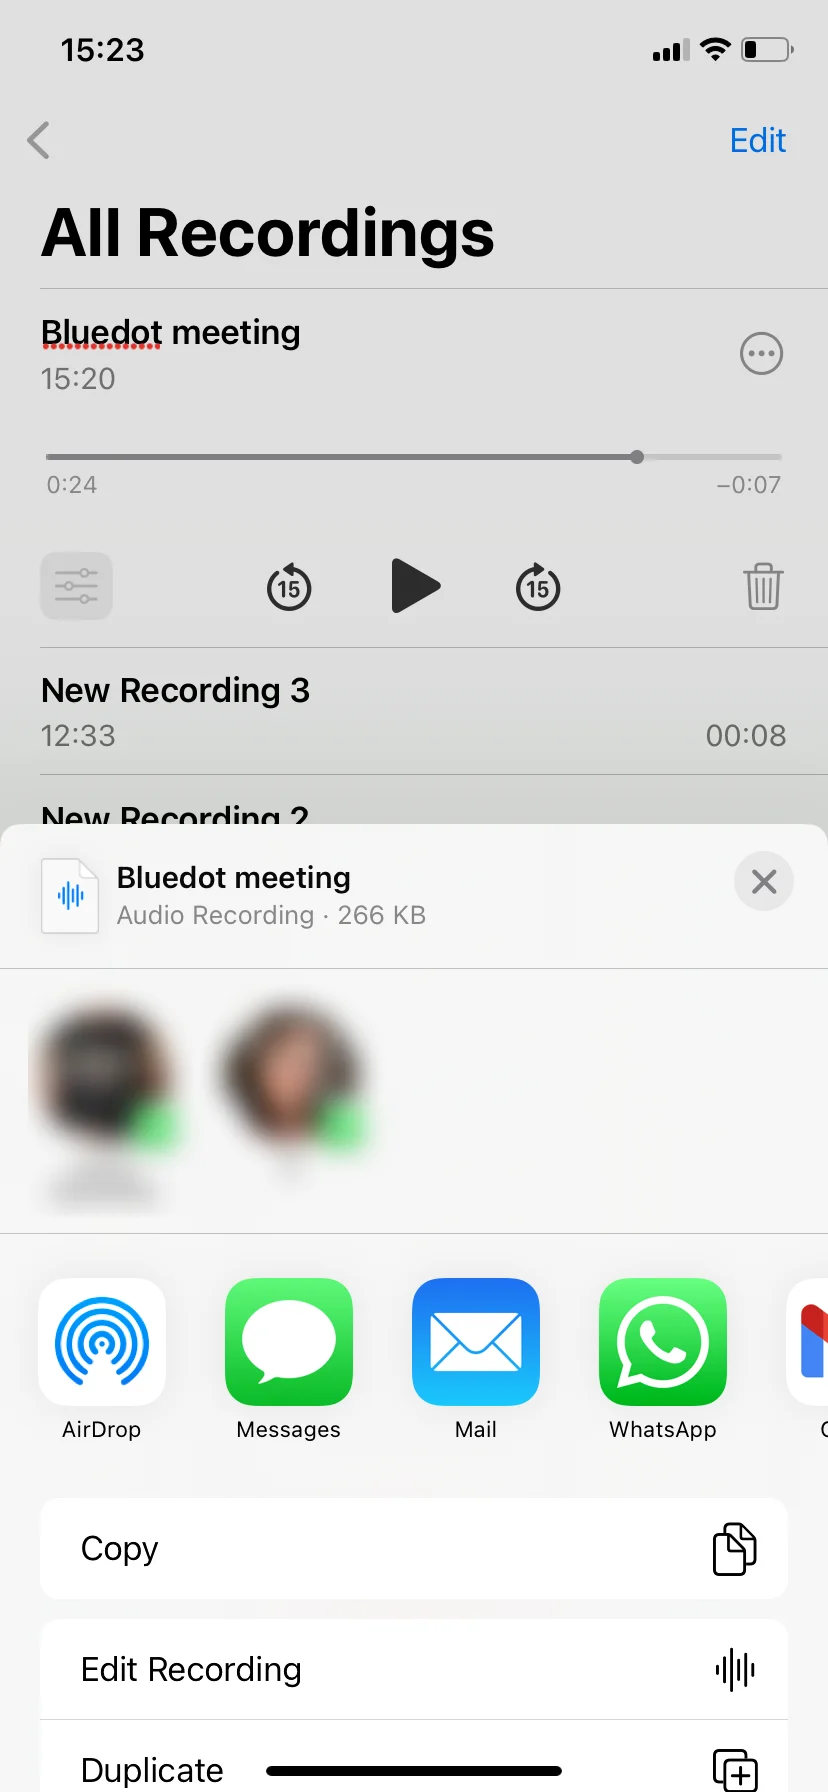
Complete the share
Follow the prompts given to you for the app of your choice to complete the share. Your audio file will be sent based on your selected sharing method. If you are sharing through Airdrop, always ensure that both devices are in close enough proximity to each other, and have your Bluetooth and Wi-Fi enabled. If you plan on sending it via email attachments, make sure it doesn’t exceed the size limit indicated for files.
How To Save Your Voice Memo
Save voice memo to iCloud
This is the best way to ensure that all important information is always accessible on all your devices, for at least one person at all times. Here’s how to save your voice memos and make sure your iCloud sync:
- Go to your settings.
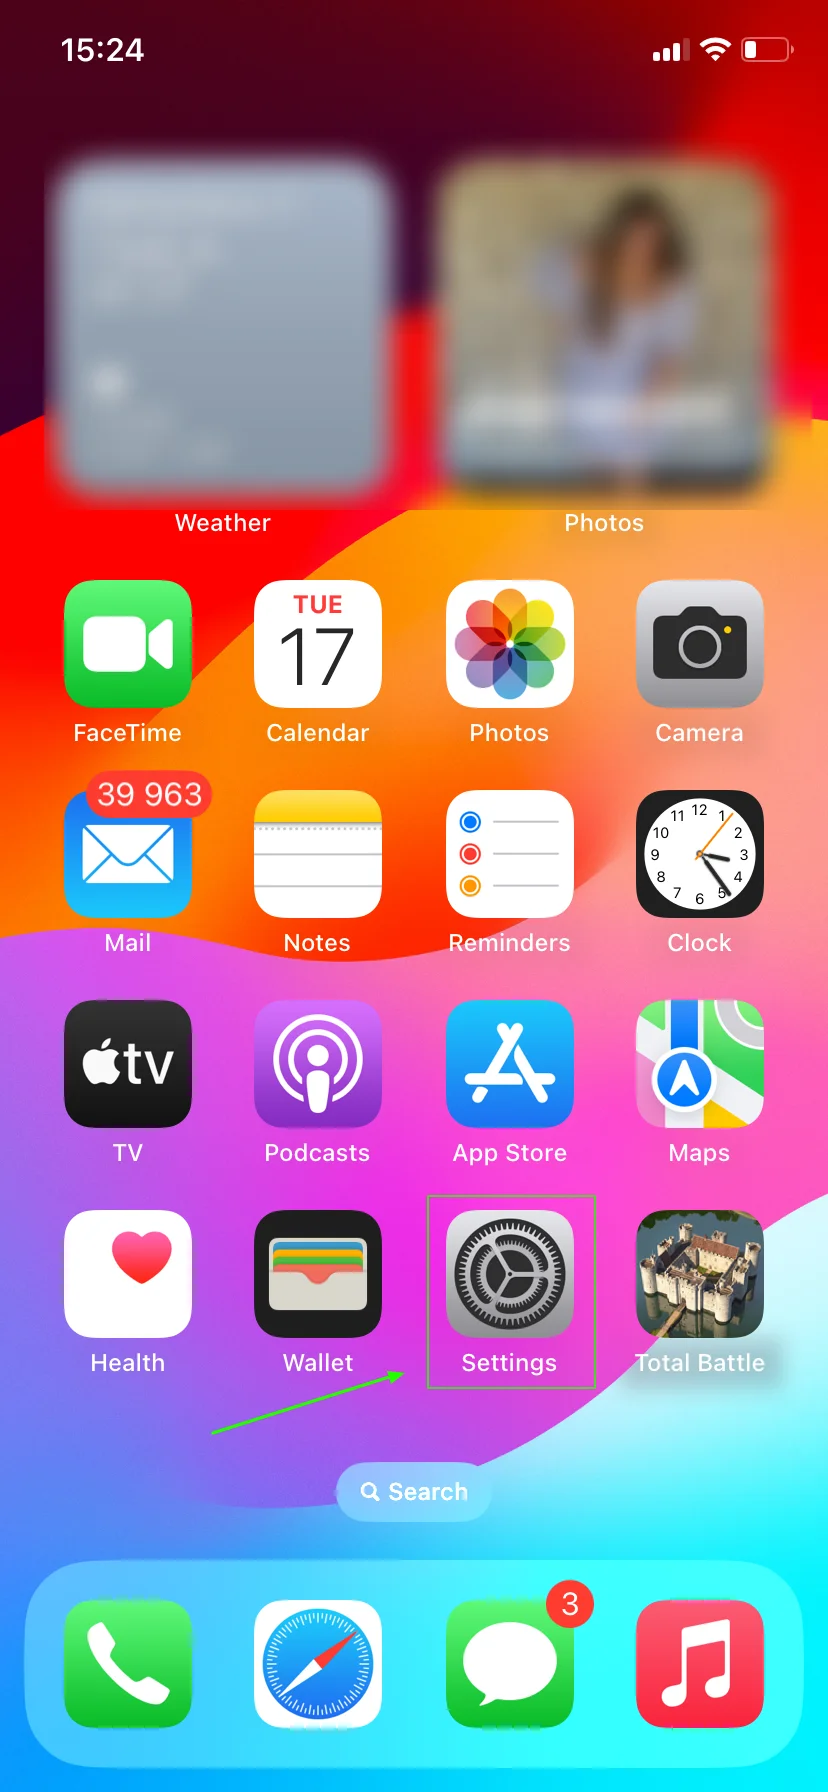
- Go to your name.
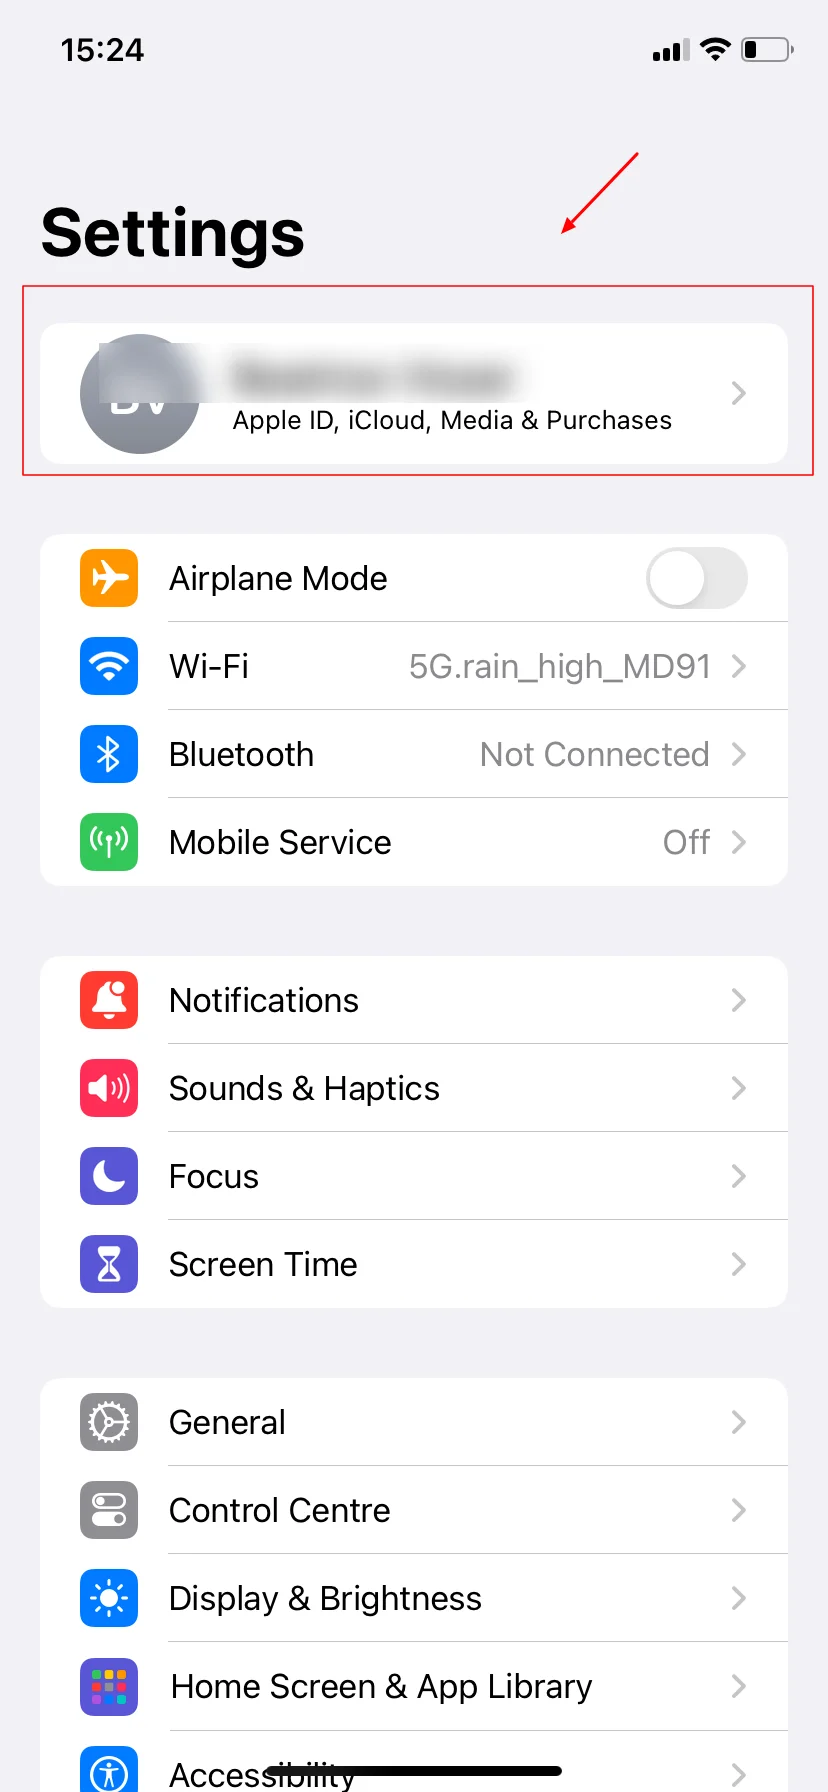
- Click on iCloud.
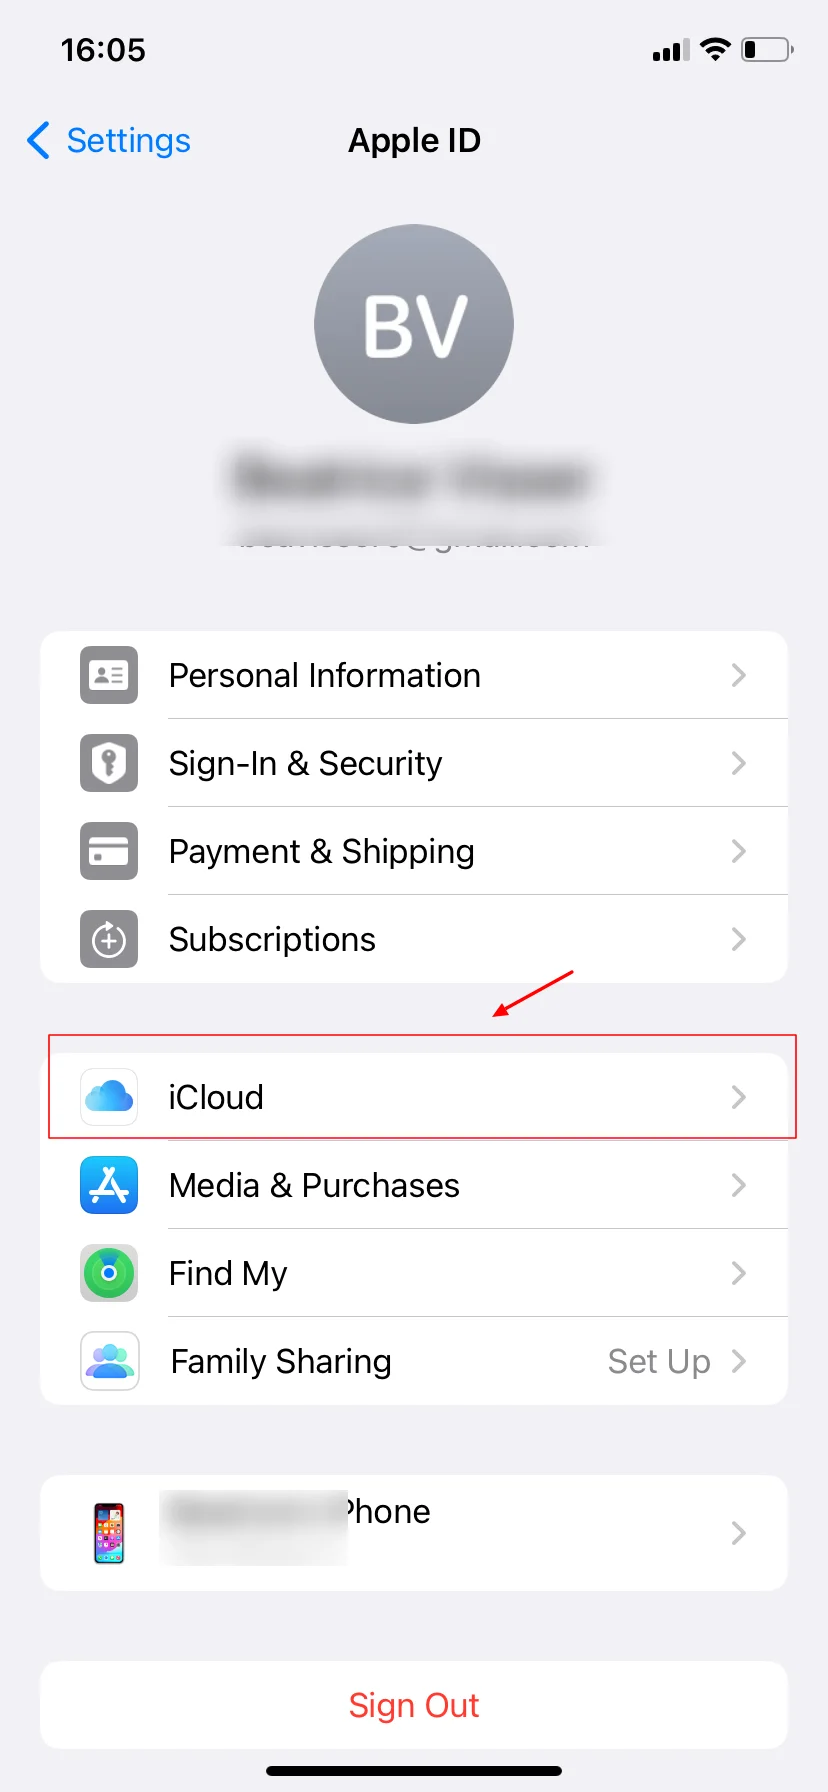
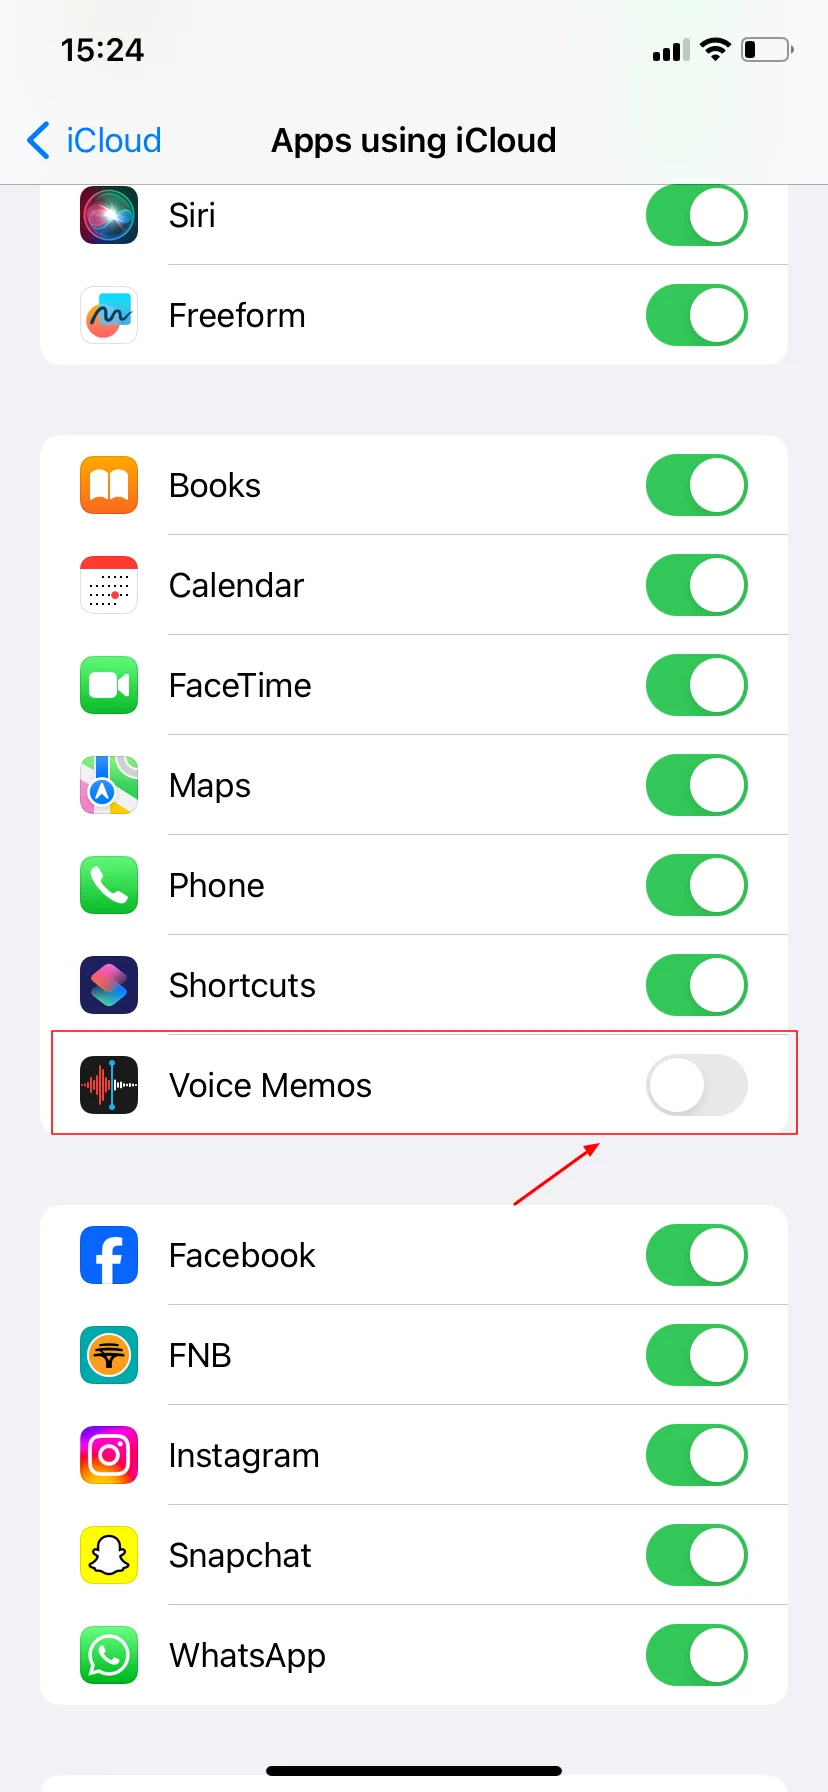
- Toggle on Voice Memos.
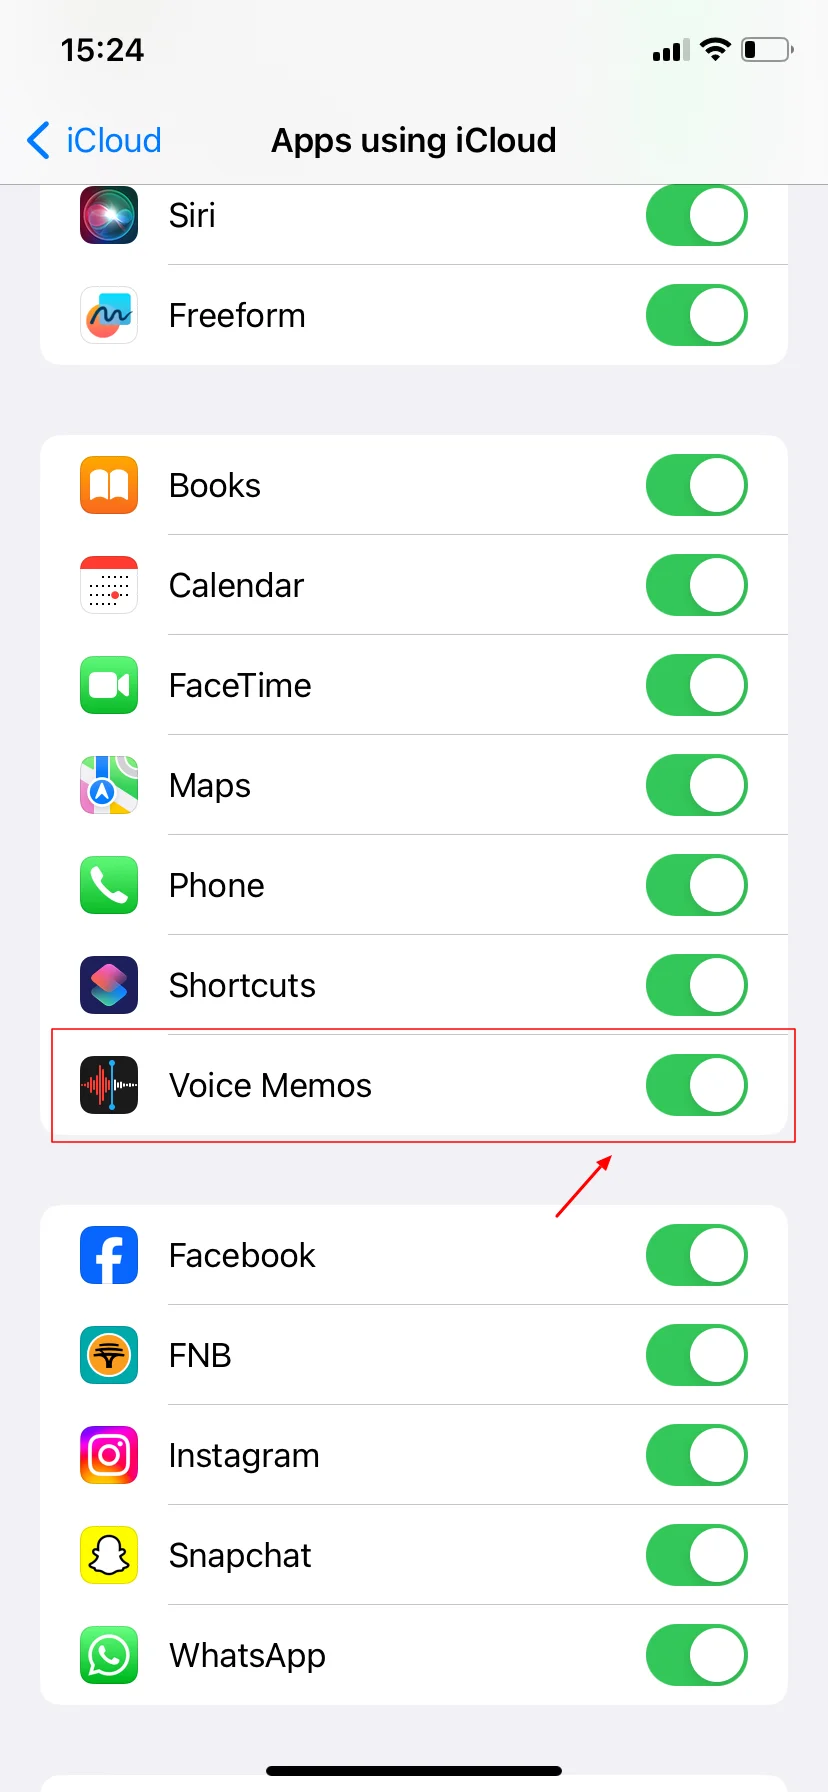
Your recordings will now be stored in iCloud Drive, making them easy to access on any other iOS device you own or Mac computer.
Save voice memo in the app
By default your voice memos will be saved in your Voice Memos app itself. You can always access them at any time by going to your main screen and then to your recording app. This also helps to preserve space in your iCloud if your syncing is disabled.
How To Delete iPhone Audio Recordings
Select your recording
Open your Voice Memos app and find the recording you wish to remove or delete from all your recordings.
Select the “trash” icon
You can either swipe left on the recording or tap the three-dot menu icon on the right and choose to “delete” it. The file will then be moved to the “recently deleted” folder, where it can be removed permanently or restored.
Conclusion
For iPhone users, voice recording on an iPhone is an effective yet easy way to capture important audio for professional and personal use, like when you record a phone call. However, when it comes to recording meetings, especially where screen sharing is involved, Bluedot might just be the tool you’re looking for.
Bluedot not only excels at recording and transcribing meetings, but also offers advanced features such as transcribing interviews, meeting minutes, recording a call, and even generating AI notes.
Bluedot can record on Google Meet, Microsoft Teams, and Zoom. Bluedot also offers a newly integrated AI feature to further enhance your experience for instant insights and securely stores your recordings and transcriptions for later use. Bluedot is the perfect tool to ensure that no detail ever gets missed.
FAQs
How long can I record audio on my iPhone?
The duration that you can record your audio actually depends on the amount of storage space you have available on your mobile device. As long as you have enough free storage on your phone you can record for extended periods without any interruptions. You can even record a phone call on an iPhone with great audio quality.
Can I recover deleted audio recordings?
Yes, you will be able to recover your deleted recordings from your “recently deleted” folder. The recordings will remain there for 30 days unless you manually delete them before the 30 days.
Can I edit my recordings after saving them?
You can edit your recordings after saving them. The built-in editing tools allow you to edit, trim, and replace parts of your audio. This is a great feature for editing recording instead of starting a new recording, or if you forgot to stop recording and your recording is too long.
Can you record phone calls on an iPhone?
Yes, you are able to record iPhone calls using the iPhone's Voice Memo app. However, just be sure to alert the person on the phone call that you want to record call, before you start recording calls. When receiving incoming calls, or when you see the incoming calls option, simply notify them before you begin recording by clicking the record button.

%201.svg)
