Discover how to seamlessly share your entire screen on your Microsoft Teams call. Whether you're collaborating on a project, giving a presentation, or simply sharing information with colleagues, our step-by-step instructions will have you up sharing screens in no time.
We'll cover tips and tricks to ensure smooth sharing, troubleshoot common issues, and optimize your screen sharing experience. Don't let technical difficulties hinder your productivity – let us guide you to successful screen sharing.
How To Share Screen In Microsoft Teams Chat
You can share your screen not only during meetings but also while chatting with individuals or groups in Microsoft Teams. However, this feature is currently only available for computer users.
To share your screen in a Microsoft Teams chat, follow these steps:
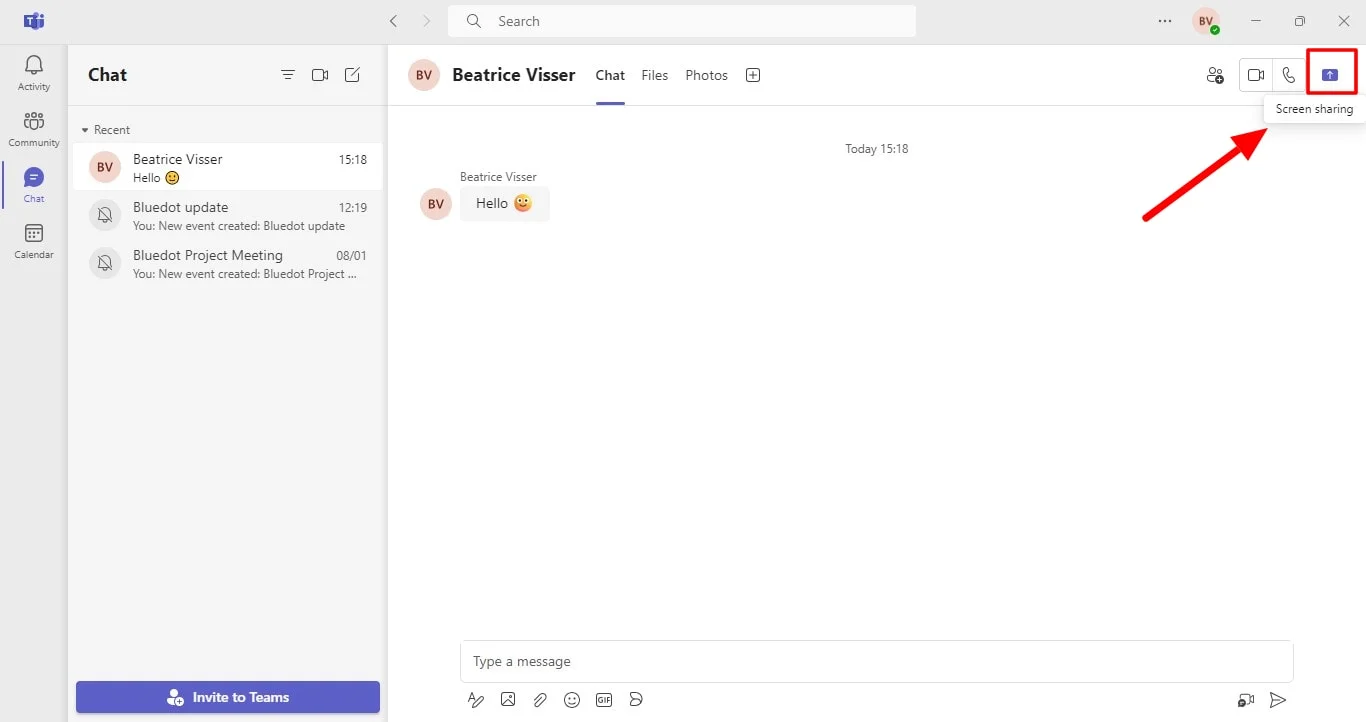
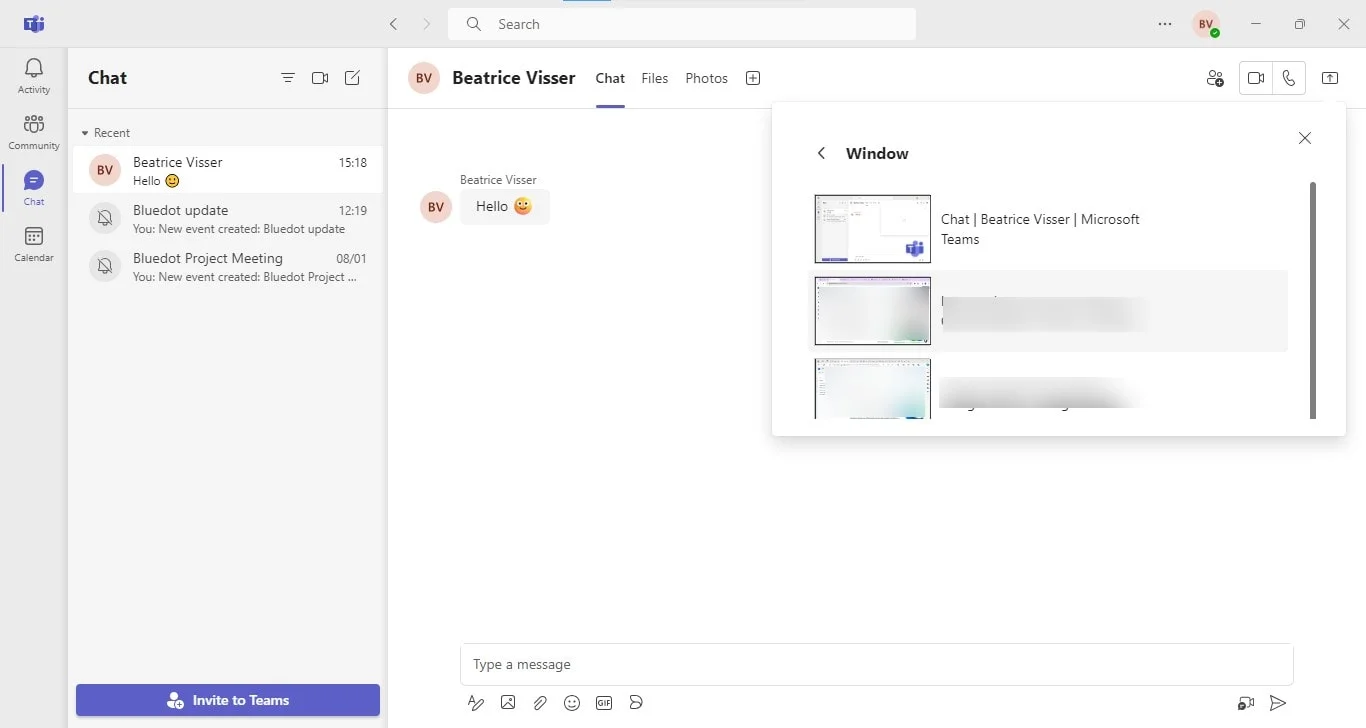
1. Locate the right icon: In the top right corner of your chat window, find and click the screen-sharing icon.
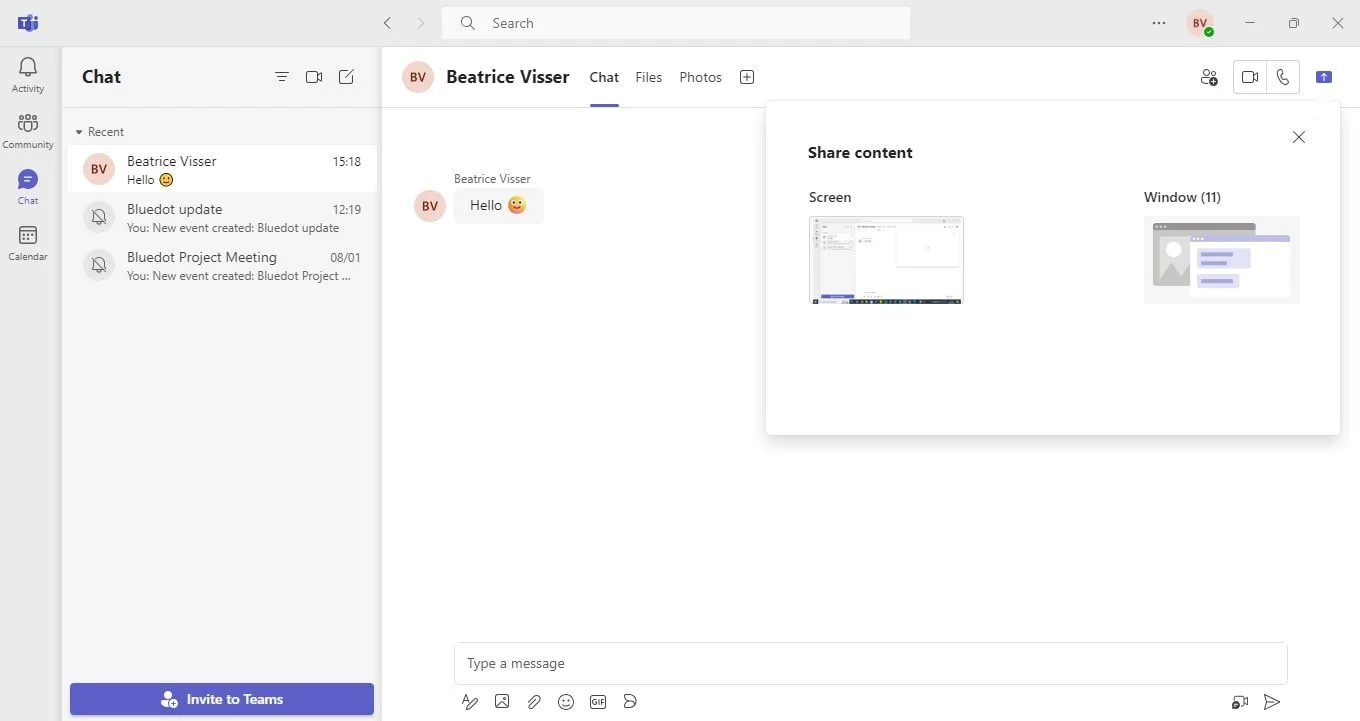
2. Select sharing option: Choose what you want to share:
- Window: Share a specific open program and its contents.
- Desktop: Share your entire computer screen.
3. Recipient approval: Other chat participants will receive a notification requesting their permission to view your screen. Once they accept, they can see your screen while continuing the chat.
4. Stop sharing: When you're finished sharing, click the "Stop Sharing" button to end the screen share.
How To Share Screen On Microsoft Teams Desktop App & Browser
Here's how to share screens on Teams on your Desktop app or even the browser:
Step 1: Access the Sharing Options When in a Teams meeting, locate and click the "Share" button. This is usually found in the upper right corner of your meeting window.

Step 2: Choose what to share Decide what you want to share with other meeting participants on the sharing toolbar:
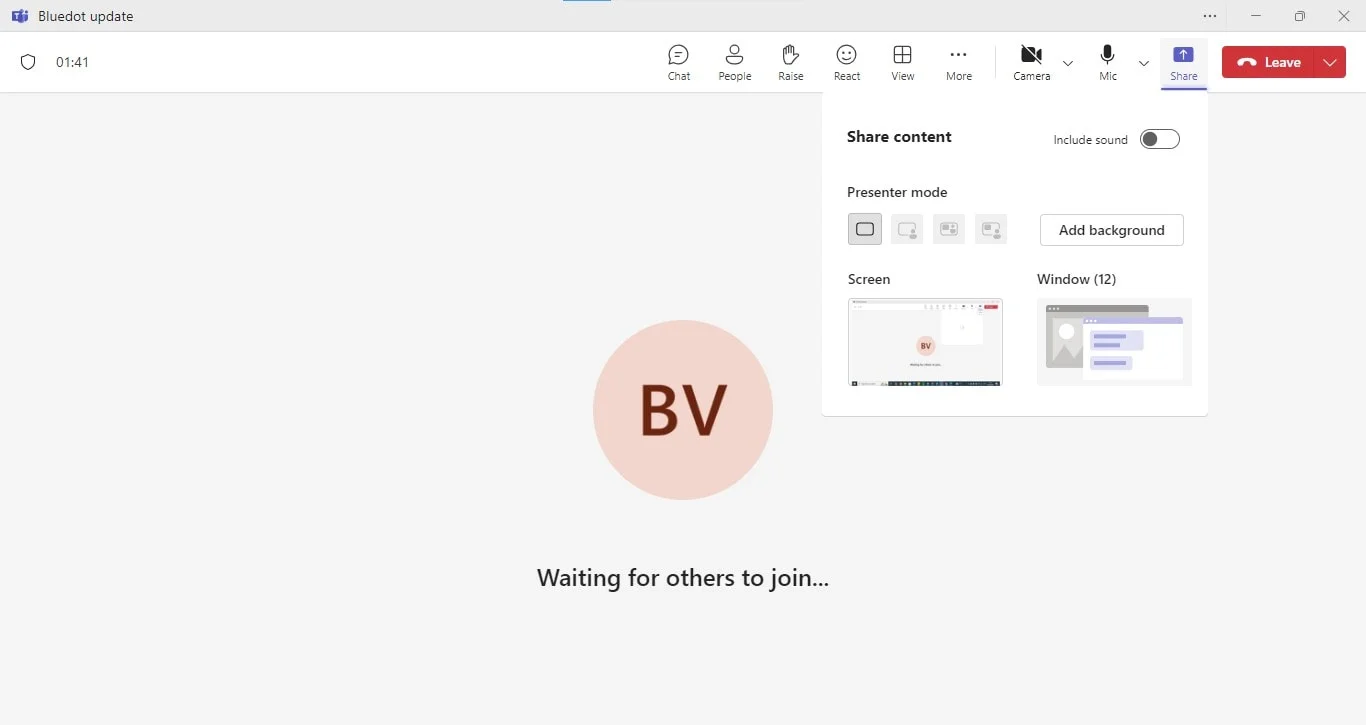
- Entire screen: Display your entire computer screen.
- PowerPoint live: Present your PowerPoint slides effectively.
- Interactive board: Collaborate on a digital whiteboard with others using Microsoft Whiteboard or Freehand.
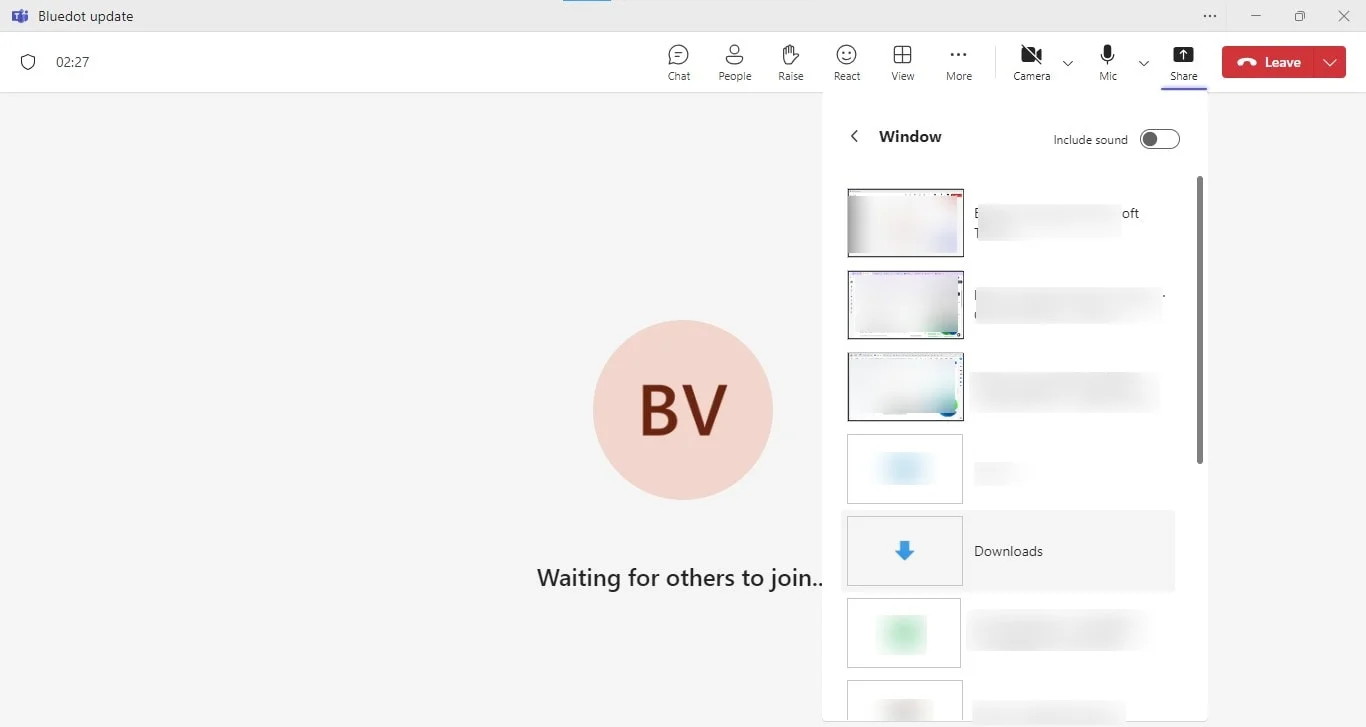
- Specific window: Share a single open application or window.
Step 3: Confirm sharing Once you've made your selection, a red border will appear around the shared content to indicate that others can see it.
Step 4: Stop sharing When you're finished sharing, click the "Stop sharing" button or the 'x' icon to end the screen share.
How to Share Screen on Teams Mobile App (Android and iOS)
You can now share your screen on different devices whether you have an Android phone or are a part of the Mac users community.
Step 1: Join your meeting Open the Teams app and join the meeting you want to share your screen in.
Step 2: Access sharing options During the meeting, tap the share screen icon at the top of your screen and select "Share."
Step 3: Choose what to share Select the content you want to share: photo, video, PowerPoint presentation, or your entire screen.
Step 4: Allow sharing Your device may prompt you to allow Teams to share your screen because of system preferences.
- Android: Tap "Start Now" to enable sharing.
- iOS: Access Control Center, long press the "Screen Recording" button, select "Microsoft Teams," then tap "Start Broadcast."
Step 5: Stop sharing When finished, tap "Stop presenting" to end the screen share.
Tips for sharing your screen on Microsoft Teams
Here are a few tips to improve your screen sharing experience on Teams:
Use the correct window
When you start sharing your screen on your Microsoft Teams meeting, it’s important to select the specific window or application you want to show. This helps ensure that only the relevant content when your share screens is visible to your audience, avoiding any distractions or accidental exposure of other open files.
Use full-screen mode
To make sure your audience can see your content clearly, switch to full-screen mode for the window or application you’re sharing. Full-screen mode enlarges your content and removes distractions like taskbars or notifications that might otherwise clutter your view.
Check your bandwidth
Before beginning your screen-sharing session, check your internet connection to make sure it’s strong and stable. A reliable connection is essential for smooth screen sharing, as it helps prevent issues like lag, buffering, or poor video quality. You can use online tools to test your internet speed and confirm that it meets the requirements for a good screen-sharing experience.
Prepare your content
Proper preparation can make your screen-sharing session go much more smoothly. Before the meeting starts, make sure all the files and applications you need are ready and easily accessible. Close any unrelated programs or windows to avoid clutter and potential distractions.
Use the whiteboard and annotations
Microsoft Teams users have useful tools like annotations and a whiteboard that can enhance your session. Annotations let you draw, highlight, or write directly on the content you’re sharing, which can help emphasize key points and make your presentation more interactive.
Communicate while you share and provide control to others
Effective communication during your sharing session is important for keeping your audience engaged. While you’re sharing your screen, keep talking to explain what’s on the screen and guide your audience through the content. If necessary, you can also share screen control with other participants, allowing them to interact with the content directly, or they can request control themselves.
Practice beforehand
Practicing before your actual meeting can help you feel more confident and prepared. Take some time to rehearse your presentation and get familiar with the screen-sharing features in Microsoft Teams. This practice allows you to troubleshoot any issues, like navigating through your content or using the tools, before the meeting begins.
Share specific documents
Instead of sharing your entire desktop, it’s often better to share specific documents or windows that are relevant to your presentation. This approach helps keep the focus on the content you want to present and prevents the accidental sharing of private or unrelated user information.
Update your Microsoft Teams app
Updates often include fixes for bugs, performance improvements, and new features that can enhance how you share your screen. Before your meeting, check for any available updates and install them to make sure you’re using the latest version of the software.
End screen sharing feature
Once your presentation or meeting is over, remember to stop sharing your screen. Ending the session helps protect your privacy and signals to your audience that the sharing part of the meeting has concluded. To stop sharing the shared screen, click the “Stop Sharing” button or select the option in Microsoft Teams.
Conclusion
Accurately capturing the details of Microsoft Teams meetings, especially those involving screen control and sharing, is crucial for effective collaboration and decision-making. While Teams offers basic screen recording functionalities, tools like Bluedot excel in providing comprehensive solutions.
Beyond transcription, Bluedot offers robust recording capabilities, automatic email generation, customizable meeting templates, extension for google meet recording and secure cloud storage for all your meeting data. By leveraging Bluedot, you can effortlessly record, manage, and extract valuable insights from your Microsoft Teams meeting, streamlining workflows and enhancing productivity.
FAQ
Is it possible to share a second monitor in Microsoft Teams?
Yes, if your computer is connected to multiple monitors, you can select which one to share when you use the screen-sharing feature in Microsoft Teams.
How do I share computer audio during a Teams meeting?
You can opt to share audio during a Teams meeting. Simply enable the "Include Computer Sound" toggle on a desktop or the "Audio" toggle on a mobile device to share sound from your phone or computer applications with other users.