Recording audio on an Android device is simple and convenient, offering solutions for capturing important conversations, meetings, or personal notes. By using the built-in voice recorder or third-party apps, you can easily record high-quality audio and save it for later use.
This guide explains step-by-step how to start recording audio, ensuring you make the most of your available tools. Whether you're dealing with interviews, presentations, or reminders, learning to record audio on Android can solve your need for quick, accessible audio storage. Keep reading to discover valuable tips that can enhance your recording experience.
Can I Record Audio On Android?
Android devices offer versatile options for audio recording through various methods. Whether you're looking to record audio using a dedicated voice recorder app, capture external audio sources, or save recordings as audio files, Android provides robust solutions.
You can choose from a range of voice recorder apps tailored to different needs, allowing you to record and save files effortlessly. Additionally, Android's flexibility extends to capturing external audio inputs, making it ideal for recording interviews, lectures, or any other external sound source.
With Android's capabilities, you can also use screen recorders that offer audio recording features, ensuring you capture everything you need directly from your device
How To Record Audio On An Android Phone With Built-In App
Recording audio on an Android phone is easy, thanks to the built-in voice recorder app that comes pre-installed on most devices. Whether you're looking to record external audio, internal audio, take voice notes, or both, this guide will walk you through the process step by step. With just a few taps, you can capture high-quality audio recordings and save them as audio files directly on your Android device.
Open the Voice Recorder app
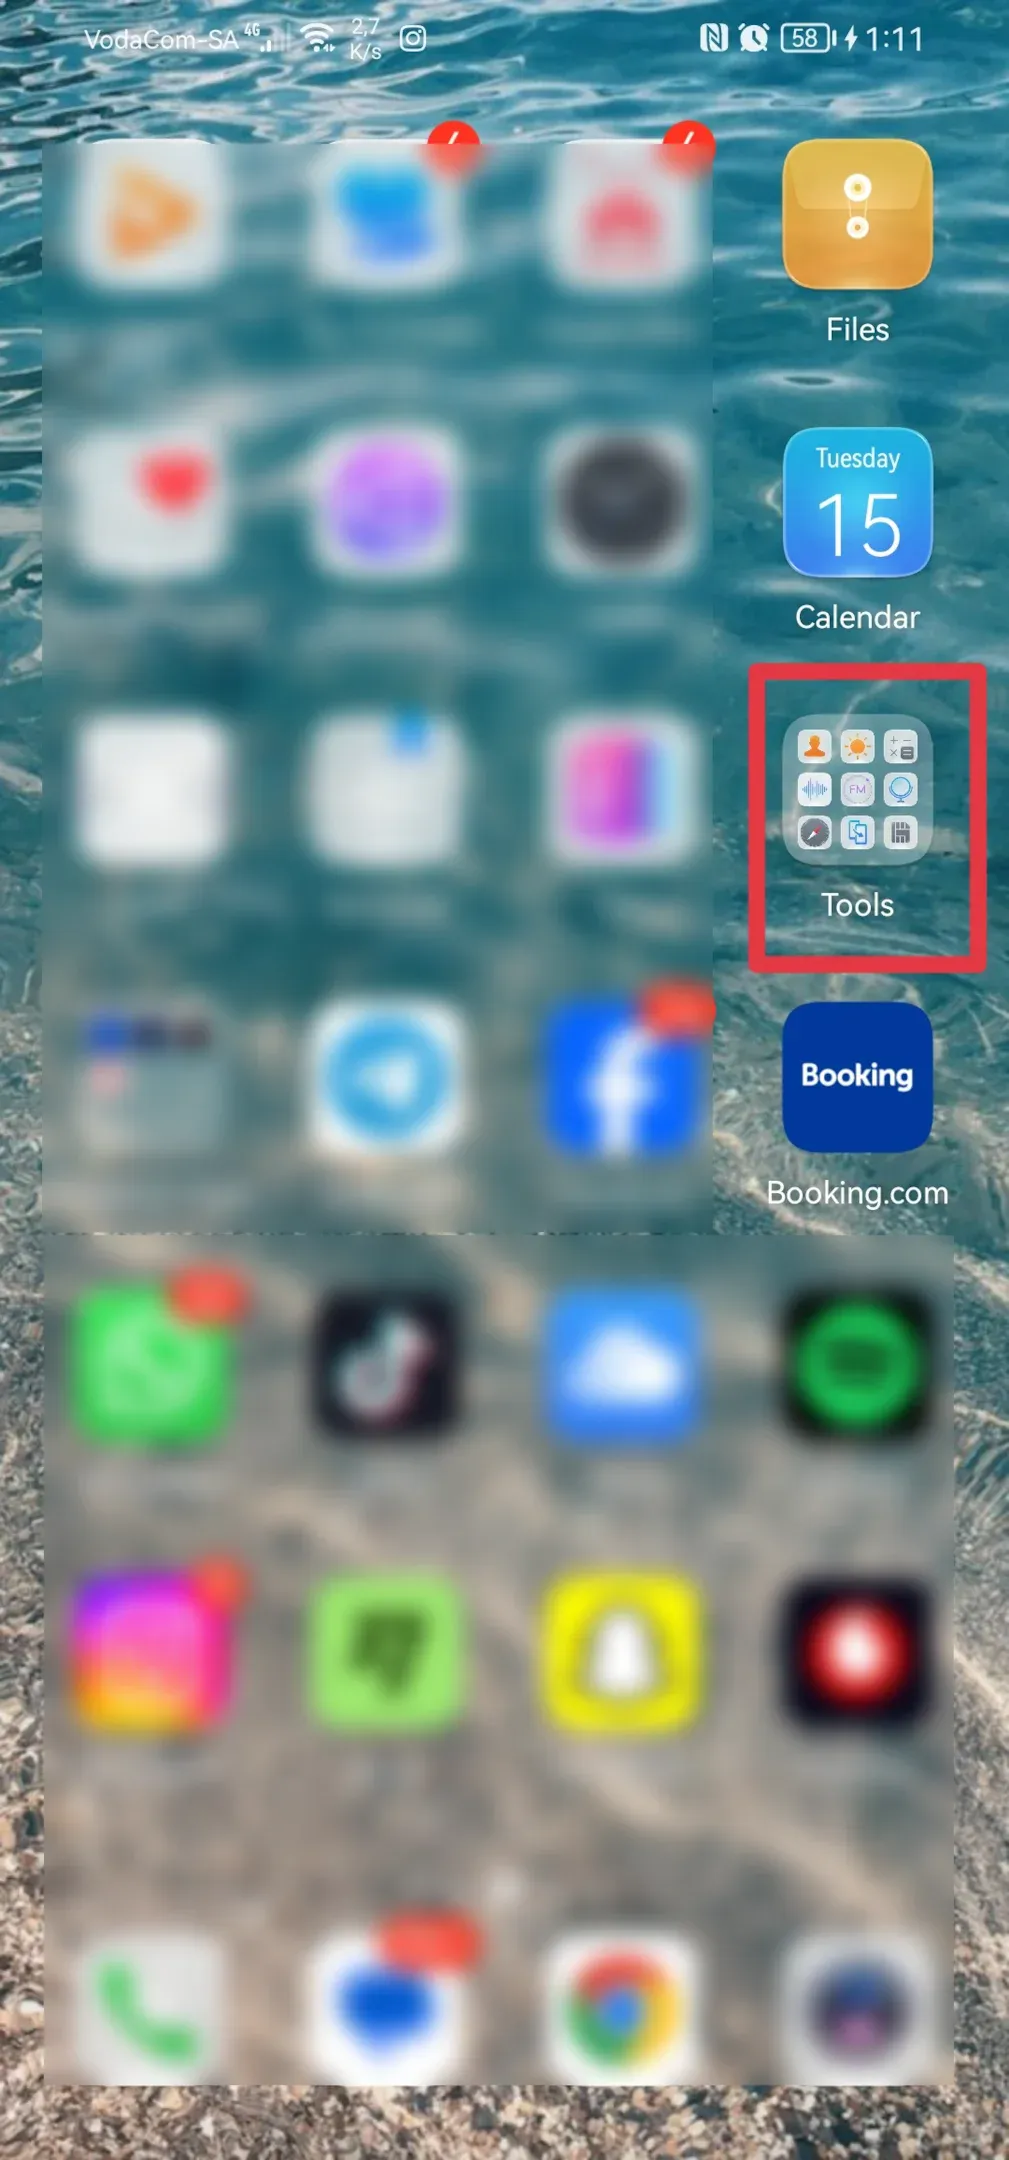
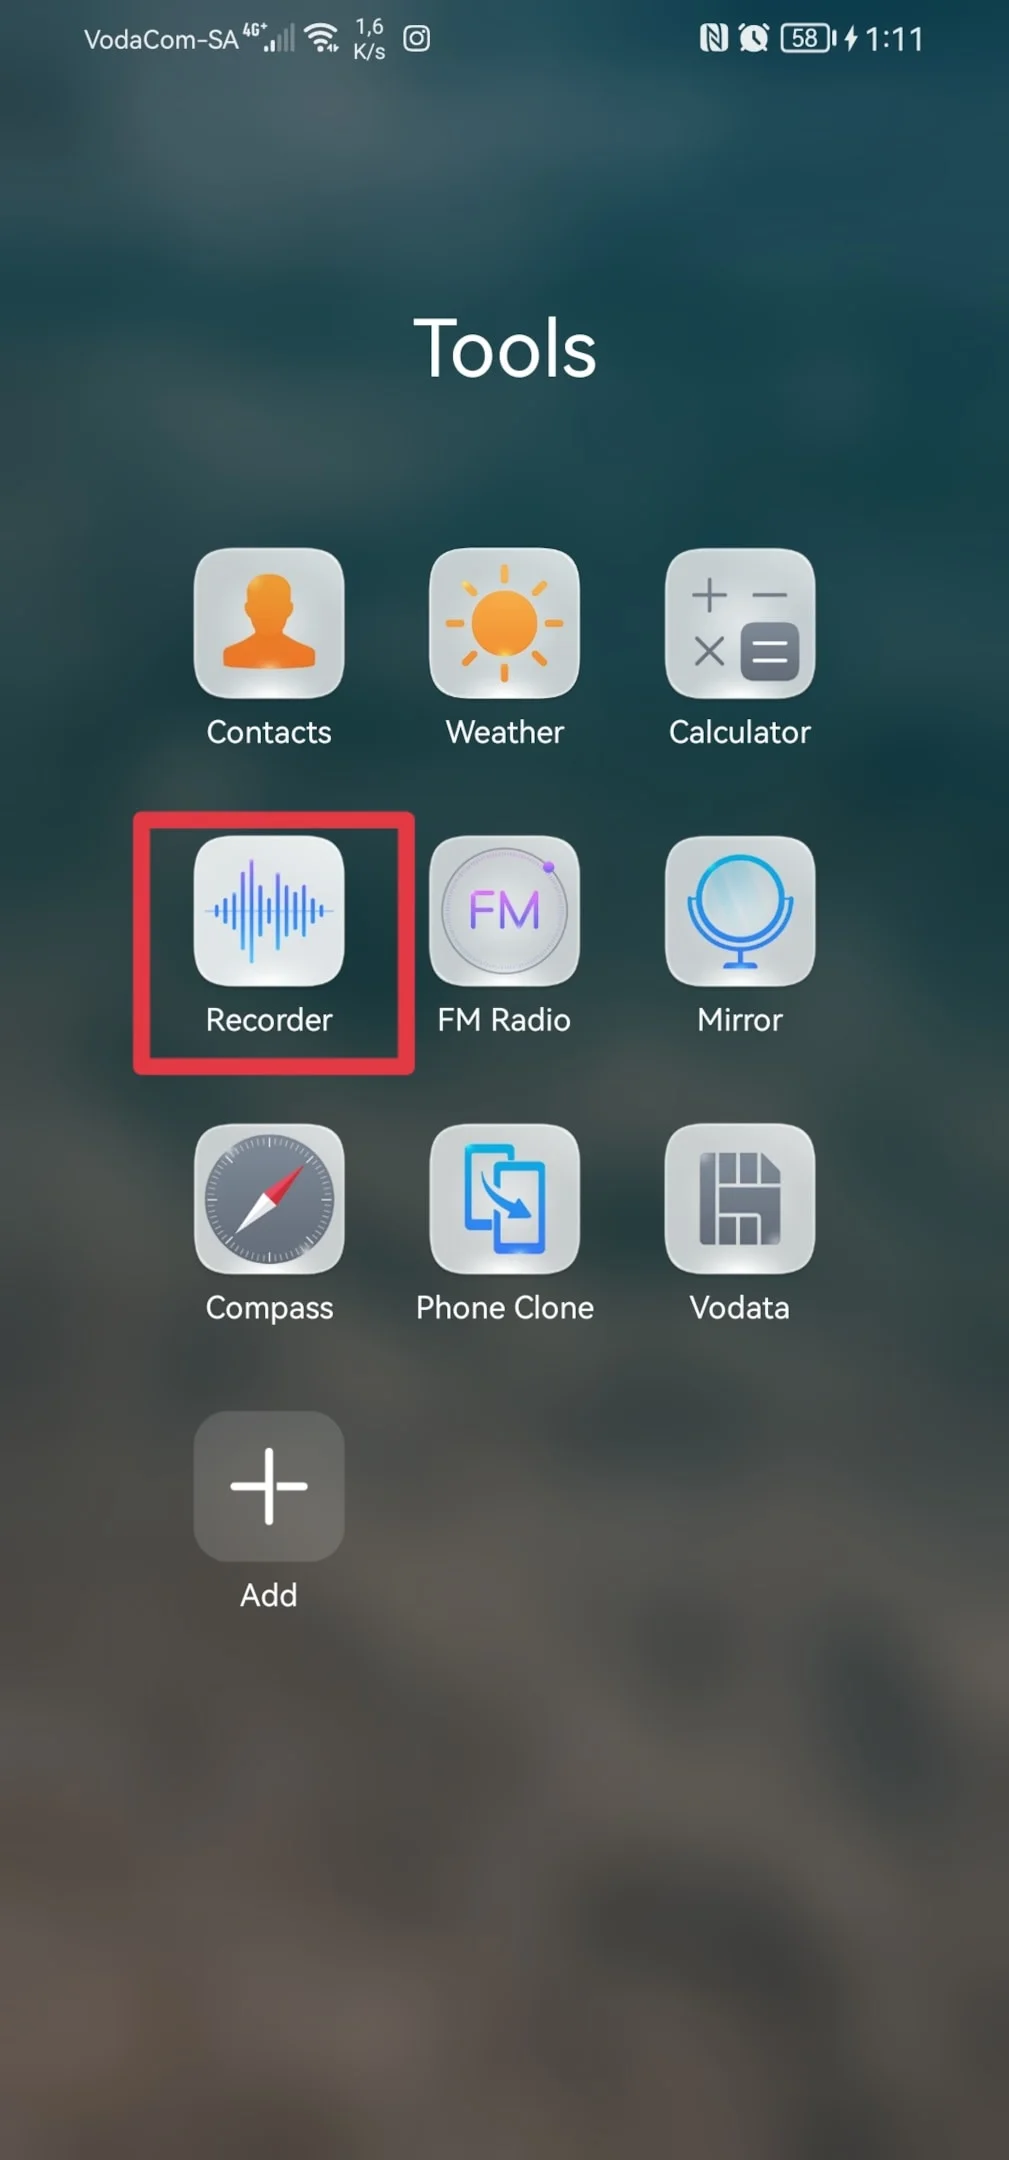
To get started, you'll need to locate the voice recorder app on your phone. This app can typically be found in your app drawer under names like "Voice Recorder" or "Sound Recorder." If you have trouble finding it, you can also search for it using your phone’s search bar.
For those who don’t have this app pre-installed, you can easily download a similar audio recorder app from the Google Play Store. With this built-in voice recorder, you can record sound without needing to install any third-party applications, making it a quick and efficient solution for capturing important moments, lectures, or meetings.
Adjust your settings
Before starting your audio recording, reviewing and adjusting the app's settings to suit your needs is important. Depending on the model of your Android device, you may have options to choose the format and quality of the audio file. Additionally, some devices let you toggle between recording external audio through your phone’s microphone or capturing internal audio, which is the sound produced by apps or media on your device.
These settings can make a big difference in ensuring that recording quality of your recordings is clear and meets your requirements, especially if you're using the recorder for professional purposes like interviews or presentations.
Click on the Sound Record button
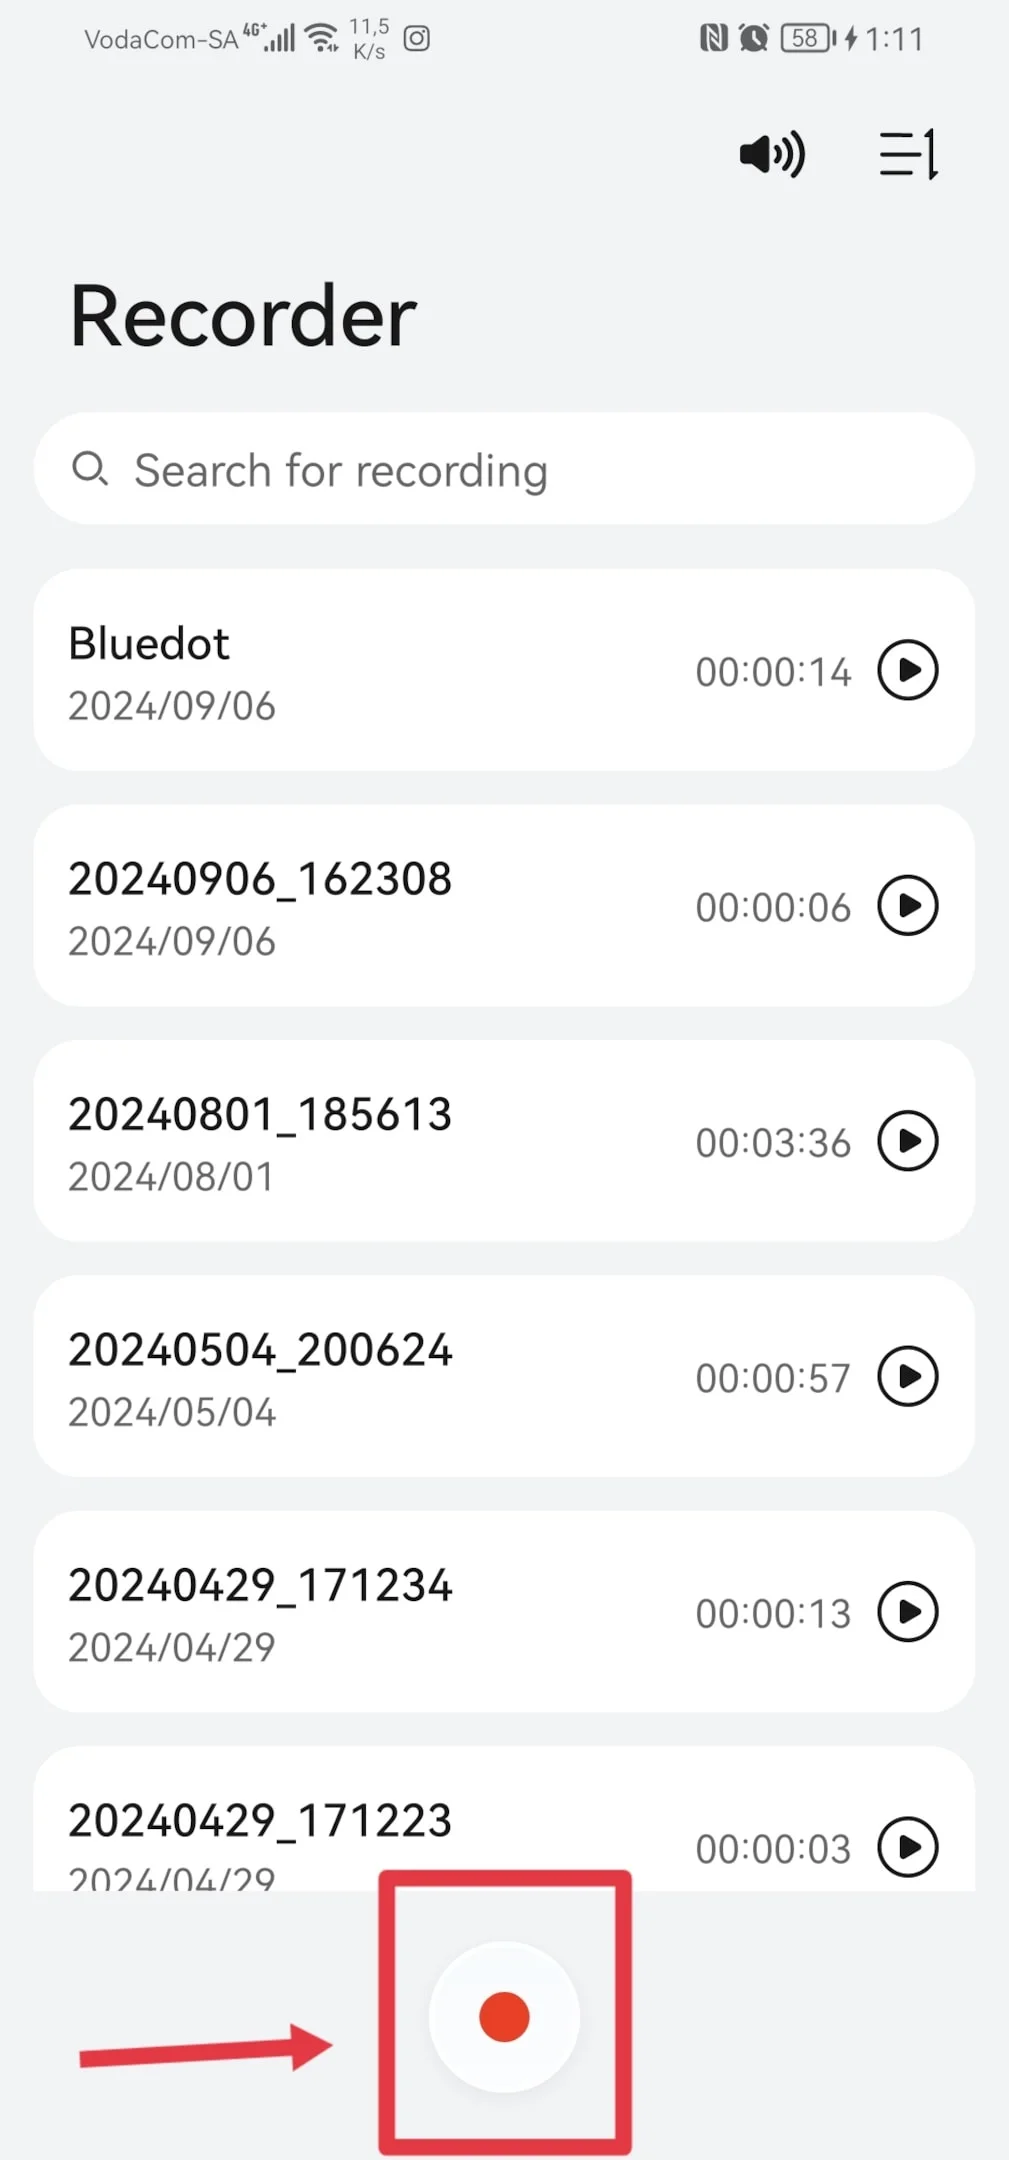
Once your settings are adjusted, you're ready to start recording. Simply press the "Record" or Sound Record button, and the voice recorder app will immediately begin capturing audio. You'll see visual indicators like sound wave animations or timers that show how long you've been recording.
This feature is ideal for a wide range of uses, from casual recordings to more formal situations saved recordings like interviews, podcasts, or even classes. The app will continue to record until you manually stop it, ensuring you capture all the necessary details without interruption.
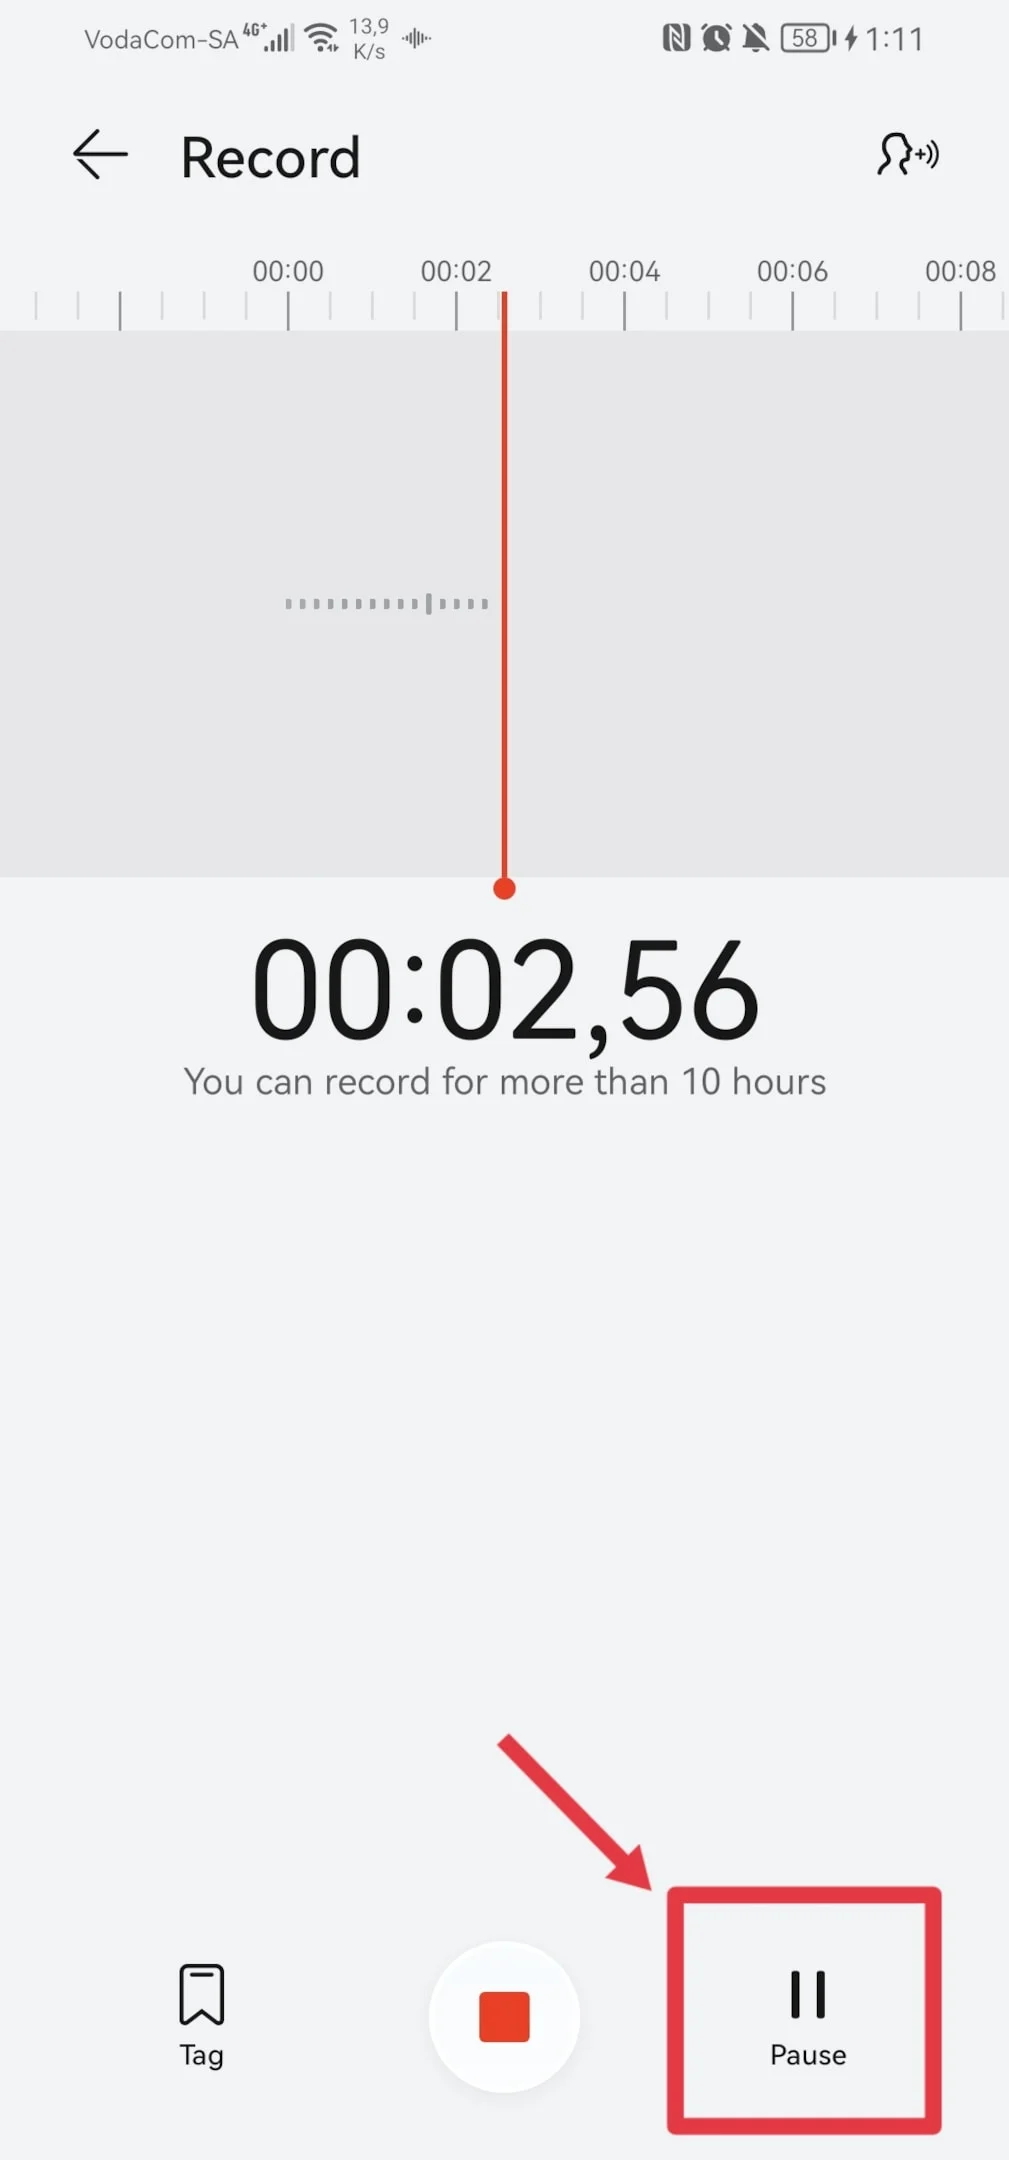
Click on the Pause button
During your recording, you may want to take a break or pause the recording without ending it. Most voice recorder apps include a convenient Pause button that temporarily stops the recording.
This feature can be particularly useful when recording longer sessions, as it lets you manage the flow of the recording without having to restart the process. Whether you're pausing to gather your thoughts or handle an interruption, this option helps maintain the consistency and quality of your files.
Name and save your audio file
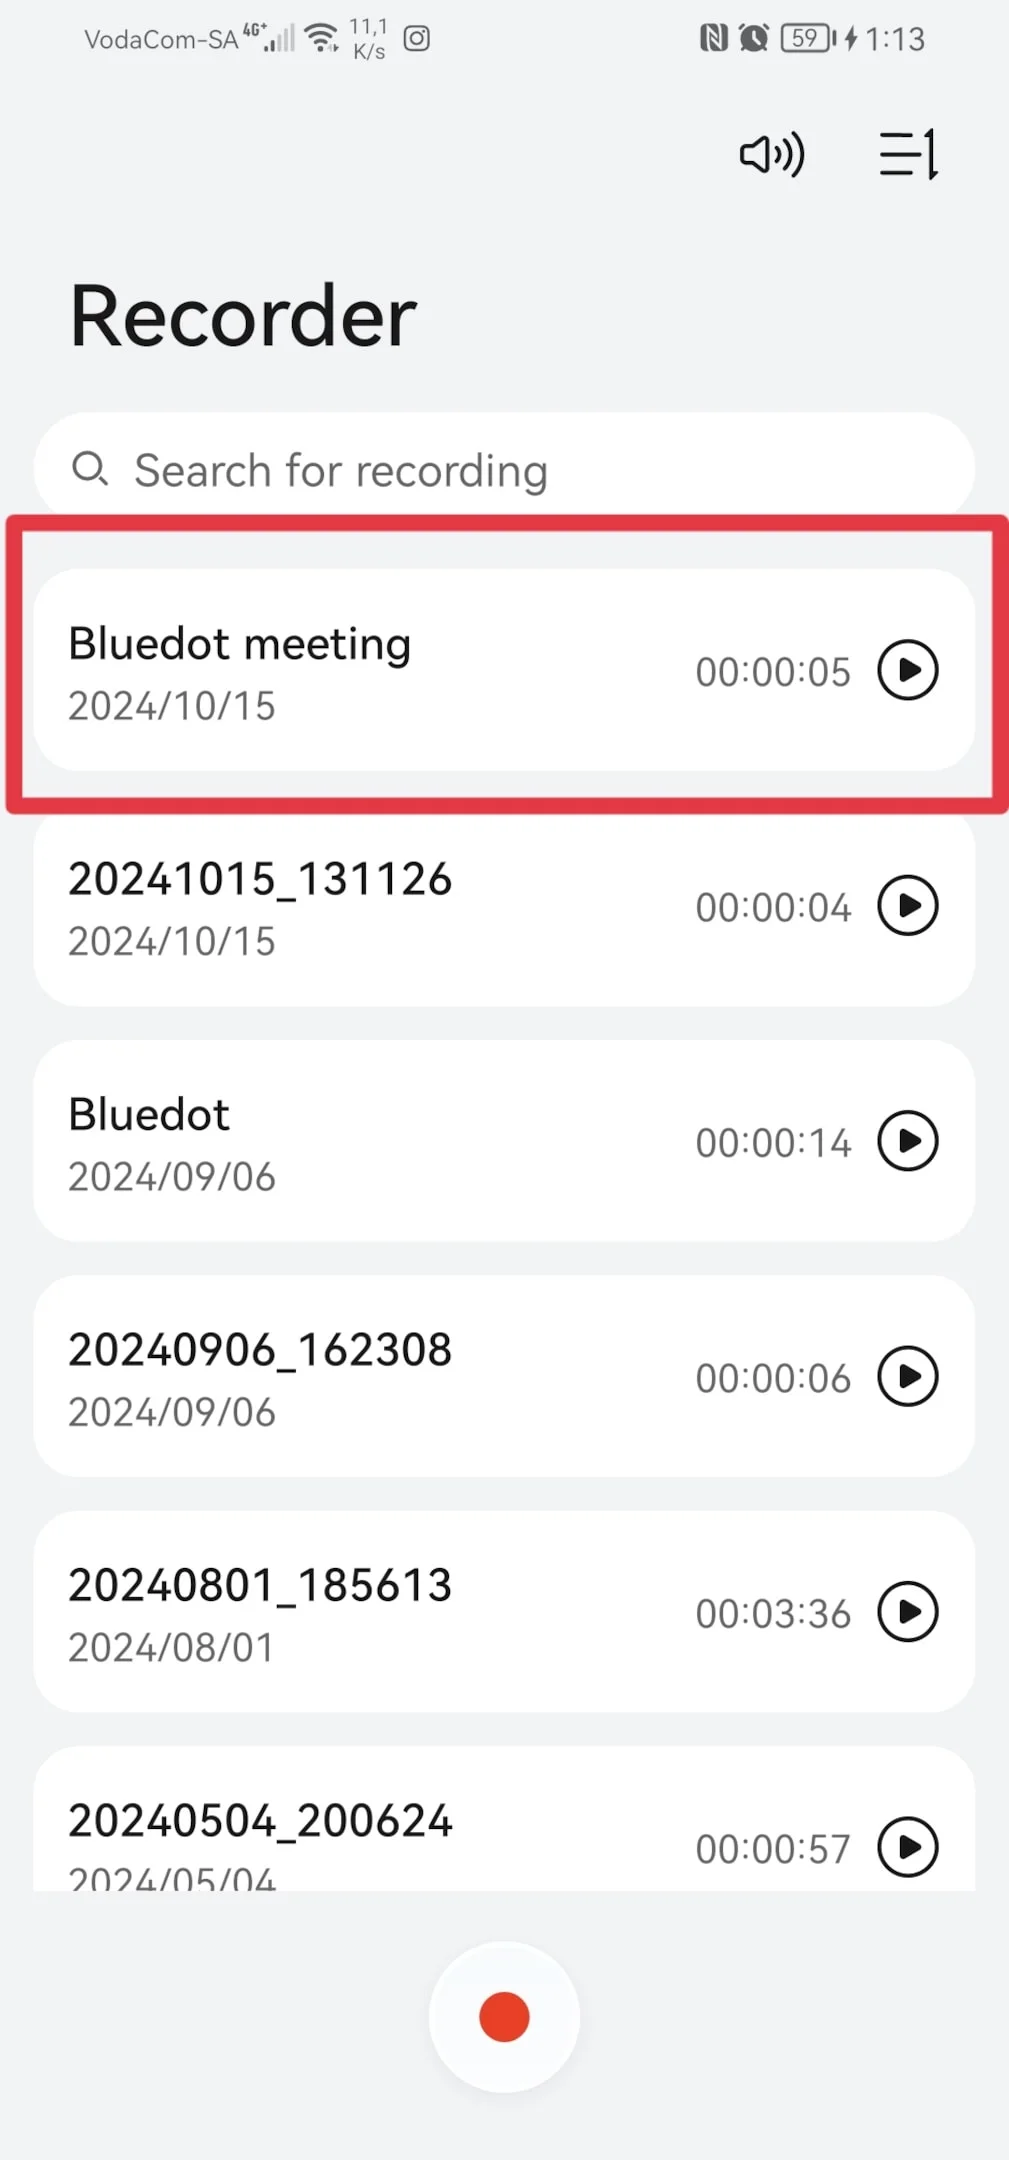
Once you’ve finished your recording, you’ll be prompted to name the audio file before saving it. It's a good idea to use a clear and descriptive name that will help you find the file later, especially if you want to capture audio.
After naming it, the file is saved directly to your Android device's internal storage or SD card, depending on your settings. Naming your files properly can be crucial if you're recording multiple sessions or need to refer back to specific details later.
Edit the recording
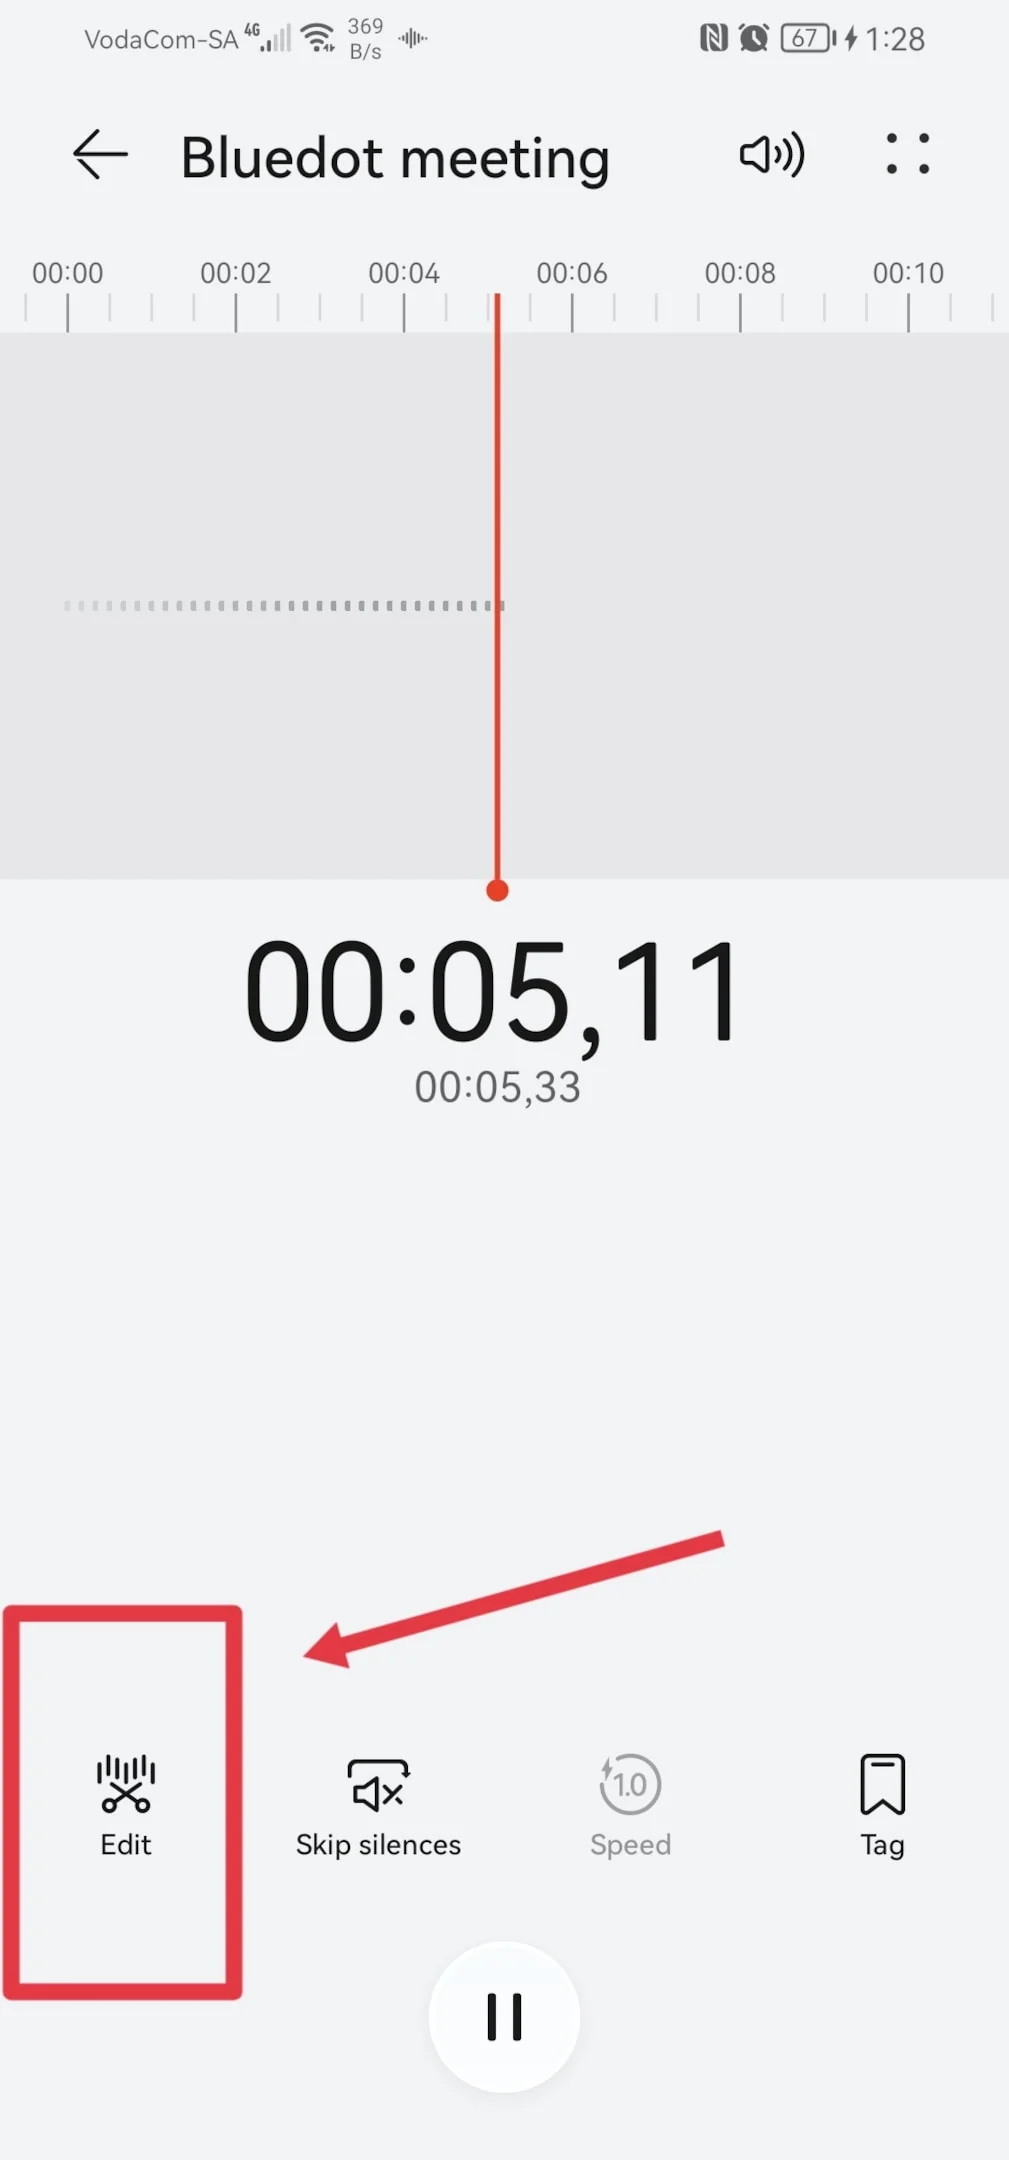
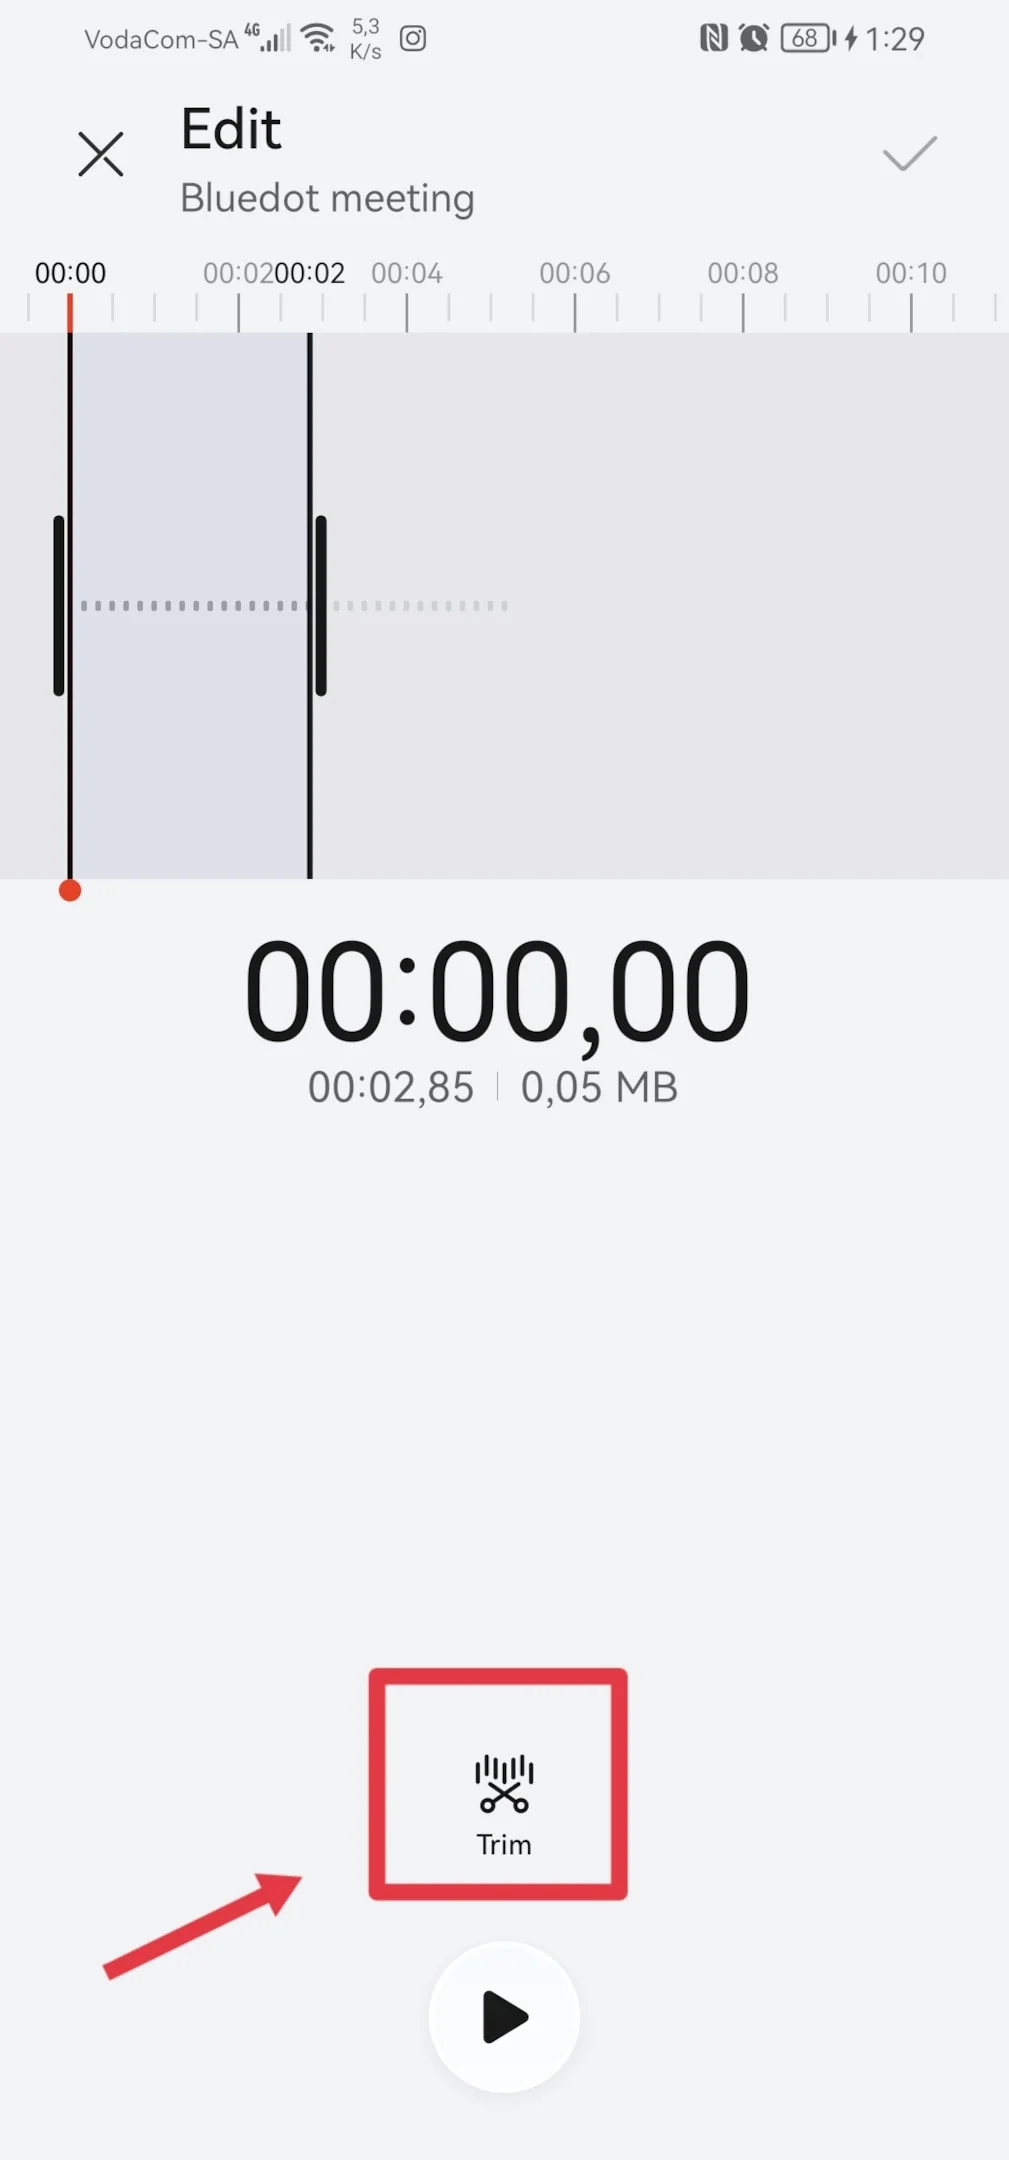
After saving your audio file, many voice recorder apps offer built-in editing tools to fine-tune your recording. You can trim out any unwanted sections, adjust the volume, or even enhance the audio quality.
For example:
1.
2.
3.
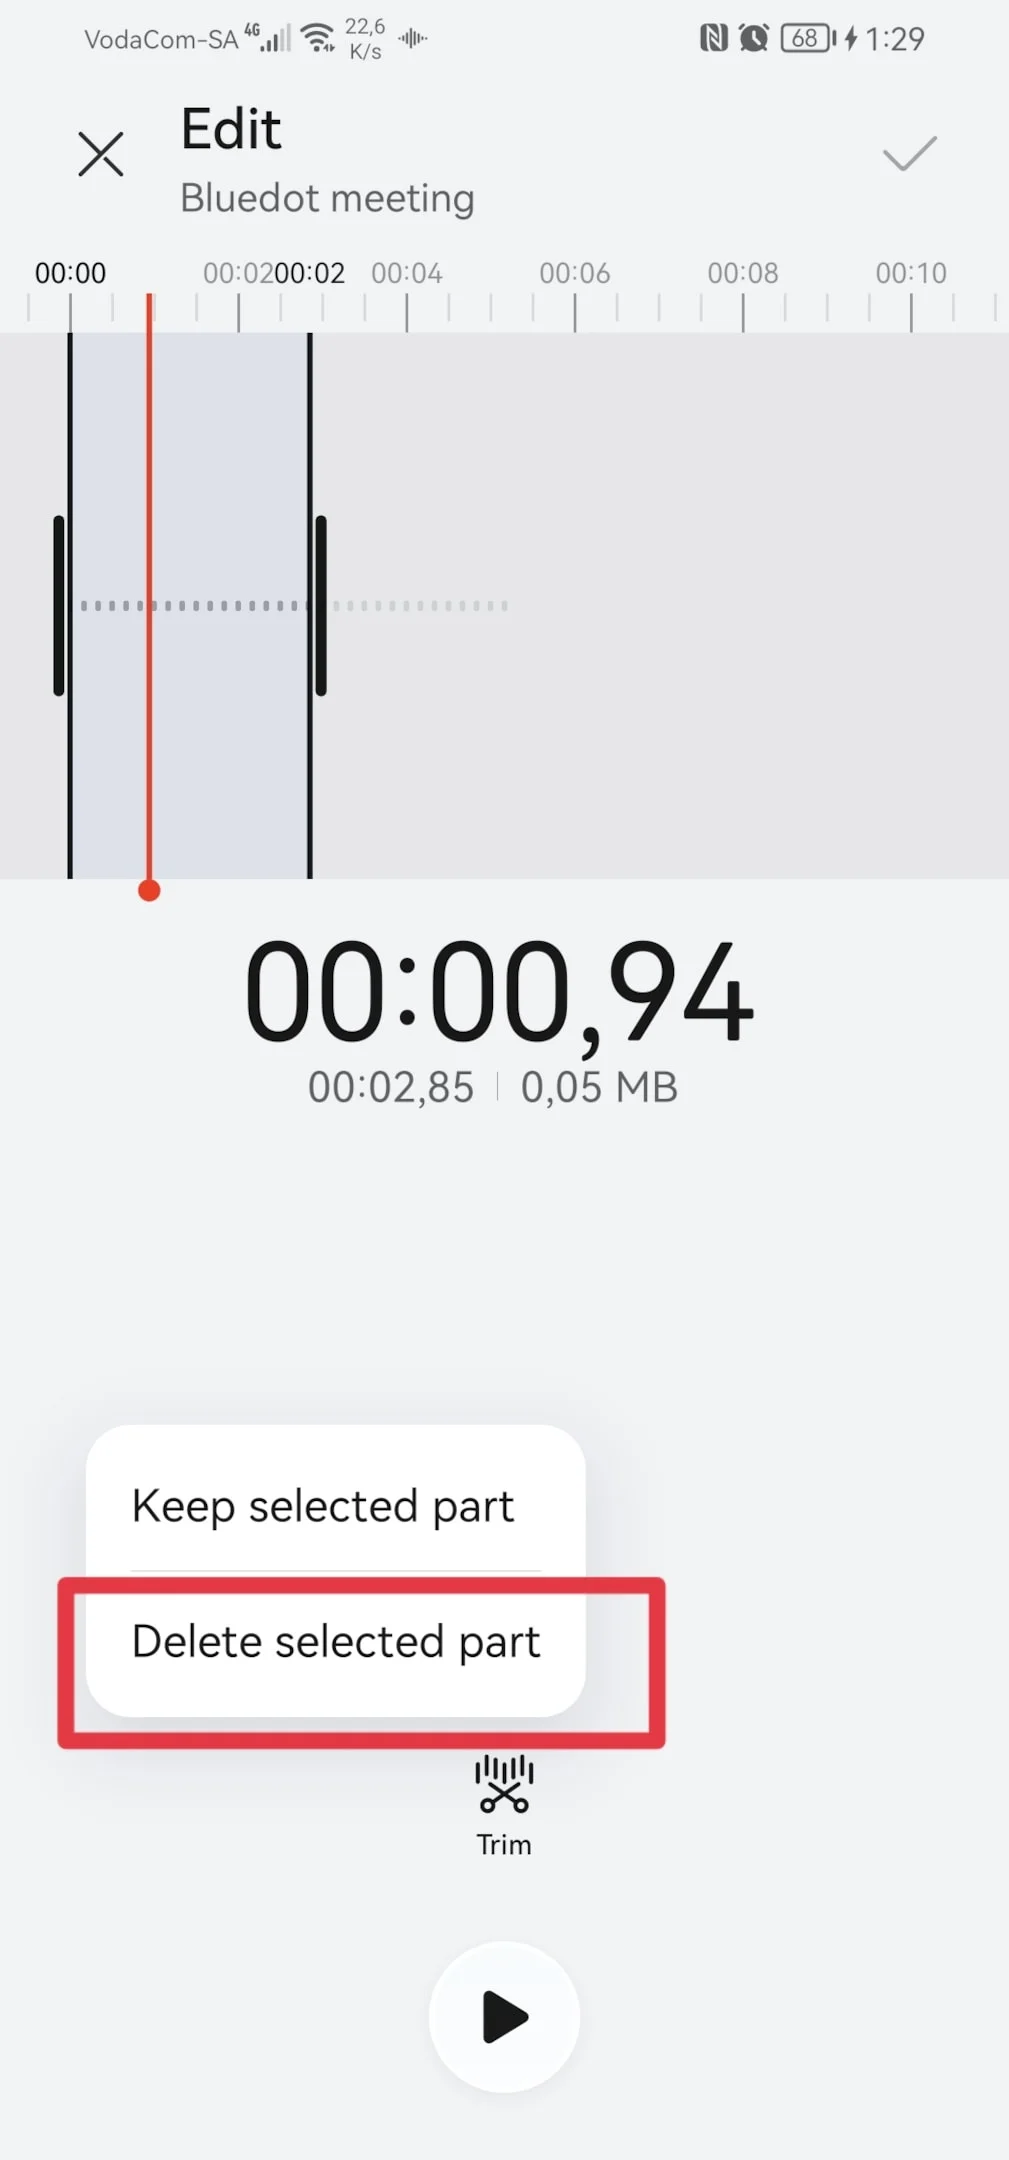
4.

Some apps allow you to add markers to highlight important parts of the recording, which is especially useful for interviews or meetings where key points need to be emphasized.
If you’re using a basic app without editing features, there are also various third-party audio recording apps available on the Google Play Store that can help you polish your internal audio.
Save and share your audio file
Once your edits are complete, you can save the final version of your recording. Android makes it easy to share files directly from your phone. Whether you’re sending the file via email, uploading it to cloud storage, or sharing it through messaging apps, your Android phone ensures seamless sharing capabilities.
For professionals, this feature is particularly useful for distributing meeting notes or interview recordings quickly. If you're working on a collaborative project, you can also share the files directly with team members or colleagues, ensuring everyone has access to the necessary information.
Conclusion
Recording audio on an Android device is a quick and efficient way to capture important moments, whether it’s for meetings, interviews, or personal reminders. Using the built-in voice recorder or third-party apps, you can easily record and save high-quality files.
However, when it comes to recording meetings—especially during screen-sharing sessions—Bluedot is the best tool available. It not only facilitates a seamless screen recorder feature that captures the screen recording of meetings but also enhances the experience with features like, auto-generated emails, conference call transcription, automatic note taker, meeting minutes transcription, interview transcription software and meeting templates.
Bluedot securely saves your meetings for later use, ensuring that you can revisit crucial discussions at any time. By utilizing Bluedot, you’ll never miss important details again, making it an invaluable resource for anyone looking to maximize productivity and capture every aspect of their meetings.
FAQ
How to Transfer Audio Recordings From Android to Computer
Transferring audio recording from your Android phone to a computer is simple and can be done in several ways. The easiest method is to connect your phone to your computer via a USB cable. Once connected, navigate to your phone’s storage where the audio files are saved—this is usually in a folder labeled "Recordings" or "Voice Recorder."
You can then copy and paste the files to your computer. Alternatively, you can use cloud services like Google Drive or Dropbox to upload your recordings from your Android device and download them on your computer. Some audio recording apps also provide direct sharing options to transfer files wirelessly. This allows you to back up or edit the files on your computer efficiently.
Where is the Voice Recorder on my Android phone?
Most Android devices come with a pre-installed voice recorder or sound recorder app. To find it, open your app drawer and look for an app labeled "Voice Recorder" or "Sound Recorder." If it's not visible, you can use your phone’s search function to locate the app. In some cases, the voice recorder may be hidden within other apps, such as the "Tools" or "Utilities" folder.
If your phone doesn’t have a built-in audio recorder app, you can easily download Google's recorder app. These apps often offer additional features like the ability to record internal and external audio, giving you more control over your audio on your Android.
Can I record just audio on my Android phone?
Yes, you can easily record audio on Android using the built-in recorder app or third-party apps from the Google Play Store. Whether you want to record external audio through the microphone or record internal audio, Android phones offer a variety of solutions.
The built-in app allows you to capture clear audio on your Android, which are automatically saved as files for easy access. You can use these apps to record sound without recording video or screen content, ensuring you only capture the audio you need. Additionally, some advanced apps provide options to record internal audio, making them useful for capturing audio from apps, games, or internal system sounds.

%201.svg)
